Choosing and Arranging Branches
Introduction to Branches
Branches are the pathways for your chameleon. While they can and will climb on just about any surface they can get a grip on, they are most comfortable on branches. It is our job to use the right branches. In this modules we are going to explore everything about branches from their uses to what makes a good chameleon climbing branch.
Types of branches
In this modules we are going to explore everything you need to know about branches from their uses to, simply, what makes a good chameleon branch.
To start this off, let’s take a look at the three different uses of a branch in a chameleon cage. They are
- Structural branch. The branches used to mount other items in the cage firmly and securely.
- Perching Branch. The branches where your chameleon will spend most of their time.
- Network Branches. This is the web of branches that extends through the cage providing access to every corner and gradient edge.
Structural Branches

Structural branches are generally a half inch or more in diameter. The goal here is for them to be sturdy. They are mounted vertically along the sides of the cage and are used to anchor perching, network branches, and potting plants. Chameleons are free to climb these branches too, of course, but that is not their primary purpose.
Perching Branches

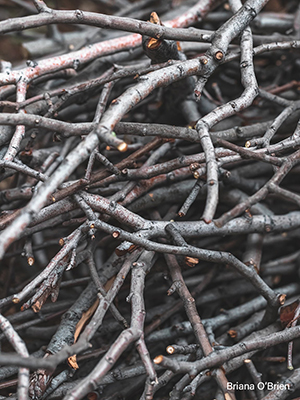
Perching branches are chosen specifically for comfort, like we would choose a good couch. Chameleons do a lot of perching in one place, especially while basking and sleeping. They do pick favorite places, and they’ll spend a great deal of time in those places, so you’ll want to choose branches that are comfortable to perch on. Ideally, these will be natural branches with varying diameters and textures (oak branches are a particular favorite, due to their attractive nature and interesting shapes). You’re looking for branches with diameters ranging from thin enough to get their feet all the way around and thick enough that they can only get their feet halfway around. Perching branches should be placed horizontally. Although you will find some chameleons that sleep vertically, chameleons are generally more comfortable on horizontal branches.
Network Branches

Network branches serve as highways from which the chameleon can travel from one perching branch to another, or access any corner of the cage. This is how you maximize your cage space and allow your chameleon to access any point along the gradients you have created. Network branches can be a variety of diameters, from thick to thin; so long as they get the chameleon where it needs to go, they’ve done their job!
What makes a good branch? Fake vs. Real?
The first thing to consider, before anything else, is what makes a good chameleon branch? For the most part, natural branches are preferable, not only because they are more aesthetically pleasing, but also because they are more structurally varied. These branches can be found in the wild; however, be wary of trees that have been sprayed with pesticides. If you are collecting from a public park, contact your parks and recreation department about if they spray their trees, and if so, with what and when? With a little research, you’ll have a better idea of when you should collect your branches, if you should be collecting them at all. Once you have your branches in hand and treated to your discretion (popular techniques include disinfection, baking, or a simple visual inspection).
There are a number of methods of disinfection of branches including bleaching, baking, sanding, and washing. At this point I have not encountered a problem with simple visual inspection to ensure I am not introducing spiders. But I will not discourage anyone from being extra cautious and to engage in the disinfection strategy of your choice.
Wood dowels and bamboo have been used as branches. I encourage you stay away from “branches” that are the same diameter as the exercise of the feet seems to be a good thing. People have used these before will not reported issue so it is, at this time, my opinion.
There are many fake vines available for purchase. Their use is controversial. Each person will have their own opinion on their use. My personal strategy is that I use real branches as often as possible. But should there come a case where I need to use a fake vine I use the smoother ones and avoid the kind that appear to have coconut husk pieces glued on. There have been enough cases of chameleons rubbing their eyes and, apparently, getting the “branch crumbles” in them causing a vet visit. Thus it is a good idea to avoid any artificial vine that has pieces that could come off.
Disinfecting Branches
Branch disinfecting can be done by heat or liquid. Obviously, the challenge is finding an oven big enough or water proof container big enough for the size branches you need to disinfect. For a deeper discussion on branches and disinfection techniques I brought on Alec O’Brien who offers sanitized branches through his company, Reptibranch. He lets us know how to do it.


How to attach branches in a chameleon cage
If you are using Dragon Ledges, the two main methods of attaching branches to the cage is by zip ties and a hot glue gun. Without Dragon Ledges you end up with options such as thumb tacks through the screen cage wall to secure branches. Unfortunately, the screen wall was not designed to be weight bearing so this has the potential to rip your screen.
If you are attaching branches without DragonLedges then make sure the weight is being borne by the aluminum frame rather than the screen. You may replicate Dragon Ledges by lashing a stick across the width of the screen panel with fishing line or even screwing it in.
There have been many hacks done in the community including push pins through the screen or simply shoving branches in to be held by the screen tension. Anything that uses the screen to bear weight is not a great answer. Other people have created a lattice of sticks that they stood against the wall. If you create two lattices, one on either side, and attach a number of sticks between them you will create a solid structure that will be effective.
The examples we will show going forward will be based heavily on the use of Dragon Ledges as they are the best solution to the problem and the results are excellent.

Executing the plan
Installing the branches and plants will be done at the same time. There really is no way to create a network of branches in the open and hidden without also including placement of the plants!
As you go through these steps remember that you can change your mind at any time and try something new! Putting together a cage is often a back and forth! Give yourself the afternoon to play with it and find the arrangement that works best. and if you are stumped and can’t make a decision then pick a direction by flipping a coin knowing that when the cage is finished you can always tweak things.
Anchoring is often done with zip ties or a hot glue gun. With zip ties I like to have micro-cutters on hand to cut the un-needed tail as close as possible. It really is worth the $6 to be able to have clean cuts. With the glue gun be careful of the strands of glue that always seem to go everywhere. Any glue strands left in the cage could cause problems if they wrap around a chameleon’s foot. so be vigilant for these.
Below are some items that will be useful when installing branches.
Zip Ties come in many different sizes and colors. I have found about 8″ to be the most versatile and able to handle the larger diameter branches that we use for chameleons. If you need them longer you can easily lock two together to increase your reach. Black is the best color for being not noticed.
Micro-cutters go with the zip ties to make a clean cut of the extra tail. Scissors or other cutting instruments may not have the strength to give you a clean cut of the thick zip tie plastic. What ever you use, make sure it is strong enough. I used other devices for years until I just bought cutters for the express purpose of cutting zip tie tails and it has been a smart move. I have never regretted getting the right tool for the job.
Hot glue guns are just great to have around. They are cheap and they can glue branches together at a crossing point without having the black ring of a zip tie. It is well worth the small investment to have this tool around. This particular one comes with 20 glue sticks which should easily get you through a couple of cage builds depending on how much you use. Sculpting garden gnomes for your chameleon out of glue is a brilliant idea, but will use up more glue.
Do you have more cages to build or did you really get into garden gnome sculpting? Well, 100 sticks of extra glue are right here. I got my extra glue pack and it has lasted me a couple years. (Of course, I don’t make gnomes so your mileage may vary.) When purchasing extra glue sticks always check to make sure that you are getting the right diameter. For example, the glue gun I have suggested here takes glue sticks that are .43″ or 7/16″ diameter.
Step 1: Install Structural Branches
The goal here is to create a grid by which you are able to affix horizontal branches and pots at any level. These are best implemented with Dragon Ledges. If you do have Dragon Ledges then four thick (about 3/4″ diameter) branches mounted vertically as shown is all you need. With vertical branches going from an inch or two from the bottom to an inch or two from the top you have the entire height of the cage to work with.
I suggest mounting these about four inches apart so that the pots you will use for your plants can nestle in between the vertical branches, but not go through. You want to be able to put in a horizontal crossbar branch for the pot to rest on and then zip tie the pot to each vertical branch.
If you are not using Dragon Ledges then skip to step 2.

This image is representing the cage view as you look in through the door. To create a grid of structural branches zip tie two vertical branches per side to form a hashtag shape with the Dragon Ledges.

This set of structural branches already has a cross beam attached ready for the pot to be installed. Notice how there is one branch that goes almost to the floor and almost to the top. This actually has two purposes. The first is to give us access to a connection point at any height in the cage for a horizontal branch. The second is to give the chameleon a way to get up if it finds itself on the floor for any reason. We don’t want the branch to go all the way to the floor because we do not want any escaped feeders to be able to get up.

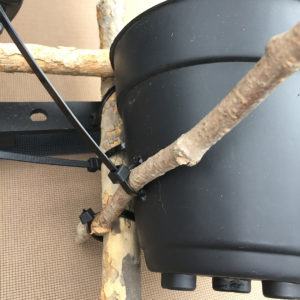
This picture shows how the pot will be placed. Think about this when you space the vertical branches. You want the sides of the pot to touch the branches to make it easy to zip tie the pot to the branches. Make the branches touch less than half way around as you want the pot to stick into the cage for the best use of the plant.
Step 2: Install Basking Branch
The basking branch should be in the open area of the cage. Usually this is the top third of the cage, but with wide format cages it could be one side or the other. Regardless, this branch should be strategically placed so that your basking bulb hits it with the right basking temperature and your UVB bulb hits it with the right UVB intensity. Usually a placement 6″ from the top of the cage allows a reasonable adjustment range for both the basking and the UVB lights. Consult your cage plan for the top of the cage placement to determine how for from the front your basking branch needs to be to be in the optimum position for heat and UVB.

Step 3: Install pots for plants
We will do the double pot method where we will repot each plant into a 1/2 gallon landscaping pot that is identical to the one we will mount with zip ties to the branches. With this strategy we are able to zip tie a pot in place and then, when ready, we will slip in the potted plant. This allows us to switch out the plant, for whatever reason, without an issue. 1/2 gallon landscape pots are the right size for most plants in a chameleon cage. Smaller pots may be used for accent plants or when working with smaller cages.
To mount a landscaping pot we will drill holes to thread in a zip tie that will hold the pot against a branch. Remember that to hold the pot firmly in place you will need three anchor points that are on different axises. This keeps the pot from swinging or listing to one side.
You want to make sure that the placement of pots and branches allows you enough room to get the potted plant into the mounted pot. At this point, the only horizontal branch in the cage is the basking branch so there is not much chance of interference, but keep this in mind in each step going forward.

Put the pot in place in the branches and mark where you would like the zip ties to go with a sharpie marker. Then drill out the holes. Weave the zip ties in and bring it to the place where it will rest. This image shows a smaller pot that can be used for accent plants.

Attach the pot to the appropriate structural branches. Remember to zip tie in three different axises so the pot does not swivel around.

Do not be shy about adding branches or pieces of branches into the cage that make mounting your pot easier and more effective.
Step 3: Add perching branches
Once the plant pots are on the main structure branches we know where we can put in the perching branches. These are the horizontal branches that chameleons are comfortable sitting on and we will place them at many different heights in the cage. This is giving your chameleon the choice as to which microclimate they desire to sit in. As much as is possible, have these run behind and through the plant cover so we can create our exposure gradient. The more areas that you give to your chameleon to perch the better. The most important perching branch to consider, though, is the hiding branch. Because we are working in such tight spaces and we really do not have that much plant cover compared to the wild we must be deliberate in our placement of that hiding branch.
As a reminder, we need to ensure that there is a branch that fulfills each one of these functions.
- The basking branch gives your chameleon access to heat and UVB. (we took care of this one previously)
- The sleeping/hiding branch allows you chameleon to be hidden from view in the leaves.
- A branch that gives easy access to drinking water (this can be the basking branch going through a big plant at the corner opposite the basking blub)
- A branch that gives easy access the eating (this can be the basking branch with a place to hook a feeder run cup nearby)
As an added note, while you are placing perching branches be careful not to block entry of the plants into their pots. You will be negotiating a potted 1 gallon plant through your cage to be slid into a mounted pot. Make sure you have this path established.
Perching branches can (and should) be anywhere. There is a special perching branch called the Hiding Branch whose key characteristic is that it runs behind plants in a way that the chameleon can feel like it is hidden. Thus this particular branch doesn’t always get noticed by the outside world. And that is the sign of an excellent hiding perching branch!
Step 4: Install plants
Once the perching structure is established, slide in all the plants to ensure you have the coverage you are looking for. The double pot method gives you the opportunity to not only switch around the plants you have at the last minute, but add in new ones or replace ones that aren’t doing the job you wanted. Move things, try things out, and keep in mind that you can always change things up if you would like to try something different!
Step 5: Add network branches
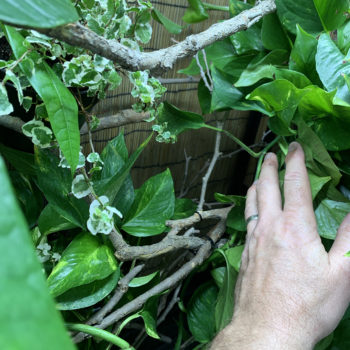
With the plants and main perching branches in place you can add in a network of miscellaneous branches of various diameters and at any angle to provide a highway to get from perching branch to perching branch. The network branches are the ones that give the chameleon access to the entire cage.
Do not worry about blocking the path of removing and replacing the plant pots with network branches. The network branches are easily removed and replaced to accommodate the rare necessity to change out plants.
Network branches are generally thin and go in all directions. They are specifically meant to reach every corner. I have found oak branches to be exceptionally good for this purpose!

Navigation
This module is part of a class on Setting Up Your Chameleon’s Cage where you learn how to build up a complete chameleon environment from start to finish. From this point you can either go back to the home room and see the other modules in this class or go on to the next module where we dive into how replicate sunlight with its heat, visual, and UVB components in the chameleon cage!


