Introduction
In this build we will execute the Forest Edge 4+4 method using an Exo-Terra Large/X-Tall screen cage. The steps shown here can be used for any wider format cage.
The major issue with the Exo-Terra cages is the same as with the ZooMed and Zilla cages. There are no drainage trays available. Though Dragon Strand does make drainage trays that will fit the standard pillar type cages, there is none for this wide format cage. So, going into the build, we need to keep in mind that we will need to determine a drainage solution.
Of all the mass market, entry level cages (Zoo Med, Exo-Terra, and Zilla), the Exo-Terra Large/X-Tall is the cage of choice because of its size and shape. Although Zilla has wide format cages, the Exo-Terra is superior due to a 36″ wide dimension and the service door in front lifting up. Zilla has smaller footprints and a fixed service door.
Step 1: Assemble Cage
Assembly
The assembly of the Exo-Terra Large/X-Tall is without complication. The standard screen cage assembly advice applies. (You can check out a tutorial on assembling screen cages here: Assembling Your Chameleon Cage). Basic reminders for success are 1) use a bowl to hold all the screws you take out of bags, 2) Build the cage on a flat surface, 3) Don’t overtighten the screws
Before you assemble the cage it is useful to attach any accessories. In this case we will be attaching Dragon Ledges and a misting nozzle. Attach these items on the cage panels before assembling the cage. Although they can be attached on a finished cage, it is much easier doing it on individual pieces.
When we build out this cage we will be moving a lot of things in and out. It will be much easier to build out this cage without the doors attached so do not install the french doors just yet. That will be the final step in the entire process.
Dragon Ledges
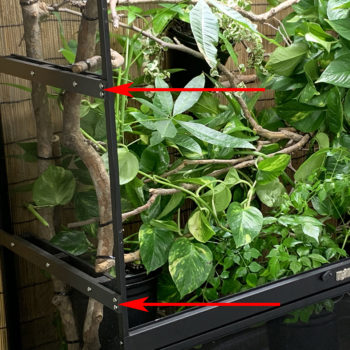
The Exo-Terra Large/X-Tall has a Dragon Ledge set made especially to take advantage of its wide format. There are two horizontal Dragon Ledges per side and one vertical double Dragon Ledge on the back panel.
When placing the horizontal side Dragon Ledges the actual placement is not critical as we will be using the grid method. With the two strong vertical branches strapped to the Dragon Ledges, we are free to install horizontal perching branches at any height. See the Chameleon Cage Assembly page for more information about installing Dragon Ledges.
Note: the Side Brace goes on the outside of the panel. Make sure you know which side is the outside before installing!
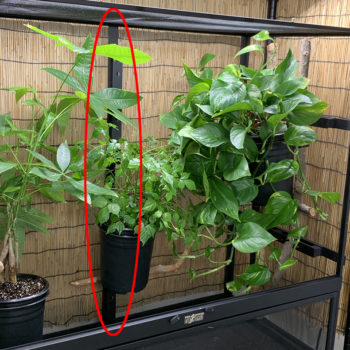
Wider Format cages can make use of the vertical double Dragon Ledge. The Exo-Terra Large/X-Tall is currently the only cage outside the Dragon Strand line which is issued one of these.
This vertical Dragon Ledge can be attached from top to bottom on the back panel down the middle. Of course, it can be installed anywhere along the back panel, but down the middle is a standard placement.
To purchase Dragon Ledges and Hydration Mount for the Exo-Terra Large/X-Tall click the image above. This link takes you to a bundle that has both Dragon Ledges and the Hydration Mount we are about to install.
Hydration Mount
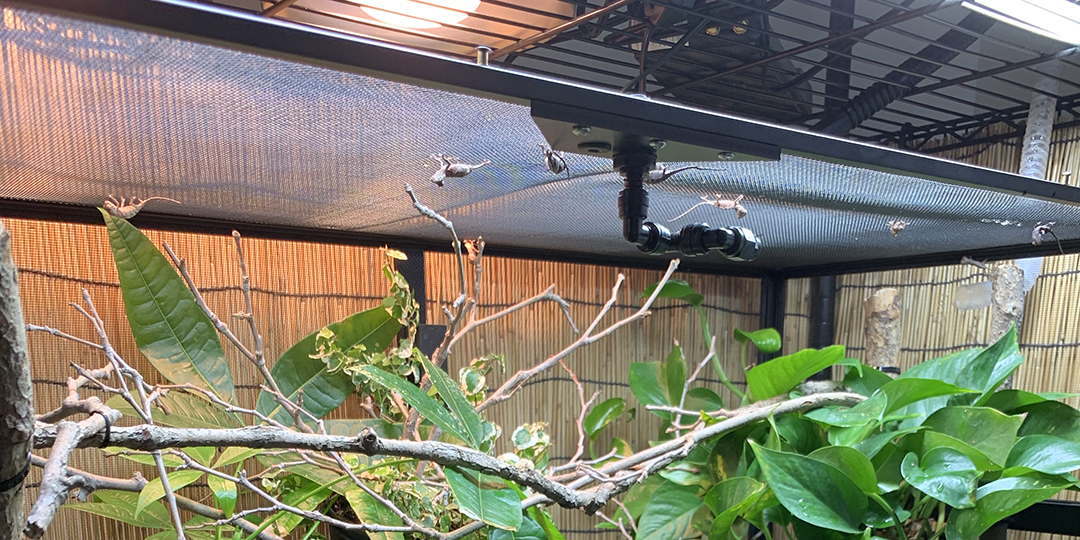
When considering the placement for the mist nozzle we need to consider what we want it to do. In my designs I am not using the misting system to shower my chameleons. Although it has been, up until very recently, something I practiced, I am now listening to my chameleons when they tell me they don’t like to be sprayed. So my misting system is now used to help with night time humidity and lay down a layer of dew for the chameleon to wake up to in the morning. This means I need my mist nozzle in the position where it can reach my leafy right hand side. To give the coverage I want I need to move the mist head to about one foot from the left side. I will be using the Dragon strand Hydration Mount because it allows my to position my mist head anywhere along the sides of the top panel rather than the corners as is common in the Industry. These corner mounts work wonderfully for 2′ x 2′ x 4′ cages, but a wider format cage needs a different configuration.
Note that the Hydration Mount we will be using has two holes. One is the standard Mist King/Cli-Mist misting head hole, bu there is a smaller on as well. This one is grommeted and is designed to allow you to input 1/4″ tubing into the cage. This can be used for plant drip systems or an entry point for the Exo-Terra Monsoon mist head. Warning! To use the 1/4″ entry point now, or ever again in the future, you will need to remove the grommet and then install it back from the top. The grommet’s purpose is 1) to provide a snug fit for the 1/4″ tubing and 2) hold down the loose screen strands produced by poking a hole in the screen. Remove the grommet before installing the Hydration Mount! Put it some where safe if you are not going to be using it immediately. If you decide to install the grommet now just to make sure you do not lose it just remember that there will be a hole that flies can escape from if you do not put a drip system in. This is easy to temporarily plug, but just remember to do it!
The build today uses the Dragon Strand X-Tall Dragon Ledges/Hydration Mount bundle. These can be purchased separately on the Dragon Strand website if desired. Here below is the reprinting of the link to the Dragon Ledgers/Hydration Mount bundle for this cage build.
https://dragonstrand.com/product/x-tall-36-wide-cage-dragon-ledges-hydration-mount/
If you desire a little more in depth instruction on mounting the Hydration Mount then please reference our page on Assembling Your Chameleon Cage. This will open in a new tab so you can do a quick reference, close it, and then come back here.
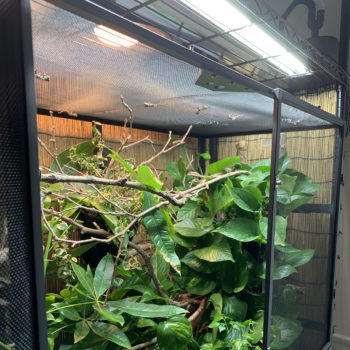
The Hydration Mount from Dragon Strand was designed for wide format cages. It allows the mounting of mist heads along the inside top frame to give us more control of our interior environment. This becomes an issue in these wider format cages as a mist nozzle in the left corner would not effectively reach our heavily planted area in the right corner and mounting in the right front corner would have a decreased effect in laying down the dew layer simply because of the direction it is coming from. Corner mount would work well enough, of course, but, here at the Chameleon Academy, we are a bit obsessive for going the extra mile and doing the best possible.

IMPORTANT: Before mounting onto the panel, remove the 1/4″ tubing grommet! This is only on the Dragon Strand Hydration Mounts. If using other manufacturer’s mounts, this is not an issue (and they must be mounted in the corner of the cage). This input allows 1/4″ drip system tubing to enter the cage for a plant watering system as well as allowing in the Exo-Terra Monsoon mist nozzles. The main Mist mount hole fits the standard mist heads from Mist King and Cli-Mist.

When ready to install the mist heads, find the larger hole for Mist King and Cli-Mist and save the smaller hole for future 1/4″ plant drip systems (or use it for the Exo-Terra Monsoon input)
Stand and Placement
Placement
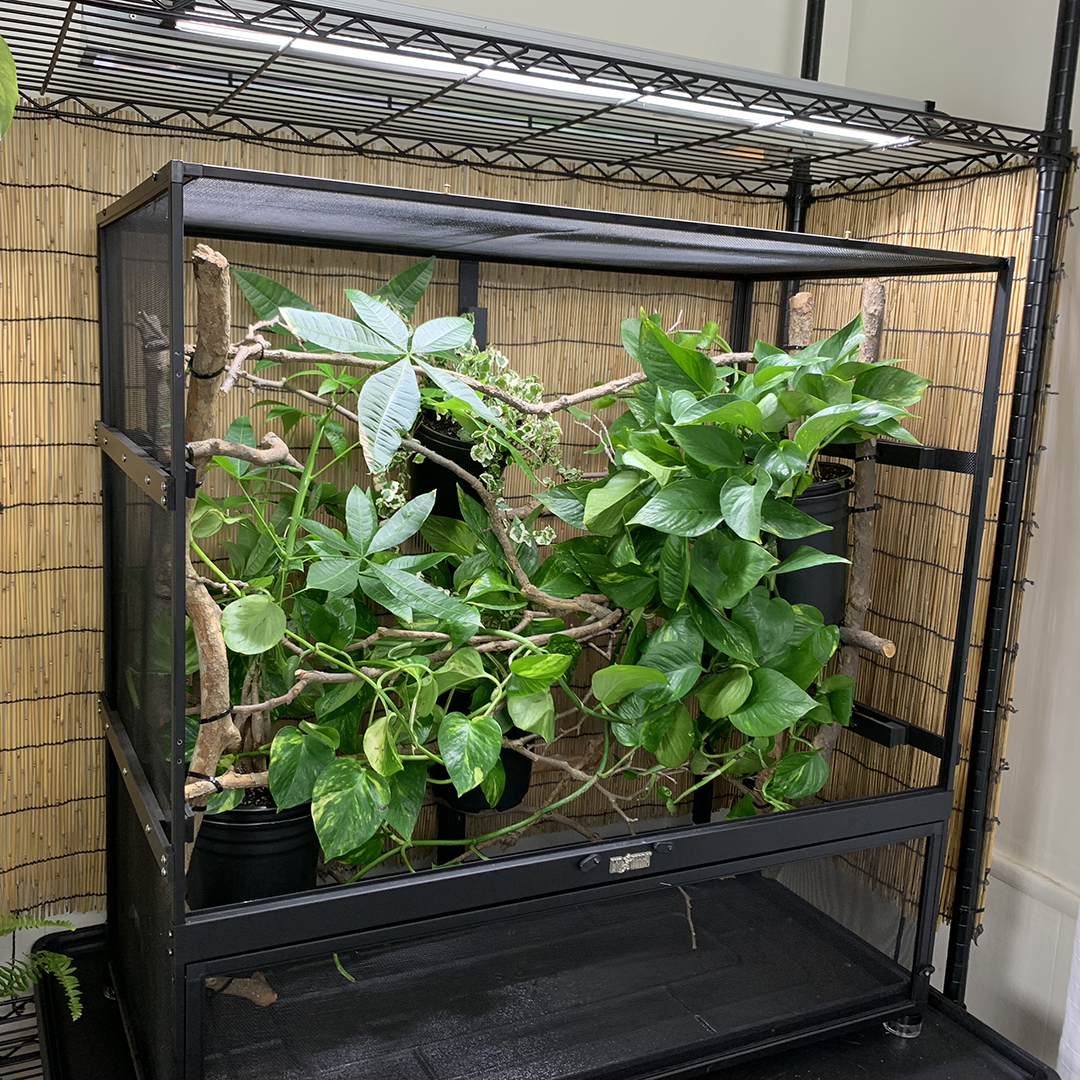
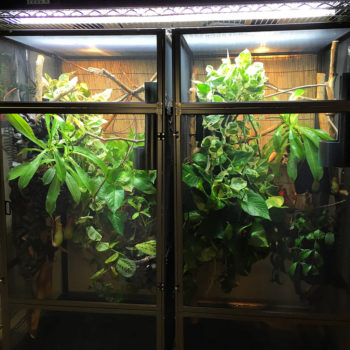
Somewhere along the way you will have to think about where you will be placing the chameleon cage and what you will be setting it on. Ideally, you figure that out in the beginning! The reason is that you can use elements of your home in your cage set-up. Chameleons have excellent vision and they can see everything in your house. The placement of your cage should take into account the flow of human and other pet activities as well as where the windows and heating/cooling vents are. In the picture of my cage, the right side of the cage is in the corner of the house, while the left side is by a room door. So I take account of these and I plan for the area for my chameleon’s hiding place to be on the right side. Remember that in a cage that is clear on all side that a spot is not hidden just because you cannot see it from the front. It needs to be hidden from ALL angles. House corners are great for this so my dense plant cover is to the right.
Stand
I am going to use a standard black wire rack to set up my cage. This has great flexibility in that the shelves can be set at any level and it is all on wheels. I can have storage below the cage and my lights and equipment set up on a shelf above the cage. This allows me to have my energy sources raised above the cage so my chameleon does not have to dealing with the intense energy produced in the first couple inches of the device.
Wire Accessory Basket for Fogger
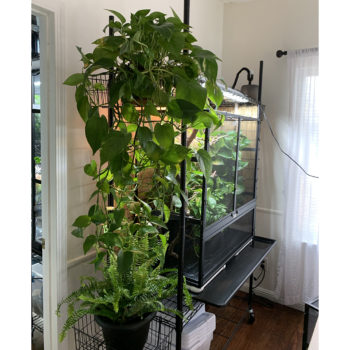
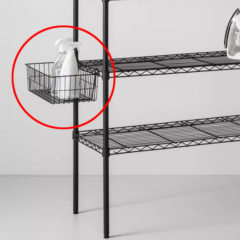
Wire racks also have a number of accessories that are useful us. In this case, a wire basket hooks on the side and makes for a perfect perch for a fogger and a lush potted plant to hide the equipment!
Bamboo Mats
I have zip tied bamboo mats across the back. This is to provide a more natural back drop and also to catch water droplets that may spray out of the cage. This is hardly water tight, but it does provide visual cover if you desire to go the extra step of lining the back of the mat with plastic tarp to make it completely water repelling.
This black wire shelving unit has been incredibly versatile and will adjust to just about any cage I am building. I have added a number of accessory baskets which hold my fogger, but also hold some plants to break up the utilitarian nature of the rack and give it a homey feel. Underneath I have storage space which I can place maintenance items as well as the 5 gallon basin for my misting system.
This wire rack is 48″ wide. This width is needed to hold both the cage and whatever drainage solution you settle on. These racks have 3″ of horizontal space taken up by the poles so the 36″ rack actually only has 33″ of space – not enough for this almost 36″ wide cage.
The link above is my choice as it is black, has wheels, and is 82″ high instead of the standard 72″ wire rack.
Note: This project require two of the above mats. When shopping for bamboo mats I suggest finding ones that do not use metal to hold the slats together. These will rust quickly! We need at least 6′ worth of coverage which is, ideally, at least 3′ wide. 4′ would be great. But it is hard to find bamboo matts sized perfectly for our use so I end up getting two mats per project. The above link is for purchasing a two mat package.
The floor of this cage is not well executed. The cage does not come with a standard flat floor, but we are provide with a substrate tray that fits in the bottom. Which would be fine, except it does not fit well and has edges that are seemingly designed to offer escaped feeder insects a place to hide or even escape the cage. If using this cage, you will have to create a drainage solution and have a feeding plan that accounts for the minimum security design.
As we know, chameleon cages need drainage trays for water to flow through the cage and not be trapped in the cage. Therefore to optimize this design we need to come up with a tray that fits under this cage. The best solution I have found thus far are replacement dog crate trays. These come in large footprint sizes and we can find one that fits under the cage and is still within dimensions that will fit on the wire rack shelf. Though there will be spill over as the pan is larger than 18″ front to back.
The next challenge is finding a way to prop the cage out of the waste water. Anything that will support the cage and lift it an inch or so off the dog pan will work. I constructed a very simple PVC frame system which works great. I described the construction below.
One the drainage system is in place, then I drilled small holes all around the substrate tray so that it would drain as quickly as possible into the drainage tray.
This dog crate replacement pan is 42″ x 24″ and provides a nice drainage tray for this size cage.
A Quick Drainage Tray Stand Project!
It is a very simple thing to do to create a spacer for your cage using PVC piping. I suggest making two 19″ x 12″ frames using 3/4″ PVC pipe and corners. Go to your local home improvement center and get the following
1* 10′ long 3/4″ Schedule 40 PVC piping
8* 3/4″ Schedule 40 PVC 90 degree elbows
Cut the PVC piping (you will need a PVC pipe cutter) into the following pieces
4 * 16″
4* 12″
and then assemble them into two identical frames. There is no need to glue the pieces for our application. The fit should be more than tight enough to keep the water from seeping in and “marinating” on the inside of the pipes. But gluing would ensure this cannot happen.
If you are very serious about this project you can special order furniture grade PVC pipe in black or even clear.
You will need one length of 10′ Schedule 40, 3/4″ PVC piping for this project. The above link takes you to the product description at Home Depot, but, if you are able, it is easy to drop by the store. Any hardware store in your area should have this item.
If you want to purchase these online you can buy six 2′ lengths at the following link: Home Depot 2′ Length of 3/4″ PVC Pipe Unfortunately, these will still need to be trimmed down for our purposes.
Note: Depending on the size of your car you might consider taking out your PVC pipe cutters and doing your cuts in the parking lot!
The above link is for a pack of ten elbows. You will need eight. It is usually cheaper to pick them up from the hardware store. The official long name is “3/4 in. PVC Schedule 40, 90-Degree S x S Elbow”
You will need a PVC cutter to cut the PVC to size. You can use the link above or just pick one up when you pick up the piping.
Cementing the pieces together is completely optional. The tight fit should be adequate, but this will ensure the water tight seal if you want to go the extra mile.
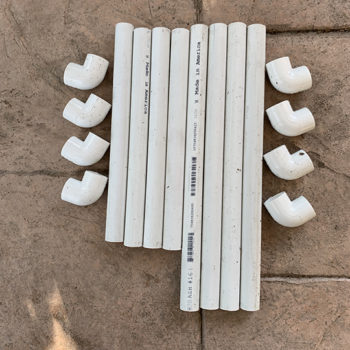
The above pieces (4*12″ and 4*16″) were cut from one 10′ length of Schedule 40, 3/4″ PVC piping which is common in most any hardware store. Together with the eight elbows this cost $5 to $6. (not including the cutting tool)

Putting it all together was very simple. I used friction fit so not PVC cement needed. Though make sure the connections are tight.Press down from all sides to properly set the corners. And then place the entire assembly on flat surface and press down to ensure the frame is flat.
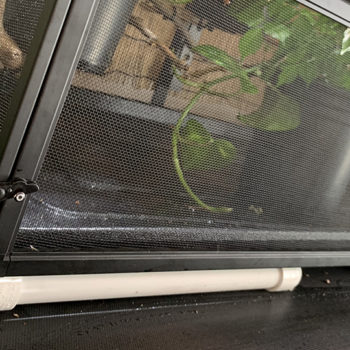
Put the frames between the cage and the drainage tray to lift the cage up. I decided to make two frames instead of one big one to make it easier to move them around.
Building the Dragon Ledge support structure
I am going to use the traditional Dragon Ledge strategy of attaching two thicker vertical branches on each of the sides. These are meant to be strong and give me the option of placing horizontal branches at any level. By placing short “crossbeams” across them I have a solid support for potted plants.
The vertical Dragon Ledge will have branches connecting it as needed once we start putting in the potted plants.
Branches can be attached using zip ties.

The first step is to find some strong branches to use as vertical supports. Anything from a diameter of 1/2″ to 3/4″ to even 1″ is a good candidate. I, personally, seek out Oak as a branch type. The many parks and wooded areas around have an excess of oak branches fallen to the ground so I am kept busy sorting through all of the dead branches looking for the ones with the most character.
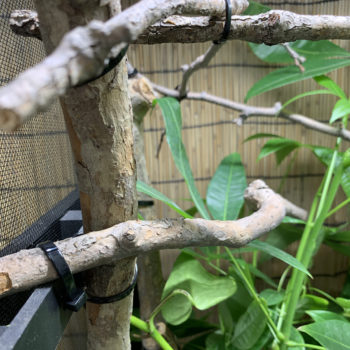
Once the vertical supports are in, horizontal branches can be zip tied on at any height by lashing to the vertical supports.

To give pots support, shorter “cross beams” can be attached across the two vertical supports that makes just enough of a shelf to attach the pot.
Adding potted plants
With the strong vertical supports we are able to mount potted plants around the inside of the screen cage walls.horizontal branches can be added in at any height for support. Support branches can be horizontal or placed so they run in front of the pot and trapping it in place even without the zip ties. Before branching for the chameleon’s use, the cage is set up with strong support branches to ensure the pots are well anchored.

I will be using the double pot method where one pot is zip tied to the branches and Dragon Ledges and the plant is in the other pot. This makes it easy to change out plants if necesary
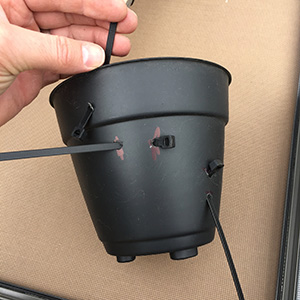
The pot to be mounted will be measured and holes drilled for the zip ties to be strung through.
I am using standard 1/2 gallon landscaping pots which cost around $1 and are easy to drill through.
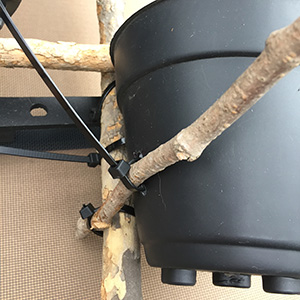
The pots are then zip tied to the branch support network.
Every potted plant needs to be secured in three different axises. What this means is that there needs to be three point where the pot is tied down to a Dragon Ledge or branch and that these points need to be offset from each other so there is no “hinging” where the potted plant just swivels.

Once the vertical supports are in, horizontal branches can be zip tied on at any height by lashing to the vertical supports. Three separate anchor points are created by the two vertical support branches and the crossbeam piece.

In the case of mounting to a vertical Dragon Ledge you can do this by attaching in two places along the Dragon Ledge and then in one place on a branch brought along the bottom. This branch is anchored to one of the side branch structures so is a solid support. The connection to this support branch can be done a couple inches out of line of the Dragon Ledge and that is enough to keep the pot from swiveling.

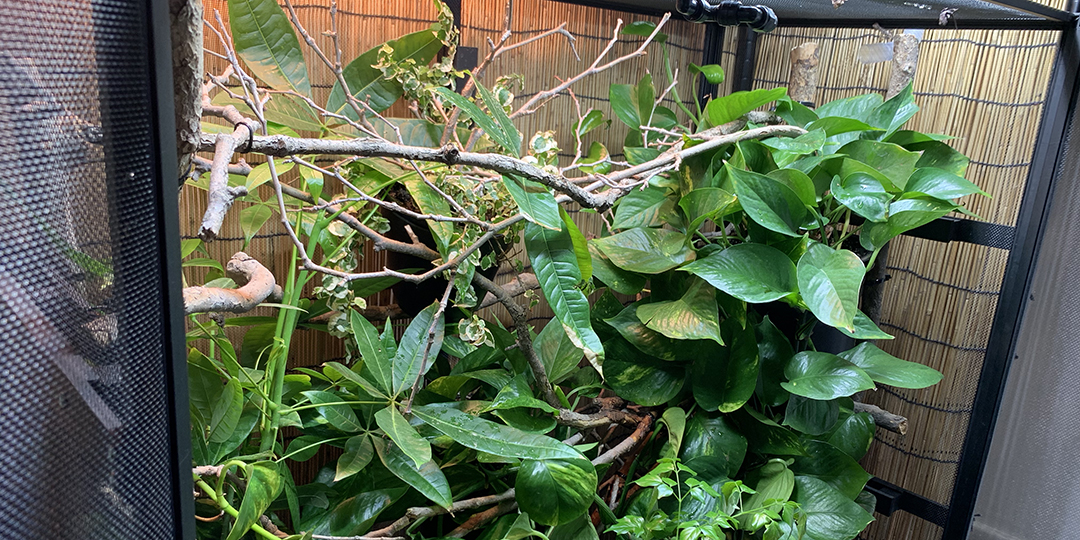
Fill up the spaces with plants. To the chameleon there will always be ample space they can fit their body in. Create your Forest Edge! One the plants are mounted on the side you can, at your discretion add a plant or two on the bottom. I have elected to do this in this particular situation because this is going to be a baby rearing cage until I make my decision of which of the babies will stay with me. Once that baby is chosen and the rest have gone to their new homes I will remove the extra plants on the bottom. They are there only to add more foliage and hiding spaces. Once there is only one chameleon, only one hiding area is needed.
Branching
With the strong vertical supports we are able to mount potted plants around the inside of the screen cage walls.horizontal branches can be added in at any height for support. Support branches can be horizontal or placed so they run in front of the pot and trapping it in place even without the zip ties. Before branching for the chameleon’s use, the cage is set up with strong support branches to ensure the pots are well anchored.
Branches provide the network by which all parts of the cage are accessed by the chameleon. The screen sides of the cage should never be considered perching spots. Although, as evidenced by the pictures here, sometimes with babies it can’t be helped! But there are four main purposes for branches in our Forest Edge 4+4. The first is the Basking branch where the chameleon may warm up and get UVB. This is the most obvious branch that can be seen running the width of the cage up top. This branch also does the duty of the feeding branch and drinking branch. because it goes tot he left side where I plan on hanging my feeder run cups and it extends to the right side into the leaves so there is access tot he dew which I will make sure is there every morning.

Horizontal branches can be zip tied to any part of the Dragon Ledge or vertical support grid.
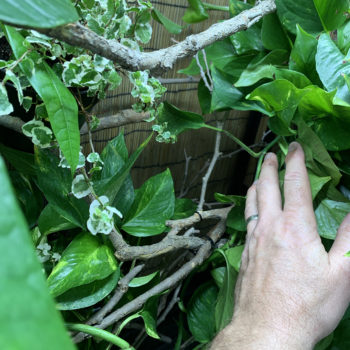
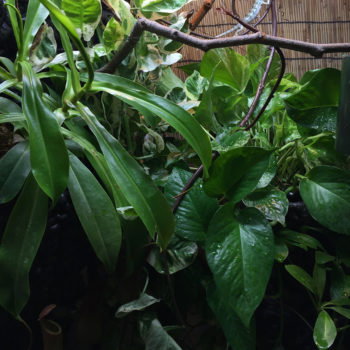
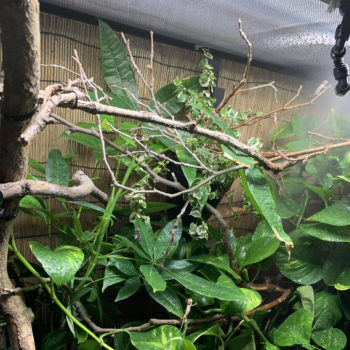
One of the most important, but often overlooked, features of a chameleon cage is that it have place where the chameleon can hide rom view. I chose the right side of the cage to be the hiding space as the house corner and the bamboo mat are visual barriers. In this image you can see the network of perching branches behind a thick pothos plant.
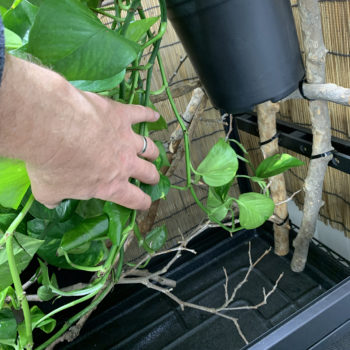
The hide spot behind the pothos is actually a sizable network of branches that allow many hiding spaces for the chameleon.
The Top (and Bottom) Of The Cage: Lighting, Heating, Misting
The lighting and hydration equipment is placed in different areas around the wire shelving system.
Light:
In place of a multi fluorescent bulb, I am using the Arcadia Jungle Dawn LED Light bar. This gives me a nice amount of light in a compact package. I am using the 34″, 51 Watt size.
UVB:
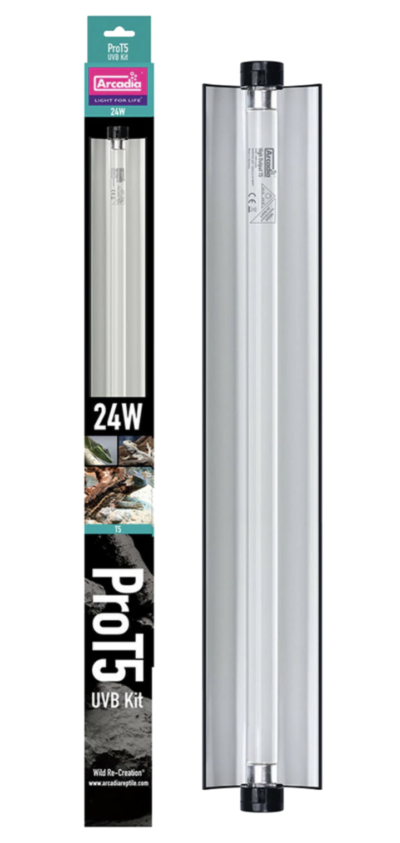
I am using an Arcadia 12% T5 24″ bulb in a single bulb reflector which is resting on the top shelf which is about 6″ above the cage itself and shines to a basking branch 6″ below the top of the cage. A 6% can be used if the bulb is placed 6-8″ above the back of the chameleon as he is sitting on the basking branch. If you are resting the fixture on the cage top go for the 6%. If you have chameleons that will hang upside down on the screen make sure the 6% is raised up about two inches off the top of the cage to protect your chameleon from excessively high UVB levels. The Reptisun 10.0 is equivalent to the Arcadia 12% and the Reptisun 5.0 is equivalent to the Arcadia 6%.
Heat:
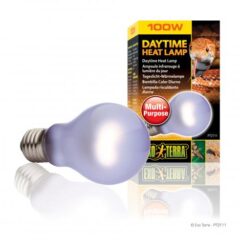
For the baby phase I have two dimmable reflectors having a 100W Exo-Terra Day Glo bulb each. For the adult phase this will be reduced to one fixture. The only way to use wattages this high is if you have them 6″ above the cage top. The reflectors recommended come with a dimmer so you are able to bring the power down if need be.
Misting:
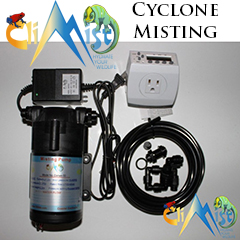
I have a single nozzle mist system using the Mist King Basic System using a 5 gallon jug of water as the water reservoir.
Fogging:
A top-filled PetsPioneer Reptile Fogger is used and set in a wire accessory basket. This makes it easy to fill and a potted plant can be added to hide the fogger.
Lighting
I have been experimenting with using the Arcadia 34″ LED Light Bar and am very happy with the results. It has less of a footprint than the dual T5 fixture and lights the cage very well. I am recommending the light bar, but T5 lighting can be sued. There is a significant shelf space hit in going with a T5 Fixture. A good quad T5 fixture can be 14″ wide, leaving little room for the basking reflector. You can use a dual T5 fixture. I recommend getting a 48″ wide fixture. The two common sizes are 24″ and 48″. With light it is better to go for more light than less.
UVB Lighting
I am using a 24″ Arcadia 12% T5 UVB in a single reflector to give a UV Index of around 3-5 at the various basking areas. I will be implementing the sun/shade method spoken about by John Courteney-Smith and allowing the right third of the cage, which is my dense leafy area, to be without UVB. I do this, simply, by using a 24″ fixture on top of the 36″ wide cage. I keep the UVB on the left side where I have my open area. The 12% strength should only be used if it is at least 12″ away from the basking branch so it is generally 6″ above the cage. Use a 6% if you are resting this fixture on or close to the cage top.
Basking Bulb (Heat)
I like the Fluker’s Repti-clamp lamp fixture as it is a larger size reflector (8.5″ and has a dimmer built it. In the particular build I am doing, a 100W works well as far as providing an effective heat without going too far.
Top Shelf Light Placement
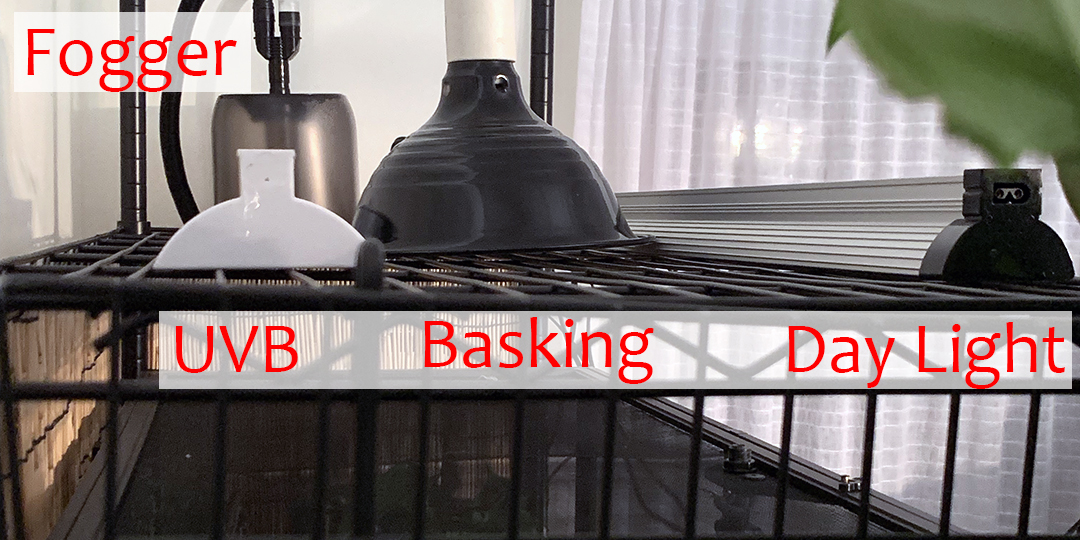
Placing the lights is always a challenge. The guidelines to follow are
1) Daylight is placed over the front of the cage so that the light does not create a silhouette of your chameleon. Your chameleon does not care, but you will!
2) Basking Bulb is placed where it cannot accidentally slip and fall if the cage or rack is bumped.
3) Basking Bulb is kept away from anything that could catch fire. This is why we have the basking bulb between the daylight and UVB fixtures. It keeps the heat lamp away from the bamboo backdrop that is attached to the shelving unit to contain mist and create a visually aesthetic background.
4) Basking Bulb shines on the branch you have set up to be the basking branch.
5) I have the 24″ long UVB fixture so it shines on the first 24″ of the cage. This includes the basking area, but the UVB light is directional so there isn’t complete overlap. On the daylight side of the basking bulb the chameleon can get heat without UVB. On the UVB side of the basking bulb there is a combination of heat and UVB. On the far side of the UVB bulb there will be UVB without direct heat. Chameleons have been known to regulate their heat and UVB separately so this provides that opportunity.
6) Be mindful of where the mister must point. You do not want the mister to spray light bulbs.
Misting System
If you are using the 4′ wide rack you have just enough room to place the misting system water reservoir in the shelf under the cage. The pump will have no problem driving the mist nozzles from the lower shelf.
I have purchased extra corners for the tubing which makes corners much easier.
Hints for misting systems:
- PRESS fit. Put some force behind shoving the tubing into the connectors. If you have any leaks around the connectors, 99% of the time it is just a loose fit. Shove it in harder!
- If the misting system turns on, but the water does not come out you may need to “burp” the system. Simply disconnect the output and run the pump. Once water comes out the output of the pump reconnect the tubing. This is a magic trick that works most of the time.
Note that in all these pictures the lights are on. This is so we can see. In actual use, I do not run the mister during the day. Chameleons do not like to get wet. So I use the mister during the night to lay down a layer of dew and to help the fogger raise the humidity. A cage with wet surfaces is much more receptive to fog rolling in. With out then, fog tends to just rollin and roll out. And, of course, a good spray before the lights come on ensures that the chameleons wake up to dew on the leaves.
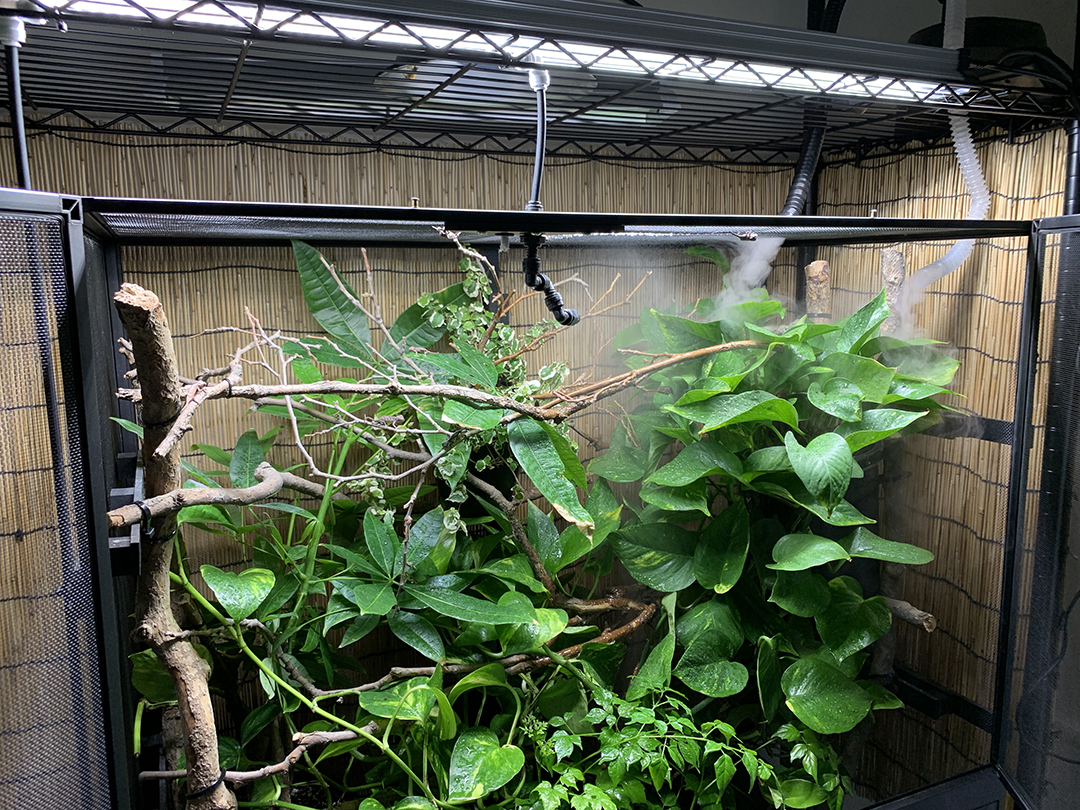

The press fit corners also help when the tubing gets to the top of the cage. I make sure the run of tubing goes by structure that I can zip tie it down. The pumps send quite the vibration through the tubing so if they aren’t tied down they rattle annoyingly. For the tubing going up I zip tied them to the Dragon Ledges and, in this picture, I ran the tubing along the inside edge of the shelving. With all these solid anchors there is no vibration.
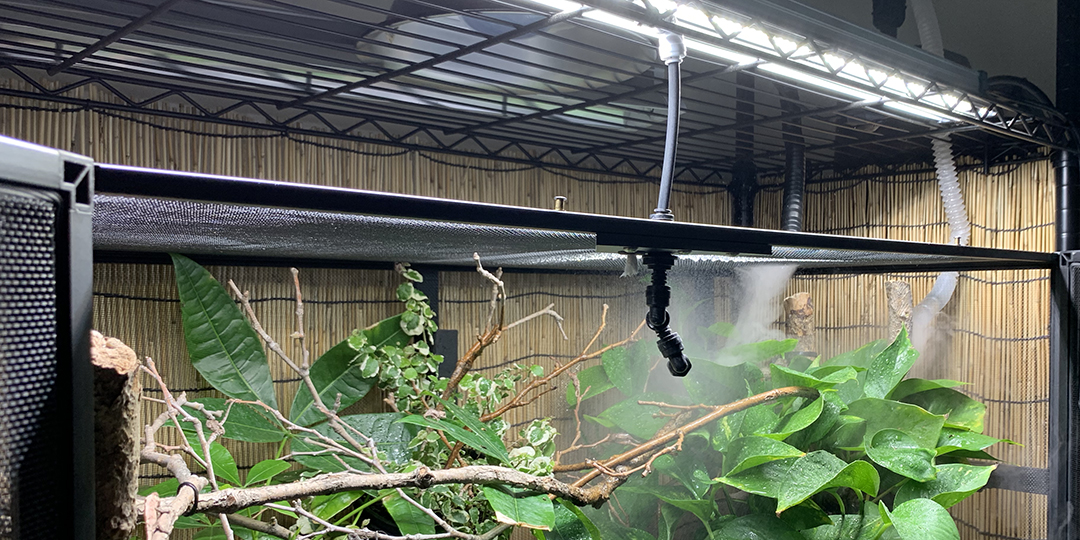
I wanted to have a dry section and a wet section. My wet section is the right hand side of the cage which has the densest foliage. this is the wide which has the fogger as well. So I have mounted my mist head in the front middle and it points to the back right, The mist is strong enough to reach across half the cage. So if you wanted the whole cage to be misted then just add another mist head. The drier section is the left hand side of the cage.

Of course, the mister and the fogger can be used together, though the mister will blow the fog away!
Mister purchasing information
Optional: 1/4″ Misting Tubing Corners
Optional, but I love being able to make a true 90 degree turn with my tubing runs! One pack of ten will more than take care of one cage. I usually use four.
- input to pump from water jug beneath
- output from pump to point up the side of the cage
- jogging over the top of the rack
- rack down to mist head.
Fogger
The fogger provides the high night time humidity that chameleons need to maintain a natural humidity cycle. A fogger is most effectively used in the dark morning hours before the sun comes up (or lights come on).
Using the rack system makes for easy placement of the foggers. I have elected to use one of the wire baskets, though it could have easily been placed ion the top of the rack. The output tubes are long and so there is great flexibility in where this has to go.
Hints for fogging:
- Avoid horizontal runs of the output tubing. Keep them at a downward angle or else water will build up in the tubes and the fog will be hindered.
- Put the fogging system on an external timer because the internal timer is a cheap cyclic timer and this does not give us the flexibility we need.
Note that in all these pictures the lights are on. This is so we can see. In actual use, I do not run the fogger during the day. Although I admit to enjoying seeing the fog bank when the morning lights come on slowly dissipate. But the fogger and the basking lamp are not on at the same time. Our recipe for success is cool/moist and warm/dry.

The fogger output tubes are aimed so that the intended sleeping area of the chameleon (the right leafy area) experiences a fog bank just after midnight.
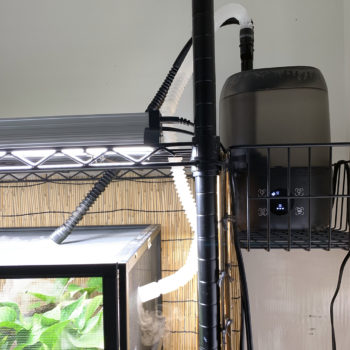
The wire rack shelf and accessory basket provide a convenient place for the foggers that us away from electronics so that filling the fogger does not accidentally get water on electrical systems.

And, houseplants can easily hide the utilitarian nature of the wire rack and equipment!
Fogger purchasing information
Scheduling: Lighting, Heating, Misting
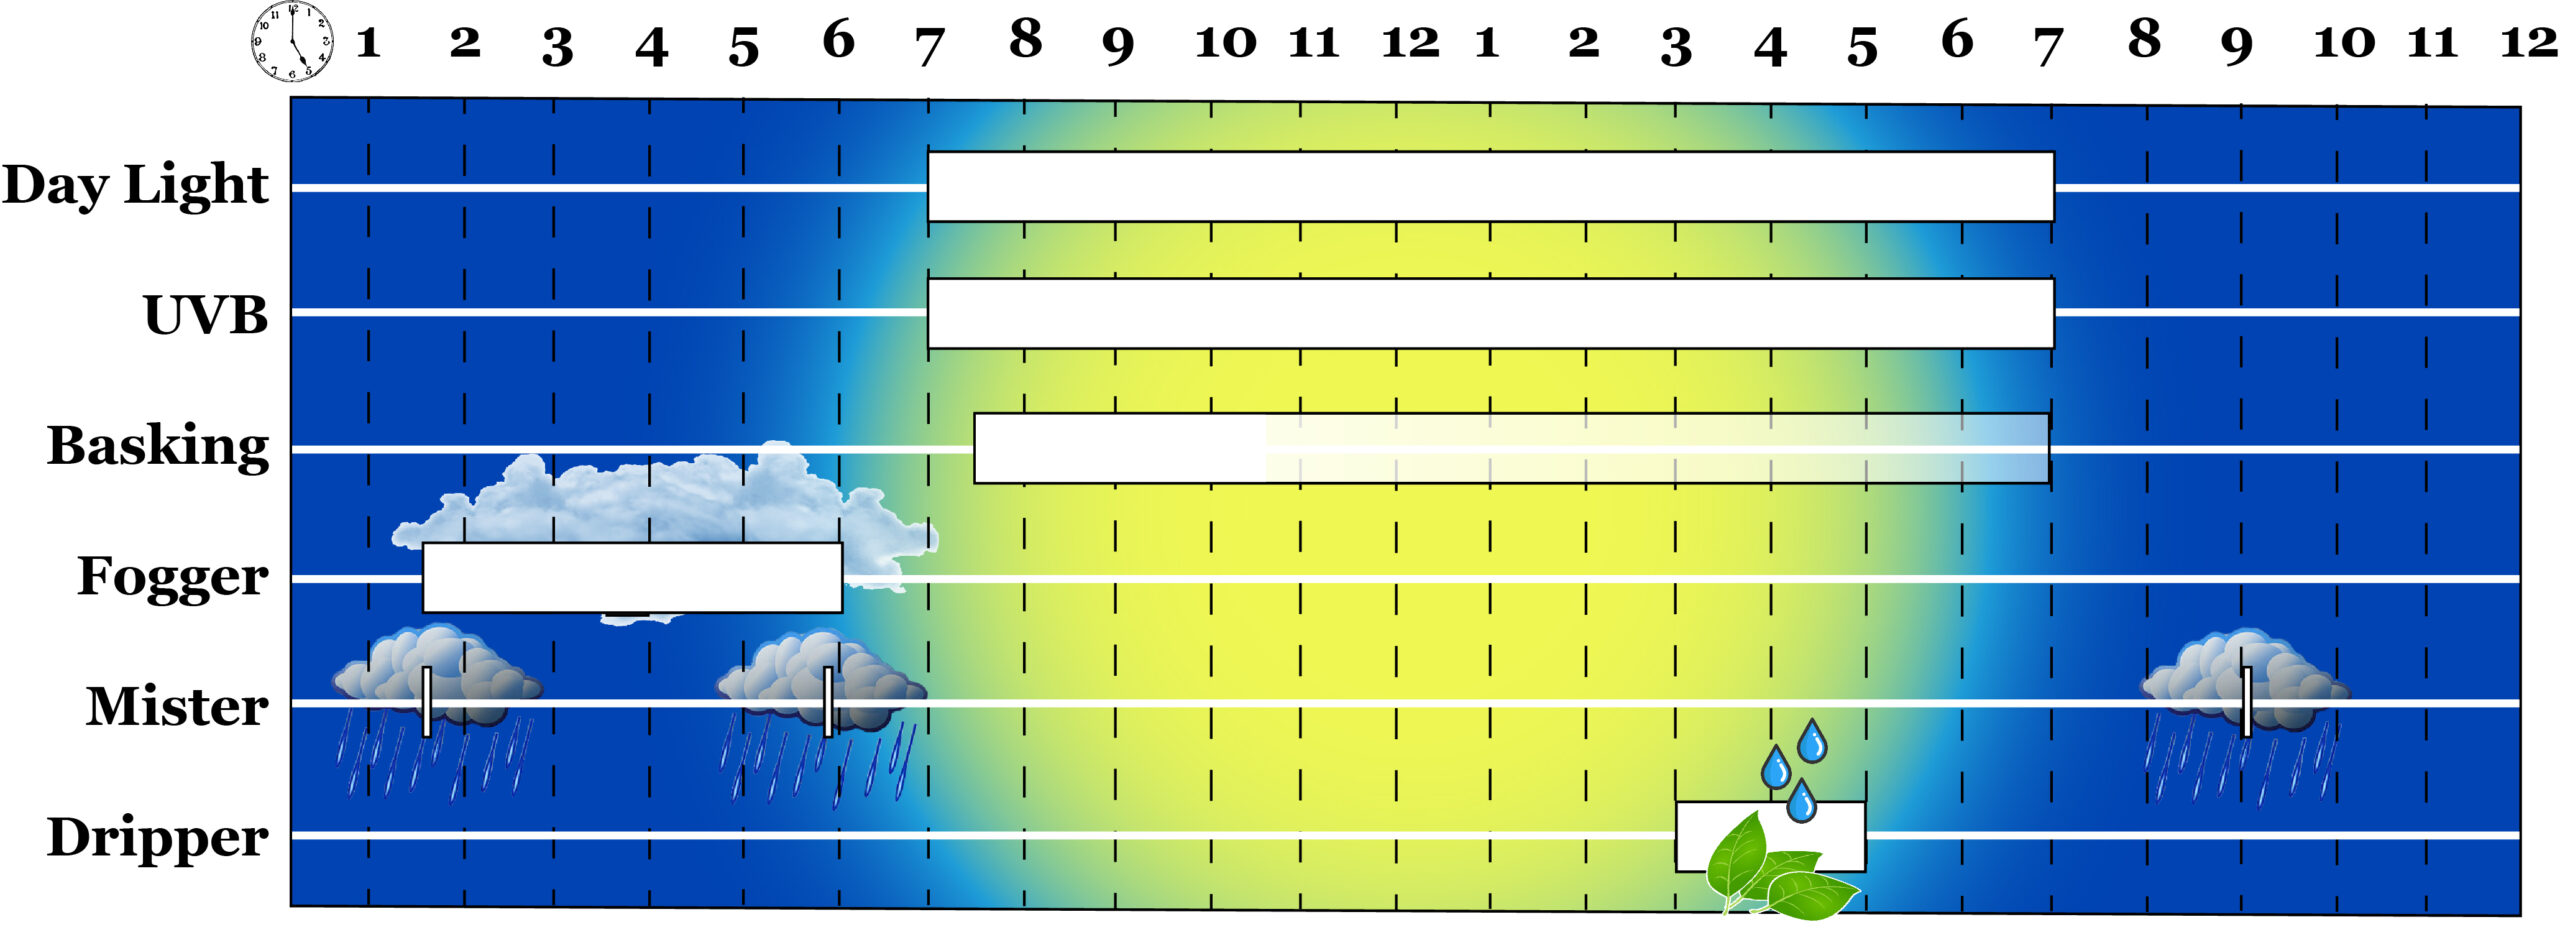
In setting up my timers I am replicating the above lighting/hydration cycle.
Midnight: all items are off
1AM: Misting system turns on for 45 seconds to create a moisture layer to help fogger “stick” instead of just bouncing off dry leaves
1AM – 7AM: Fogger runs for a 30 minute on/off schedule until 7AM. The frequency and length will be dialed in as I evaluate the need for more or less humidity during the night.
6:45AM: Mister comes on for 1 minute to throw down a layer of dew for the chameleons to wake up to.
7:00 AM Daylight and UVB bulb comes on
7:30 AM Heat Lamp comes on
10:.30AM How long the heat lamp is on is dependant on how long your chameleon needs it. In screen cages it is customary to leave the heat lamp on all day as there is no heat build up. In enclosed cages the ehat lamp must be more carefully regulated as it can produce an over-heating condition. In all cases, it is best to gauge how much of the heat lamp you need by your chameleon’s behavior. Keep the heat lamp on for as long as your chameleon is showing it needs it by their basking behavior.
3PM: Optional dripper or hand mister session. Here is where I personally observe their behavior and response to water. Ideally, they ignore it. Otherwise I have to adjust my hydration cycle. This is a constant process and will never be completed.
7PM: All lights go out
8PM: 45 second misting to start the night off moist.
Summary
Shown here is a specific build for a specific cage with all the equipment linked. In the coming months, I will be doing case studies with other cages as well. The pattern you will see is that I will be using the exact same strategies to build up the Forest Edge 4+4. This is not because this is the only way to do it, but this is a complete system and I want to demonstrate implementing it in as many ways as possible. Please learn this method, implement it, and then, when you feel comfortable with it, expand and explore! Find new ways of doing things. Everything I show here is to get you started and successful, but it is meant to be just your first step. There is no rush. Work at your own pace. But never view anything you learn here at the Chameleon Academy as the final word. We make sure your first steps are successful. Where you go from there is up to you and, honestly, I can’t wait to see what you come up with next!
Navigation
Setting Up Your Chameleon Cage is a class that is part of the Term 1: Getting Started With Chameleons coursework which gives you a basic exposure to the important issues in chameleon husbandry. This case study is the final project and shows a step-by-step implementation of the skills learned in this course. In the next course, Maintaining Your Chameleon Cage, we will go over what it takes to keep your chameleon and its environment healthy and alive!

