Bioactive environments have given us success with the rarer species and is a next step for the dedicated chameleon herpetoculturist. I team up with Michael Nash to create a step-by-step build guide to make creating your first bioactive environment easy!
Podcast Player

You have probably heard the term bio-active thrown around a great deal.
Bioactive is a term reserved for when the soil is a living environment. There are leaves breaking down, springtails and isopods flourishing, and a healthy moisture exchange tying it all together.
As chameleon keepers we often don’t think about the soil. Chameleons live in the trees and if they are on the ground we are rightly concerned to figure out why! And when someone is just starting out with chameleons I usually recommend starting with a bare floor. Starting with chameleons is hard enough with everything you have to learn. There is no reason to add maintaining a substrate into the mix!
But there is room to grow. We want to view our chameleon’s enclosure as a total environment Adding a soil layer can be a powerful next step. And, what do I mean by powerful. Well, there is the philosophical where once we have the environment mindset we look at everything we do differently and our chameleon gets better care. Instead of them being in a cage and us taking care of them, we care for the environment and the chameleon takes care of themselves.
But there also is the practical aspect. Adding a soil planter box is critical to outdoor keeping because it completes the environment and allows a heat and humidity gradient. And, there is the unarguable success that breeders and keepers have found when keeping rare species and chameleon babies in a bioactive enclosure. So, while having bioactive substrate is not required to keep the most common species like Veiled, panther, and Jackson’s, it is a worthwhile skill to develop to advance your husbandry skills.
So, just what does bioactive mean? It is simply a soil and substrate layer on the floor of the cage. But this substrate is filled with the cycle of life. Leaves and twigs are decomposing which, in addition to your chameleon’s waste, feeds the springtails and isopods.
Many people hear about having a bioactive substrate so they don’t have to clean up the poop in the cage. This is true, but it is just one piece of the whole picture.
Creating and maintaining a bio-active environment is a hobby all of its own. It requires putting in the right substrate materials, managing your colonies of isopods and springtails, and maintaining an ecological balance. So, I am not sure how much time it actually saves, but I am sure that it puts your efforts into a much more enjoyable aspect of the hobby!
So, should you try a bioactive environment? That is up to you. It can be challenging with the larger species of chameleons. But when you get to carpet chameleons, jeweled chameleons, Brookesia, and babies, bioactive environments actually start bringing direct benefits to your chameleon.
This is a build guide put together by both me and Michael Nash who has done extensive work with exploring rising baby chameleons and smaller species with bioactive cages.
Selecting the Cage
This is a build guide where Michael and I will take you through a bioactive cage build. You can take these concepts and apply them to any cages and equipment you want to use, but here is a shopping list if you would like to use the equipment we both used in our builds. This is a build guide based on equipment which is mostly available from Leap, a new company that has developed a product line optimized for bio-active builds just like we are doing here. The Leap product line is design to work in a baker’s rack to keep multiple cages organized and a clean look. I am providing two shopping lists. The first is if you want to work with a single stand-alone cage system. The second is if you want to create a rack of cages.
Bioactive Cage Basics
When creating a bioactive environment you need to be mindful of the cage you get to make sure it can maintain the proper conditions. When we think of bioactive we usually think of the forest floor like in a dart frog vivarium. But just know that there can also be arid bioactive. So we need to be mindful as to what species of isopods or spring tails we use. Luckily, the humidity conditions we normally target for chameleons, 80-100% at night and around 50% during the day are perfect for the bioactive invertebrates we can easily obtain.
When picking out a cage type you have to be aware of your ambient conditions. What does it take to maintain a humidity during the day of around 50% and up to 80-100% at night? Most Northern latitude countries will need to use a solid side cage like a glass vivarium, any of the number of hybrid cages available out there or the Leap cages that I will be using for this project.
The cages that are optimized for a bioactive set-up are the hybrid or glass cages where you have sold sides, back, and front door with vents by the bottom of the door and a screen top. This holds in humidity, but allows air exchange via the chimney effect from the cool air being drawn into the cage through the lower front vents and then sucked upwards through the screen top of the the cage as it is warmed by the lighting system. This air exchange keeps the cage environment from stagnating. So be careful that these elements are in place. They are with the major brand names, but as more companies try to break into he rapidly growing reptile market, quality may suffer. So, be mindful of the ventilation features before you buy.
You will also have to consider what you want to house in the cage to determine how big it needs to be. This is where we chameleon keepers need to do careful evaluation. Many of our species requires cages that are relatively large. The standard vertically orientated 4’ tall chameleon cage needs to be chosen carefully as the light must get down to the substrate bottom and you need to be careful of plants above blocking to the light for the plants in the bottom layer. In this project I am focusing on the smaller species of chameleons like carpet, jeweled, and Brookesia chameleons. So the 24” to 36” tall cages suit this purpose very well.
Leap Habitats
We chose to use the Leap habitats. Leap is a company founded by a long time chameleon enthusiast, Tim Marks, who is actually deeply involved with breeding Furcifer willsii, the Canopy Chameleon from Madagascar. So these cages have been intelligently designed for our purpose. I’ll get Ito the specific features as I build up the cage and system. Michael designed his system using the 22” x 17” x 18” habitat. I used the 22” x 17” x 24” habitat. And I will be building up one of the 22” x 17” x 36” habitats here in this series.
The reason why those seemingly non-standard dimensions are used is because these cages are optimized for being used on baker’s racks. So, I think you can immediately see the opportunity. Yes, you can have a stand alone cage, but these cages make it easy to create a beautiful rack of bioactive cages. And, yes, this could be trouble. I can make a rack that can create individual baby chameleon raising for 12 babies. I can create a rack which would allow my to have a pair of carpet chameleon, a pair of leaf-tailed geckos, and a couple species of dart frogs. All four feet of wall space. So, you can let your imagination run free.
Right now, I have a row of 22” x 17” x 24” to raise up some baby crested chameleons and I have a row of 22” x 17” x 36” below that for the babies to grow into. And, that is exactly what I am doing with this series. My baby crested chameleon has grown to the point where he needs an upgrade. And I will be building that upgrade with you!
I have used Exo-Terra glass terrariums for bioactive builds. They work fine, but don’t fit as cleanly. I have used my own Dragon Strand cages, but those are a mid-level breeding product. The Leap system is a nice complement because it brings the full functionality we need for a bioactive environment to the entry level and I think that will open this up to more people. I make it a point to work with different cages and the Leap cage is perfect for this project.
So, give it some thought. What would you like to house? Do you want to raise a baby chameleon? Get into carpet chameleons, have a section of your wall dedicated to slices of nature that hold some of the most fascinating creatures on Earth? And, yeah, I am in real danger of getting myself another rack…I really like the carpet chameleon, leaf tailed gecko, and dart frog idea.
Leap Product Review
I want to warn you before you start building your cage that this is not what you expect from a cage. This is a completely different design and uses materials we are not used to. You may ask how corroplast walls and a thin film origami substrate tray can hold up. And the answer is that it does the job perfectly. Products before were over engineered mainly because it took much more design and manufacturing strategy to remove excess cost, but leave the full function. That said, come into this with an open mind. You can see that they function wonderfully and I wouldn’t choose to have them in my home if they weren’t effective.
So, let’s take a look at this cage. We have a sides and back made of corroplast that is strengthened by an aluminum frame. You have an acrylic door which a very nice hinge system. I love the tabs for latching the cage. You may ask why I am caring about the tabs, but, as many of you know, I started a caging company dedicated to chameleon cages in 2013. I have been obsessing over all details of chameleon cages for almost 10 years. So I know when someone went the extra mile. I can see it in the details. For example, almost all this cage is custom designed to be optimized. You may not see this just looking at it, but from the perspective of a person in caging, this is a work of engineering art.
Up here you have punch out holes for the misting nozzles. The fits nozzles from either the small cage mister from Leap or the standard Mist King nozzles
Now one of the things you need to keep an open mind about is the substrate tray. You are use to seeing thermoform trays. Well, that is way over engineered. There is no reason why it has to be that strong. And you will see that something as thin as this does the job perfectly. All it really has to do is keep the soil from escaping and getting all over the place. The cage itself provides the strength.
Now, the perennial challenge with cages and soils and water is keeping the cage water tight or having a drainage tray solution. In the case of the Leap cages, the substrate tray is held in place by industrial double sided tape. It isn’t always easy to get a 100% seal around the corners and so it is a good idea to have some sort of drainage tray solution. And, these are available from Leap. I recommend you use one no matter how good your installation of the tray is. Because you will be piping water into the cage and where there is water there are spills. Just get a drainage tray and you don’t have to worry about it.
One thing I want to mention about this cage is that once you have it together it is not coming apart. This is not a big deal as you rarely take cages apart, but just know that, if you ever have to deep clean the cage or move that the cages are going to be cleaned or moved intact. Of course, when I had to move my entire collection I had them on these baker’s racks and just wrapped all the cages in place and rolled the baker’s rack onto the moving truck!
The Leap Cages are highly optimized for the baker’s racks. And there are some very cool things that come out when it is used with the racks. For example, there a brackets which clip directly onto the baker’s rack shelves to hold your T5 and LED light bars above the cages. This is a huge space saver and makes raising the fixtures above the cage top easy. We want the lights above the cage top because this allows the highest levels of UVB to dissipate before getting inside the cage and it decreases the amount of heat that goes into he cage fro the light fixtures. You have this ventilation up top that you wouldn’t get if the lights were blocking the top. Leap offers the right rack with the right shelves. These racks are available elsewhere, but the cheaper racks on Amazon do not have the right shelving so be careful to get the right rack. Of course, pick it up from Leap and you don’t have to think about it.
The LED bar and UVB fixture plug into each other so you only need one timer plug.
Then the foggers and misters can be added on and you have a very cool vivarium wall in just four feet of space!
So, the question you are faced when selecting your cage size is your application and species.
If you want to do a stand alone, or just start with one then I have created a shopping list of what you need from Leap and Amazon.
If you are ready to do a rack of bioactive then I have a second shopping list that helps you make sure you get everything. Depending on how many cages you are driving you may want to do something different for your misting and fogging.
Individual Cage Shopping List
If you are just starting off and want to work with one cage then this shopping list will get you started. It is no problem to expand to a complete rack in the future. The only things not compatible with expansion would be the smaller lighting fixtures. For this build you can find what you need from both Leap and Amazon.
Leap Shopping List
Leap Habitats.
The easiest way to gather what you need from Leap is to go to their “Shop All” page and just go down the list of items. I am an affiliate of Leap so I will get a small percentage if you use this link right here to go to the shopping page. This link will open up in a separate page so you can keep both open and refer back to this page for the list of items.
Open the Leap shopping page here: Leap Habitats Shopping Page
Individual Cage Shopping List
- 22 x 17 x 24″ Leap Habitat. This is my favorite Leap cage size. Of course, select the cage which best matches what you want to build! My rack system has two 22x17x24 and two 22x17x36. Which one you get depends on your application.
- External Catch Pan. You can get three different sizes. If you are just going to set up one cage on a stand then get the Catch Pan that matches the footprint of your cage. For this build I would use the 22x17x3.
- Programmable Fogging System
- Programmable Starter Misting System
- 4* Living Earth Substrate
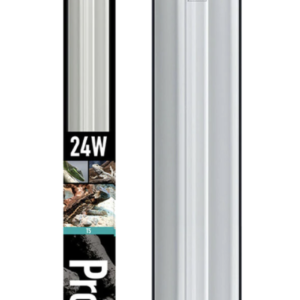
Note on Lighting: Leap is working on offering the 24″ lengths of the LED bar and T5 UVB fixture for stand alone cages. They currently have the 12″ which can be used. If you would like to use the Leap lighting fixtures then I suggest getting two of the 12″ LED bars and one of the 12″ T5 UVB Fixtures and a 12″ 5.0 UVB bulb. Any other manufacturer’s 24″ lights can work until the 24″ lengths are in. I have used the 24″ Arcadia ProT5 6% and 24″ Jungle Dawn LED bar with success. Leap is optimized for the rack system and, as you will see in the rack shopping list, becomes highly efficient with being able to use one light for two or three cages. If you would like to purchase the lighting systems in one order, add these to your Leap list. Otherwise I will link to alternative 24″ fixtures in the visual shopping list area.
- UVB T5 Light Fixture – 12″
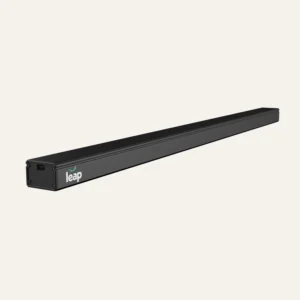
- T5 HO 5.0 UVB Bulb -12″
- 2* LED Light Fixture 12″
- 2* Interconnect Cable
Below is a visual shopping list of the exact same items listed above. Note that clicking these links will all open the same main product page at Leap in a new window. Keep this page open as reference and you can easily select all the items you want from Leap.
Leap Shopping List
There are many choices for cage sizes at this link. Select the one most appropriate for the animal you plan on housing. The 22″ x 17″ footprint comes in 18″, 24″, and 36″ heights.
Note that clicking this link will open the main product page at Leap in a new window. Keep this page open as reference and you can easily select all the items you want from Leap.
There are a couple of catch tray size choices. Make sure you get the one which matches your cage. Even though the substrate tray in the Leap cage is water tight, water will always find a way out. I always use a drainage tray for safety reasons and so I encourage you to do the same!
Note that clicking this link will open the main product page at Leap in a new window. Keep this page open as reference and you can easily select all the items you want from Leap.
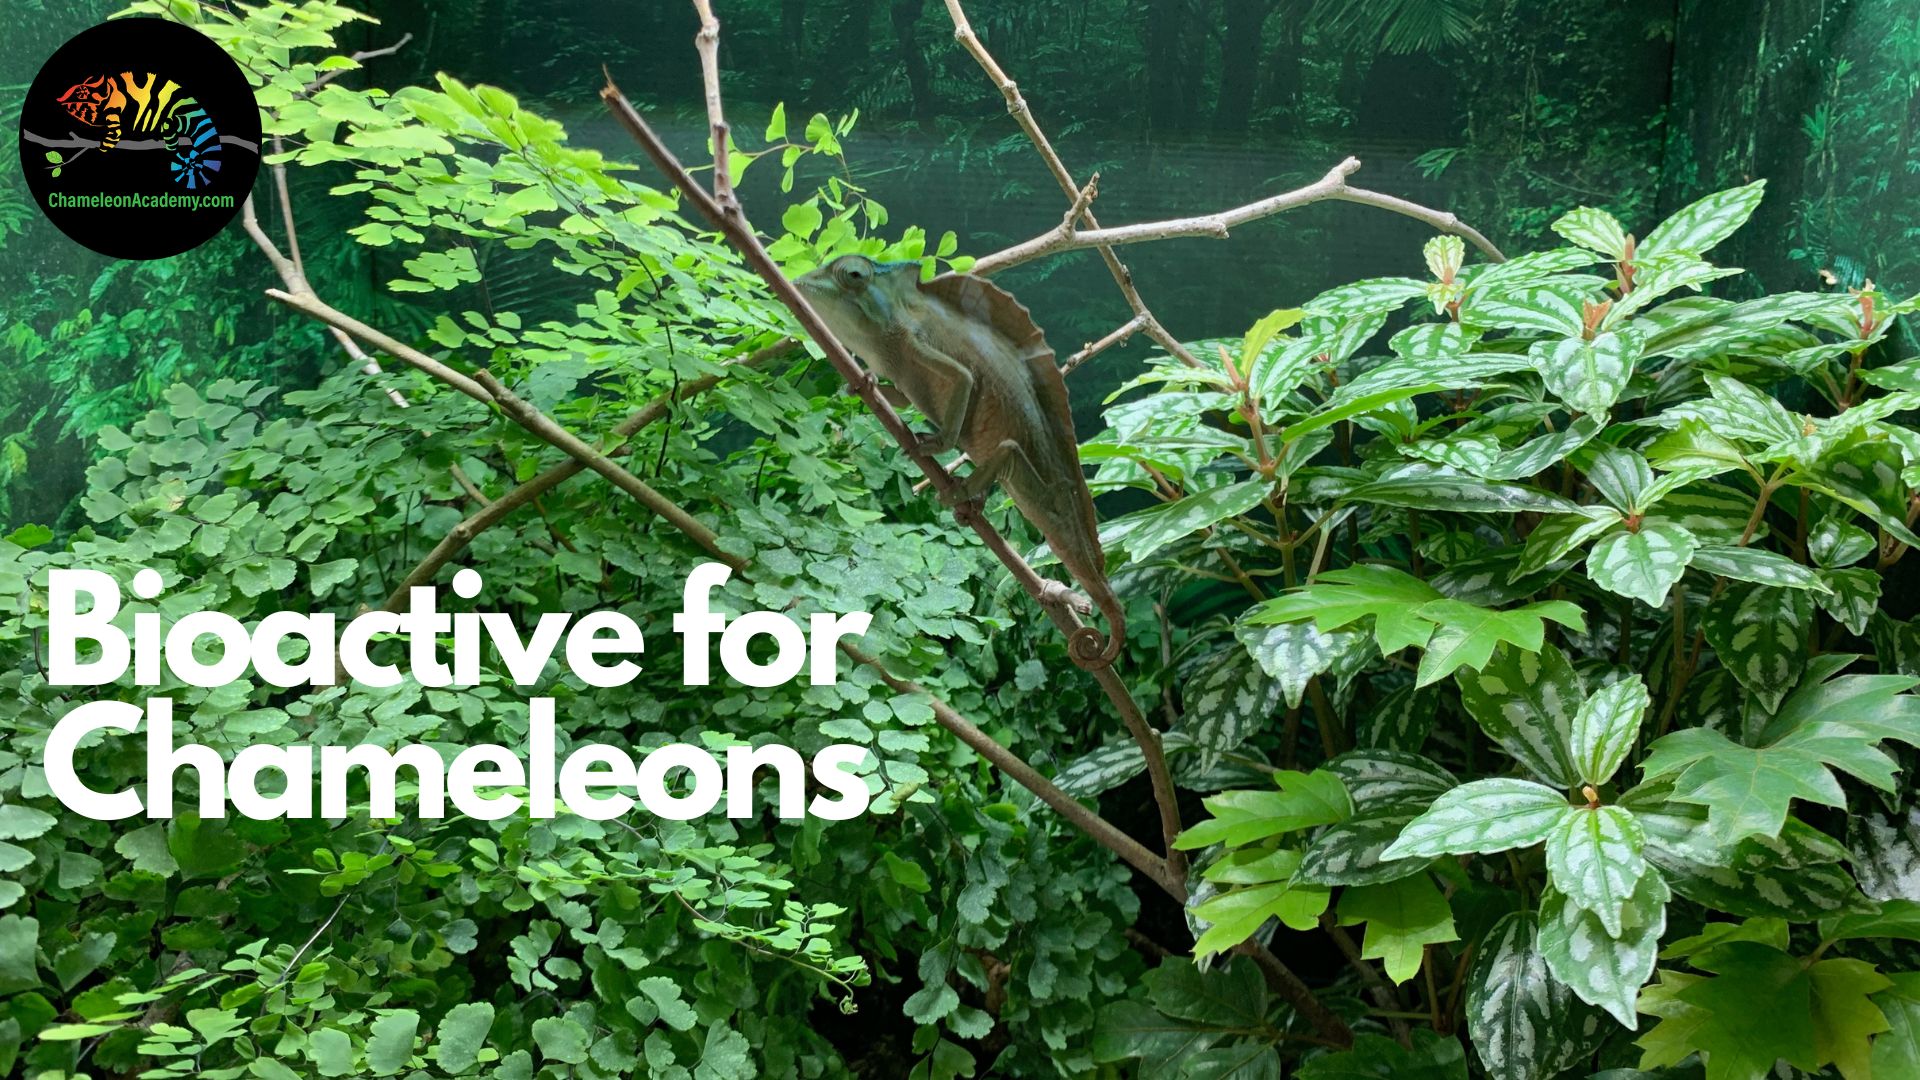
This is my favorite fogger. This is based on a model that I have been using and recommending for years. Leap adopted it and has now become a supplier that actually has customer service! The fogger is top loading, has a 4L water reservoir, and has a Y output allowing you to fog from two places above the cage – or two separate cages!
Note that clicking this link will open the main product page at Leap in a new window. Keep this page open as reference and you can easily select all the items you want from Leap.
This is a good mister that can drive two mist nozzles. You can either have two nozzles in one cage or one nozzle in each of two cages. The timer is cyclic timer so if you want finer control over mist times you would need to attach it to a appliance timer from any home improvement store.
Note that clicking this link will open the main product page at Leap in a new window. Keep this page open as reference and you can easily select all the items you want from Leap.
Leap Lighting:
Leap offers lighting in 12″ and 36″ and 46″ at this time. This works great for the 15″ wide cages and 36″ and 48″ rack systems. The 12″ fixtures can be used with the 22″ wide cages if you want a stand alone cage and they are most effective with two 12″ LED bars and one 12″ UVB fixture/light. This becomes very important if you use the 36″ tall cage as you need to get light down to the floor for plant health!
2* 12″ LED Light Fixture
Leap only offers the 12″ LED fixture at this time. You can either purchase a 24″ fixture from another manufacturer or else two 12″ from Leap. Although it would be more expensive to buy two 12″ I mention the option because it actually allows you to place the two to get a better light distribution in the cage! But I will also list a 24″ alternative below.
Note that clicking this link will open the main product page at Leap in a new window. Keep this page open as reference and you can easily select all the items you want from Leap.
2* Interconnect Cable
Everytime you add a lighting fixture you’ll need to add an interconnect cable unless you want to plug the fixture in with its own cord. You would do this if you want the LED lights to be on a separate timer from the UVB lights. If you have two LED light abrs and one UVB fixture all on the same electric cord you will need two interconnect cables.
Note that clicking this link will open the main product page at Leap in a new window. Keep this page open as reference and you can easily select all the items you want from Leap.
Alternative 24″ Lighting:
There are other manufacturers that offer 24″ LED bars and UVB lighting. This is only a consideration if you are trying the 22″ wide cages in a stand-alone build. you can use two Leap 12″ LED bars or one 24″ bar from Arcadia as linked below.
Amazon Shopping List
Leap is working on adding the following items to their inventory, but, until then, you can buy them from Amazon. (I am also an affiliate of Amazon and will a small percentage back for what is purchased.) You will need leca clay balls for the drainage layer and barrier between the leca clay balls and the substrate to keep the substrate from invading the drainage layer and creating a murky mess!
Bioactive Cage Rack Shopping List
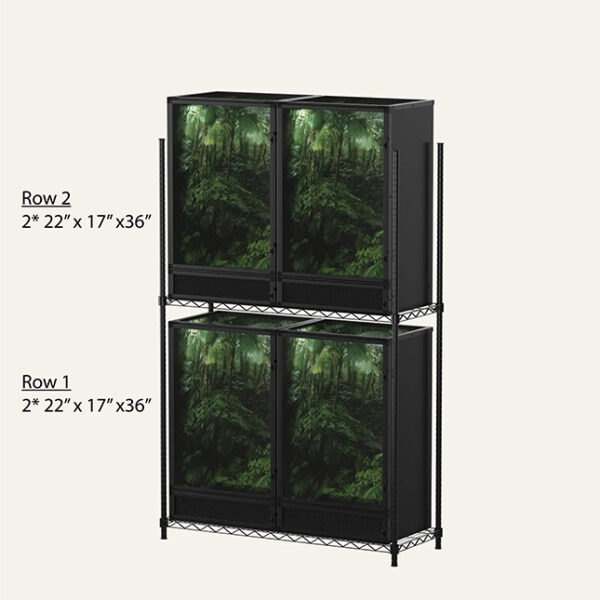
If you are ready for the experience having a rack of bioactive cages brings then here is your list! There is great variation possible and you want to select cages that match your needs. I, personally, have a rack with two levels, a 2* 22x17x24 and 2*22x17x36.
The Leap cages are specifically designed to be rack compatible so they fit like they were suppose to be there! These cages are designed for the 48″ wide and 18″ deep baker’s racks. Leap does offer their official rack. Although there are many manufacturers of racks out there, be careful of getting one from another source. A space saving approach Leap uses is clips which allow the lights to be mounted under the wire shelf. These clips require a certain configuration of wire supports. So, be cautious about using any rack out there.
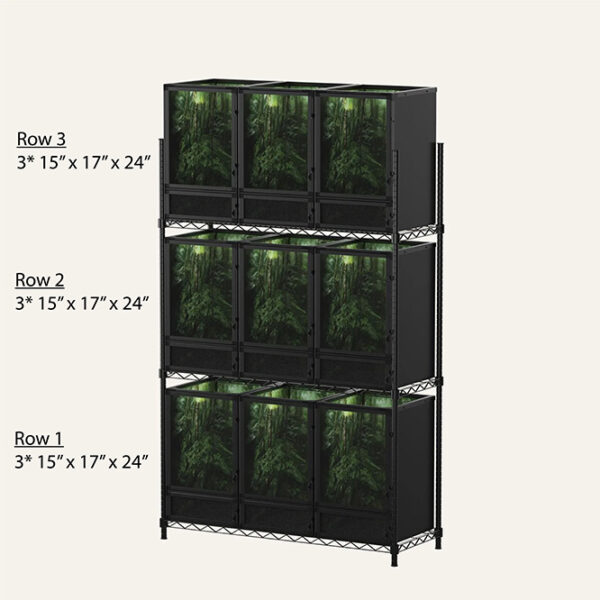
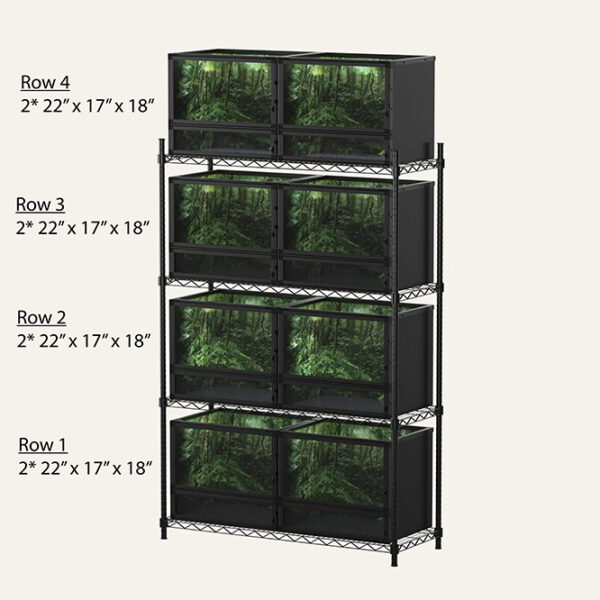
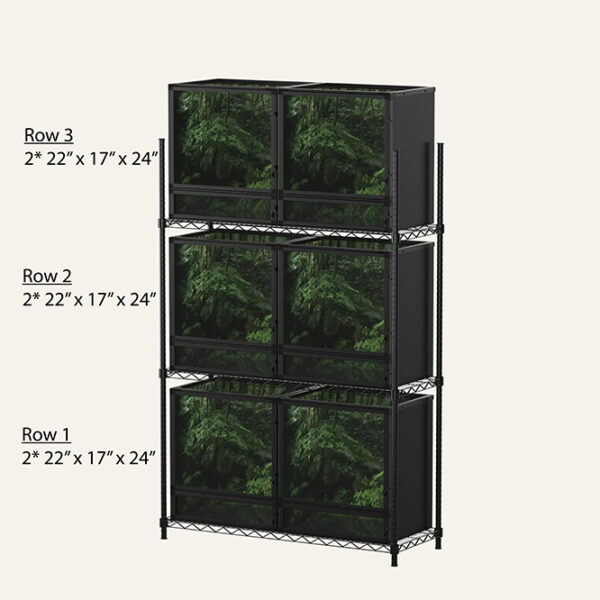
Each row can hold the following cages
2* 22″x 17″ x 18″
2* 22″x 17″x 24″
2* 22″ x 17″ x 36″
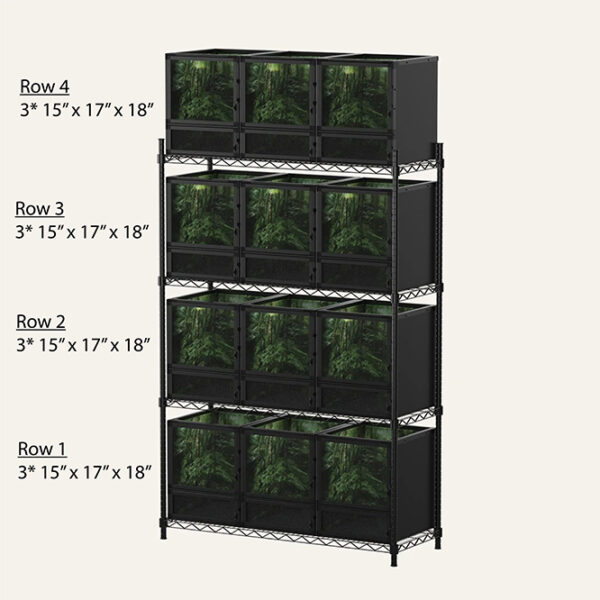
3* 15″ x 17″ x 18″
3* 15″ x 17″ x 24″
You can scroll through the above images to see sample rack configurations. Of course, you can mix and match rows. The great advantage of this is that each row can share one 48″ LED and 48″ UVB bulb. If you use catch pan then each row can share one 46″ catch pan.
Selecting the row configurations will depend on what you are keeping.
Baby Raising: If you are raising babies than four rows of 3* 15″ x 17″ x 18″ will get you the ability to raise 12 babies individually.
Carpet Chameleon Breeding: If you want to keep and, perhaps breed, a smaller species such as a carpet chameleons, jewelled chameleons, or any Brookesia you can have a solid breeding group in one rack of six 22″ x 17″ x 24″
And, if you are just in it for the enjoyment of it all, then one rack of six 22″ x 17″ x 24″ cages gives you the ability to individually house a pair of carpet chameleons, a pair of small geckos, and a couple species of dart frogs. So, let your imagination run free with this one!
You can find everything you need from both Leap and Amazon.
Leap Habitats.
The easiest way to gather what you need from Leap is to go to their “Shop All” page and just go down the list of items. I am an affiliate of Leap so I will get a small percentage if you use this link right here to go to the shopping page. This link will open up in a separate page so you can keep both open and refer back to this page for the list of items.
Open the Leap shopping page here: Leap Habitats Shopping Page
Special Note on Misters. When you put together a rack system you may consider a more robust misting system. The Leap mister is good for driving two or three nozzles so you can have one per row. An alternative is to get a Mist King system and have one mister drive the entire rack. I have used both systems and each has their pros and cons.
Rack Shopping List
- Cages. From the options discussed above, select how many rows and what cages you would like
- External Catch Pan. Do you want water catch pans below your cages? The substrate tray is water tight so a water catch pan is not 100% necessary, but I do like to have them just in case. If you would like them then select one 44 x 17 x 3 per row.
- Programmable Fogging System. One fogger will be able to feed two cages.
- Programmable Starter Misting System. One mister will be able to feed two cages. If you have two rows of two cages I recommend two of these misters. If you have more than four cages on a rack then upgrade to the Mist King misting system shown later.
- UVB T5 Light Fixture – 46″. One UVB fixture per row
- T5 HO 5.0 UVB Bulb -46″. One UVB bulb per UVB fixture
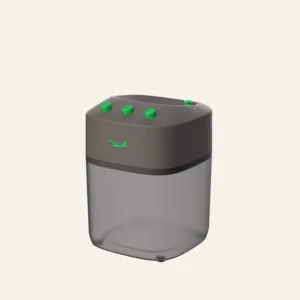
- LED Light Fixture 46″. One LED bar per row
- Interconnect Cable. One cable per UVB/light fixture.
- T5/LED Mounting Clips. Order one set for every LED or UVB light fixture you plan on attaching to the bottom of a shelf
- Baker’s Rack
- 4* Living Earth Substrate per cage.
Leap is working on adding the following items to their inventory, but, until then, you can buy them from Amazon. (I am also an affiliate of Amazon and will a small percentage back for what is purchased.) You will need leca clay balls for the drainage layer and barrier between the leca clay balls and the substrate to keep the substrate from invading the drainage layer and creating a murky mess!
For all my racks I use utility baskets that hook on to the edges of the rack so I can have my foggers on the rack. If you have a full rack than there may not be a place to put your hydration equipment! These utility shelves can go on the sides or on the back of the rack. One basket can hold two foggers. This is perfect if you have rows with two cages. You have to get creative with rows of three cages!
One thing I strongly suggest if you get a Leap rack is to get casters (wheels) for the rack so it can easily be rolled around. This makes cleaning and maintaining the system so much easier!
Leap is working on adding the following items to their inventory, but, until then, you can buy them from Amazon. (I am also an affiliate of Amazon and will a small percentage back for what is purchased.) You will need leca clay balls for the drainage layer and barrier between the leca clay balls and the substrate to keep the substrate from invading the drainage layer and creating a murky mess!
This Substrate barrier is placed on top of the leca clay balls to keep the substrate from mixing in with the balls. Purchase one per cage
I have found these wire baskets to be very convenient for holding the mister and fogger. They conveniently slide down on to the edge of the baker’s rack shelf.
One thing I strongly suggest if you get a Leap rack is to get casters (wheels) for the rack so it can easily be rolled around. This makes cleaning and maintaining the system so much easier!
Misting:
When misting a rack, if you have more than four cages then it is best to step up to a Mist King misting system which can drive the entire rack. But make sure you get enough mist heads for the entire rack. The mist heads will come with either the 90 degree attachment or the T connection. For each row you get one 90 degree for the end of the row and the rest of the cages are with T connections. The below items will put together a misting system that will drive up to ten nozzles and so you can design a system that has one mister for the entire rack of cages. If you have more than ten mist nozzles then check deeper into Mist King for the next level up which is more powerful.
Leap is working on adding the following items to their inventory, but, until then, you can buy them from Amazon. (I am also an affiliate of Amazon and will a small percentage back for what is purchased.) You will need leca clay balls for the drainage layer and barrier between the leca clay balls and the substrate to keep the substrate from invading the drainage layer and creating a murky mess!
Leap is working on adding the following items to their inventory, but, until then, you can buy them from Amazon. (I am also an affiliate of Amazon and will a small percentage back for what is purchased.) You will need leca clay balls for the drainage layer and barrier between the leca clay balls and the substrate to keep the substrate from invading the drainage layer and creating a murky mess!
Leap is working on adding the following items to their inventory, but, until then, you can buy them from Amazon. (I am also an affiliate of Amazon and will a small percentage back for what is purchased.) You will need leca clay balls for the drainage layer and barrier between the leca clay balls and the substrate to keep the substrate from invading the drainage layer and creating a murky mess!
Leap is working on adding the following items to their inventory, but, until then, you can buy them from Amazon. (I am also an affiliate of Amazon and will a small percentage back for what is purchased.) You will need leca clay balls for the drainage layer and barrier between the leca clay balls and the substrate to keep the substrate from invading the drainage layer and creating a murky mess!
Leap is working on adding the following items to their inventory, but, until then, you can buy them from Amazon. (I am also an affiliate of Amazon and will a small percentage back for what is purchased.) You will need leca clay balls for the drainage layer and barrier between the leca clay balls and the substrate to keep the substrate from invading the drainage layer and creating a murky mess!
Leap is working on adding the following items to their inventory, but, until then, you can buy them from Amazon. (I am also an affiliate of Amazon and will a small percentage back for what is purchased.) You will need leca clay balls for the drainage layer and barrier between the leca clay balls and the substrate to keep the substrate from invading the drainage layer and creating a murky mess!
The Substrate

The Substrate
When we put together a bioactive system the substrate floor is more than just something to hold plants in. We are looking to take it a level up and make it a living environment. Of course, this takes a deeper knowledge into what makes up soil and how we can best replicate a living forest floor.
Luckily, we can save truly understanding the composition of high quality substrate for later and we can stand on the shoulders of those who have dedicated much of their life to making substrates for us that have the right balance of ingredients. The most famous is called the ABG mix. It was put together at the Atlanta Botanical Gardens, hence the name. It was the right balance between drainage, retaining nutrients, and maintaining aerated. A number of companies have optimized mixes for use in reptile bioactive environments. And when you get these in your hand you can tell this is not normal dirt.
In this particular build, both Michael and I used the “Living Earth Substrate” that is available from Leap alongside their cages. How many bags you will need depends on how much leca soil you use for your drainage layer. I like to use at least four bags, which comes out to four gallons, of substrate per cage. Although I generally buy 6 gallons because I like making mounds, hav ing extra, and being able to add more in the future when the substrate breaks down just as it should.
Drainage Layer and Substrate Addition
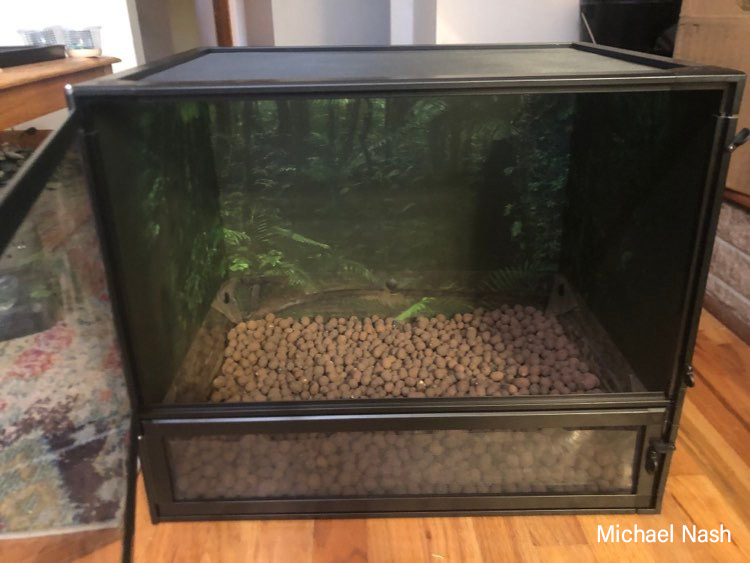
It is time to put some substate in our cage! The basic steps are to put in a drainage layer of leca clay balls, lay a substrate barrier between the leca and the substrate and then pour in the special bioactive substrate. You want this substrate to be light and airy.
I am using about 1 inch of leca clay balls. The deeper it is the more drainage action you can provide, but the less soil you can fit in your cage. So it is a trade off. Honestly, these other cages don’t have a drainage layer because if you effectively use the fogger and mister you don’t have a saturation problem. I go into the hydration cycle in detail tomorrow to explain this. The hydration cycle is worth a day of its own. Having a drainage layer is a good practice, though, because it gives you a buffer to not have to watch your misting as closely. So I am recommending it, but it is optional if you become confident enough in your system that it is not necessary.
Assuming you do have a drainage layer we put a substrate barrier on top to make sure the substate does not mix in with the clay balls and create a muddy mess. The whole point of the drainage layer is to keep the soil from becoming saturated! So, make sure the edges are well sealed. I am going to use some shade cloth for my barrier. Many things will work. Of course, just reference the shopping list if you are unsure what to use.
And, on top of the substrate barrier you dump the soil. I am using the Leap soil with this build. The Leap website recommends 3 bags per cage. I actually like using four bags. So, that is 4 liters. You’ll notice that soil is measured in liters, quarts, gallons, and whatnot. So you may need a calculator to do volume conversions if you are working with another soil provider.
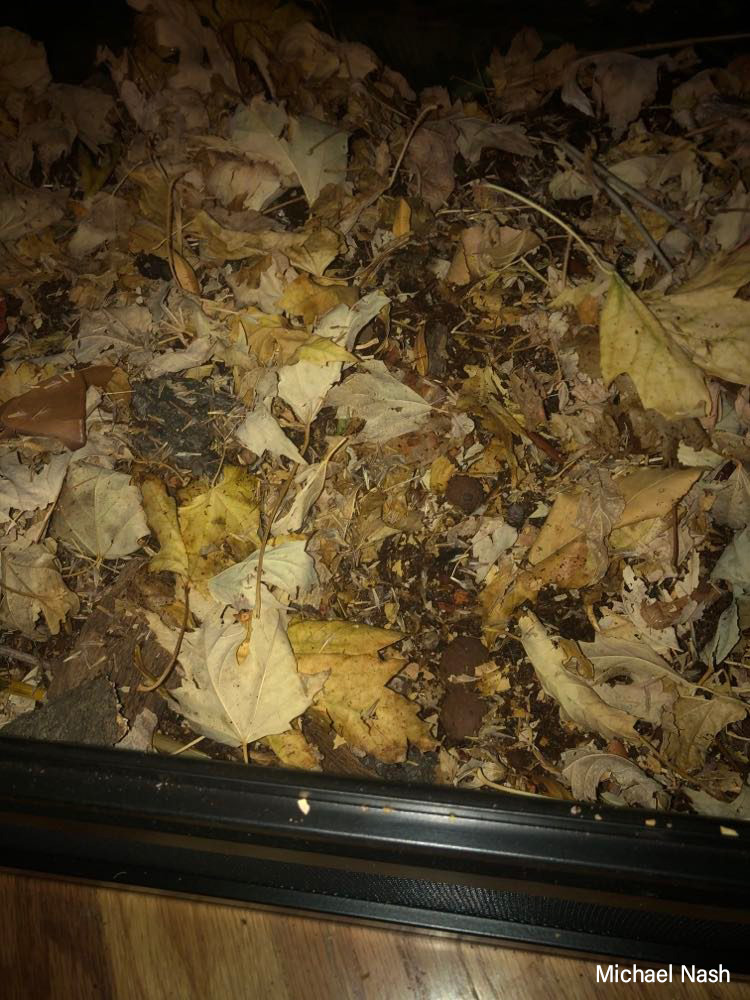
Now, one of the important parts of the substrate is the leaf litter. You can buy leaf litter or you can gather it from the wild. And, yes, there is a level of caution to only collect from areas you know have no pesticides and you have to be careful to inspect each leaf to make sure undesirable elements such as spiders or ants are not coming along.
The core of the bioactive system is the substrate. And when you get a hold of a specialty made bioactive substrate you notice it sure isn’t like what you find at the home improvement store. So, I knew it was time to bring on an expert to give us a view into this substrate. So I was lucky enough to get Josh Halter, also known as the BioDude to come on and talk about the bioactive substrate! Josh built his entire business on bioactive substrates so he was the perfect one to bring on.
In this video I show how I put in the substrate layers starting with the drainage layer. The one thing I would have done differently is to wash down the leca clay balls to avoid the cloud of dust! I also bring Josh Halter, the BioDude, on to answer questions about leaf litter.
We have been talking about bioactive soils and how it is much more than just “dirt”. To close off the day on substrate, I’d like to bring on Michael Nash and ask him how he makes a substrate “bioactive”
Hydration
Hydration for a bioactive system will be a learning experience for many in the chameleon community because we are still coming out of the screen cage mindset. So let’s start where many viewers are coming from.
A screen cage has essentially 100% ventilation. That means that the ambient conditions int he cage are the same as the room they are in. Often, the room they are in is air-conditioned or heated which removes humidity from the air. So the chameleon is constantly in a low humidity environment. This take moisture from the chameleon’s body which needs to be replenished. And we did that through misting the cage multiple times through the day to give the chameleon a chance to rehydrate. But you see how that produces a swing between hydrated and dehydrated.
Of course, there are some people that have their cages in high humidity environments, in which case they don’t have the wide swings. So this isn’t about a type of cage or having a fogger. This is about what it takes to maintain an environmental condition.
The hybrid cage is designed to lessen this hydration swing. A hybrid cage is one with solid side and a strategic venting system to allow for air exchange. See, chameleons don’t need 100% ventilation. They need air exchange. And, they need humidity levels appropriate for their species. The hybrid cage gives you the ability to hold humidity while also having an air exchange.
The next piece of the equation is a humidity producing device. I use a fogger which will send a cloud of water vapor into the cage very much like a fog bank rolling in. This allows the chameleon to breath in humid air. The more humid the night air, the less dehydrated the chameleon gets just from breathing. So, why not just have the fogger running 24 hours a day? Well, we need a drying out during the day. Chameleons need something that replicates what they find in the wild and our cages need the surfaces to dry out or else it gets unhygienic!
Learning about naturalistic hydration has allows us to effectively use hybrid cages. And these skills go into maintaining a bioactive environment. Explorations in keeping certain hard to breed species in a bioactive environment have given us success where we didn’t have it before. This is why it is so important for us to keep refining our chameleon husbandry art beyond just that which works for Veiled or Panther chameleons.
Misting and fogging have two distinct uses which, when used effectively give you control over your bioactive environment. A mister gives a spike in humidity and water on the surfaces or the chameleon themselves for drinking. This drinking is a quick way to raise the hydration level. Fogging is a slow working element. Fogging is done over time and prevents dehydration. So you can see how a chameleon losing moisture though breathing all night would wake up thirsty and want to drink. While a chameleon that was fogged all night would not have dehydrated and so would not need as much water during the day to maintain a healthy hydration level.
While this is a point of trivia in a cage that has a floor and drainage, it becomes a critical success element in a bioactive environment where the substrate will become saturated with too much water. Effectively using the fogger means that you only have to mist in short sprays to coat the surfaces with a layer of dew. Thus the amount of water your drainage layer has to handle is drastically reduced. It can be reduced and controlled to the point where some people don’t even put a drainage layer in their cages.
Now, I am going to recommend you put a drainage layer in your bioactive and I am going to put one in the cage I am building here. But I bring that up to show the benefit that learning these hydration skills brings.
An effective timing for your typical bioactive build for chameleons is the typical chameleon academy hydration schedule where I have the fogger running from around midnight until lights come on. I mist at the beginning and ending of the fog session to help start the fog bank at the beginning to providing a dew layer in the morning. Any misting through the day can be short spurts just to coat the surfaces with water. You will not need to do the shower method where you mist your chameleon for a minute or two until they start drinking. The whole point is that now you can work on creating the environment around the chameleon so it is nourishing for the chameleon.
Plants
The selection of plants is much like us selecting for any of our arboreal cages. The chameleon’s needs are the same. They need leaf surfaces to drink from and to be able to hide behind. So that is the same. The part where selecting plants for a bioactive set-up is different is that the plant is now an integral part of the environment. What I mean is that many of our chameleon cage set-ups have plants in their own pots. They have their own room, so to speak. And if there is a problem with one of the plants you can easily replace it. In fact, I came up with the double pot method specifically for that purpose!
But in a bioactive environment the plants are generally planted in the substrate. While, yes, you could keep them potted and place them on top of the bioactive substrate, you have to ask just why you are going bioactive if you aren’t creating an environment!
What this means is we have to be extra careful now about cleaning the plants. Where as before I didn’t care so much about switching out the soil, I now do care. Because the health of the system is dependent upon everything going in being healthy. Once we start creating an environment around the invertebrates, soil, leaf litter, and plants, anything brought in on one of them affects all of them. So it is time to raise our awareness level.
The next consideration is that if you have plants on the ground you have to be careful that the plants you put in to provide leaf cover higher up where your arboreal chameleon is don’t choke out the ones at the bottom by blocking the light, which is the plant’s food source. This isn’t a huge consideration with the size chameleons Michael or I am working with right now because the smaller species and babies are at home in plants at the ground layer. But as we progress as a community we will come up with new ways to give chameleons their floating garden as well as be able to maintain a bioactive substrate layer.
Now, in order to put plants in the system we want to go through a bit more of a cleaning. The standard cleaning that the chameleon community does is actually quite good. We gently remove the soil from the plants under a stream of water and soak the entire plant. Leaves and surfaces can be rubbed. Of course, be careful. Serpa Design on Youtube has an awesome video about this and I link to it below. He then suggests soaking in a dilute bleach solution of 5% bleach to 95% water for five minutes. So, that is 1 part bleach to 20 parts water. Then you rinse off thoroughly. The plants can be planted in the substrate mix you use with your cage and then put into quarantine to see if anything else comes up in the coming weeks. Quarantine is being extra careful and is worth it to be careful. How much work you put into being careful should be taken into consideration compared to how much work it will be to gut the system and start over. Most of the time you will probably be okay. But all it takes is a bunch of pest eggs to be hiding in the soil to ruin your environment. Once something is introduced, it is there forever! That is the nature of a bioactive system! You can reference his video here.
This page is a work in progress and will be completed as the BioActive week progresses!
Everything below this line is placeholder text! I will move this notice further down each day as the sections get filled out!
Clean-up Crew: Isopods and Springtails

I am text block. Click edit button to change this text. Lorem ipsum dolor sit amet, consectetur adipiscing elit. Ut elit tellus, luctus nec ullamcorper mattis, pulvinar dapibus leo.
OK great! First is of course the leap enclosure, we can use the smaller sizes. Next, I’d decide whether or not to use clay balls. If misting will not be that frequent, and depending on your environmental conditions, I find they are not always necessary, and the plants can often just take up the water themselves. For babies I might recommend using them in case you need to mist more to keep up humidity, but for things like brookesia where I need to give them a dry brumation period I don’t bother.
I will mix in springtails as I go. I will also mix in various grass seeds and peas. This way either there’s more degrade-able matter, or as the substrate gets churned up, more seeds get exposed to the surface and therefore more grows
adding in all the extra stuff to the soil further aids in drainage.
\
When adding the soil is close to complete, I will add one or two “structural plants”, like the classic schefflera or other plants. Ideal is plants with tiny leaves and stems, but with some stability.
Then I add some grass seeds and peas to the top, sometimes I even use grass sod from the garden in small areas. This way I guarantee something will grow in soon
I then loosely cover the ground with leaf litter of varying types (usually a hardwood + softwood, like oak and maple for instance). A diversity of leaves helps keep the system dynamic it seems
I also add small wood pieces to the surface. More microclimates where springtails etc. can hide
Then I add small twigs and branches of various diameters, but mostly small. I arrange these in a way where the chameleons can have a great highway to patrol, but also strategically so that the peas will sort of grow up and around them in a useful way
I make sure there is no easy access to the screen. So the highest point stops maybe a few inches away from the screen. This is critical for babies of many tiny species that can desiccate in mere minutes
I add some more springtails at the end if I can. Then of course, I add the lighting. I measure with a solarmeter the highest UVB exposure at the highest point. Based on my findings (finally published this month) I have been trending lower in UVB levels offered. Never more than 3 for babies of any species
I will arrange the daylight 6500K bulb so as much of the enclosure is lit up as possible, if I am using a separate fixture. If using a tiny basking bulb, I will arrange that accordingly too. I’ll then set up the mist nozzle and ensure that it will be in the best position possible to hit all the leaves
Within two weeks most of the peas have grown in substantially, and the grass usually will have sprouted and started growing. So you get an idea by that time how the final setup will be, and you can cut/cull plants if necessary, and leave the scraps in the enclosure for the springtails
I’ll then add the babies and observe their behavior. One needs to check the plants from time to time to make sure no new avenues have opened up for them to access the screen from. This matters most for sensitive small species. Misting is adjusted based on behavior and urates
You can twist the pea plants or other plants “out of the way” if need be, to make sure as much of the enclosure is utilizable as possible

