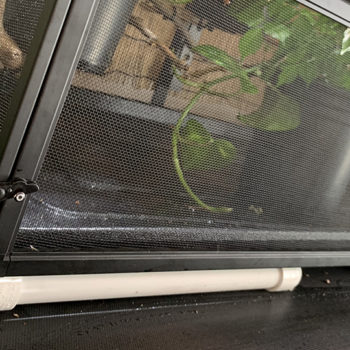
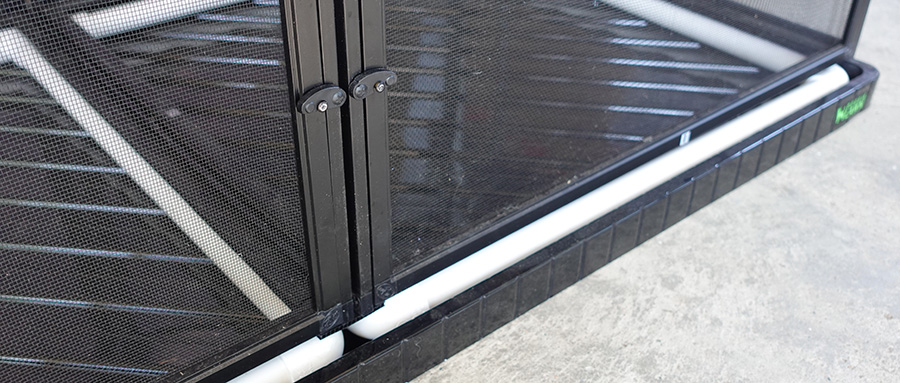
Drainage Trays are a very important part of your chameleon cage strategy. When mist, dripper, or even fogging water goes into your chameleon. Cage it needs to go somewhere and you do not want it to gather at the floor of your cage where it can mix with poop and escaped feeders to create an unappetizing poop soup bacteria bomb out of any cricket that crawls through but and then gets eaten. So, a proper drainage tray is under the cage with the cage floor allowing the water to pass through, but not the escaped feeders or the chameleon.
Unfortunately, most cages on the market do not have drainage trays available. Cages made by ZooMed and Exo-Terra only have substrate trays which go inside the cage. Obviously, this is going in the wrong direction as it specifically keeps all the waste water and poop together. This is also why we don’t use paper towels or puppy pads. Even if they absorb the water, they are still providing a moist environment for bacteria and parasites. The best approach is to have nothing on the floor of the cage the gathers the water. The only exception is when you have a soil substrate at the bottom, but even then there is a drainage layer to take care of the excess moisture.
So, what can you do if your cage does not have a drainage tray option? Well, this is where we get creative! And I have a number of solutions I am going to present to you and the webpage linked in the description will have a shipping list for trays and supplies for the most common cage footprints.
Step 1: Find a tray that fits the cage footprint. For this you can look for oil pan drip trays, dog crate replacement floors, and even indoor dog peeing grass holders! It is amazing how many options there are out there! The important thing is that the inside dimensions are greater than the footprint of your cage. Because you want to be able to access the captured water to remove it. There is a special situation if you are using the ZooMed Reptibreeze cages that are smaller than the 2x2x4 XL. If you are using any of the smaller sizes then you can make a drainage tray out of the substrate tray of the next largest cage size. For example. If you are using the Large 18”x18”x36” cage you can buy the XL substrate tray. It is designed to sit snuggly inside the 24”x24” XL, but the smaller 18×18 footprint of the Reptibreeze Large fits nicely inside the XL substrate tray.
24″ x 24″ Footprint cage
This tray is 26″ x 26″ so it gives you plenty of room to put your cage inside. One warning on this one, though, is that there are some reports of the PVC drain hardware not being included. Whatever the case, this tray requires the drain hole to be plugged with 3/4″ PVC parts. he one I had delivered to me allowed me to seal off the hole with a couple inches of 3/4″ PVC pipe and an end cap.
36″ x 18″ Footprint cage
But make sure you select the 42″ tray!! (the 36″ tray is really 35″ and will not be big enough for the cage!)
This try requires 42″ x 28″ of space. The Exo-Terra Large X-Tall cage will fit comfortably on this tray with a lot of room left over!
48″ x 24″ Footprint cage
This tray is a tight fit, but is functional.
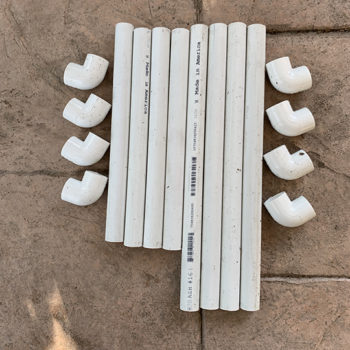
Step 2: create a spacer or something that can lift the cage up from the bottom of the drainage tray because, otherwise the water will eventually just flood the cage. Really, anything can be used that is about an inch thick and will provide adequate strength to hold up your entire cage. I like creating a standoff frame from PVC pipes. A quick trip to the home improvement store gets you a bunch of 3/4” PVC pipe and corners to be cut to size and put together. They can actually be press fit together so you don’t have to use the PVC cement if you don’t want to.
Here are a couple of tricks if you would like to create a PVC pipe frame as a stand off.
You will need PVC pipe cutter or, at least some kind of saw to cut the pipe.
I use 3/4” pipe because it is a nice middle-of-the-road diameter, but any size can be used.
Because the pipes fit tightly in the PVC connectors, using PVC cement is not necessary.
To cut the pipe the correct length to count for how much is shoved into the connector, you need to measure how far in the pipe goes with your particular pipe and connector. Take a ruler and mark off an inch in 1/8” increments and then push the pipe into the connector. You will the be able to see how much you need to add to either end to account for connection length.
For wide format cages I actually make two frames to give me a little more flexibility in placement. If you are connecting two cages, definitely go with two half-size frames to offer support in the middle
It is expensive to get PVC piping shipped to you due to the size. Most home improvement stores will have PVC piping and supplies. I will include the shopping links to be thorough. But I do encourage you to visit your hardware store if that is an option!
3/4″ PVC Piping
You will need about 16 feet of 3/4″ PVC piping in two foot lengths. If you are ordering from this link then you will need exactly 3* six foot lengths and I recommend getting four lengths to protect against making a wrong cut.
The above link is for a pack of ten elbows. You will need eight. It is usually cheaper to pick them up from the hardware store. The official long name is “3/4 in. PVC Schedule 40, 90-Degree S x S Elbow”
You will need a PVC cutter to cut the PVC to size. You can use the link above or just pick one up when you pick up the piping.
Cementing the pieces together is completely optional. The tight fit should be adequate, but this will ensure the water tight seal if you want to go the extra mile.

These are the pieces I made for the 36″ wide cage. Each cage footprint will require careful measuring.

Putting it all together was very simple. I used friction fit so not PVC cement needed. Though make sure the connections are tight.Press down from all sides to properly set the corners. And then place the entire assembly on flat surface and press down to ensure the frame is flat.

Put the frames between the cage and the drainage tray to lift the cage up. I decided to make two frames instead of one big one to make it easier to move them around.
Step 4: Removing excess water
I use a wet/dry vacuum for removing excess water. Home Depot has a very nice, inexpensive wet/dry vacuum called the Bucket Head because it is a head unit that fits perfectly on a five gallon bucket. I have used this for years!
Use the links below only if you don’t have a Home Depot nearby and can pick the pieces up in person. Shipping a bucket seems overkill!
I use the crevice tools to be able to get inbetween the cage and the side of the tray to get at the water.
Wet/Dry Vacuum
This is the head of the vacuum which sits on top of a standard 5 gallon bucket
5 Gallon Bucket
This is the water collection basin for the Buckethead
Crevice tools
These allow you to get to the drainage tray and suck up the water.


