The Forest Edge 5+5 Method
Chameleon care is not easy. It is a complicated thing to take a slice of tree top and recreate it in a living room cage. But this is our task! Distilling this down to a simple concept has been challenging. The most effective method to create a chameleon husbandry checklist is the Forest Edge 5+5 Method. It is a simple, but powerful checklist. The Forest Edge 5+5 Method consists of a “Forest Edge” that supplies “4” Gradients with “4” branches. This module defines each component. If you understand the components and make sure each is checked off, you have an effective chameleon environment for your chameleon to contently do what chameleons do.
So what does a chameleon do? Let’s review a typical good day in a chameleon’s life. This is what we have to set the stage for in our living room. They sleep in a protected area breathing in moist air. When morning comes they lick whatever dew they need for moisture and head out to warm their body in the early morning sun. Once warmed up they retreat back into the cool of the bush or tree leaves to wait out the heat of the day. When the day cools down they emerge again for some evening hunting and then they find a safe place to sleep before the sun goes down. All the while, they are eating and drinking when they can.
And this daily activity happens in what we call a forest edge. In this section we describe the Forest Edge, the gradients, and the branches. We will then go on to practice the Forest Edge 5+5 by designing a cage together. If you would like to learn about the Forest Edge 5+5 in a video I have embedded a tutorial video below. This video is part of a video series that lays out the fundamentals of chameleon husbandry. They are featured throughout the website to demonstrate important concepts, but if you would like to follow the videos, at the end of each one there is a link to a playlist that will allow you to play them all in order.
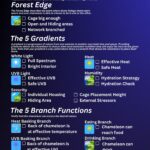
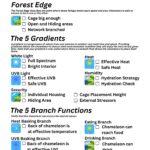
If you would like to download a summary sheet to have handy when you are doing an evaluation you can download a summary here. There is one optimized for sharing digitally and the other is a pdf that is print quality. (The print quality file is also black text on white background to save on color ink!)
Note that the .pdf print file contains a QR code so that you can print it out and anyone who wants to download one of their own can just scan the QR code with their smartphone and get to this page. They can not only download their own copy, but will be sent directly to all the detailed explanations!
The Forest Edge

In biological terms an “edge” is where two types of habitats meet. At the point where the trees stop and the meadow begins you have a forest edge. When we talk about creating a forest edge in our cages we are saying that we are going to provide an open area which is brightly lit and an interior area that is protected. And from the simplified daily life of the chameleon just presented you can see how this edge is utilized with the chameleon going in and out of the open and interior areas.
They sleep in a protected interior space, they bask in an open space, they retreat to the protected space, they eat and they drink in either.
The most critical aspect to creating a Forest Edge is that the forest part needs to be dense. It is not enough to have foliage in the cage. It must do the job of protecting the chameleon from view and from the strong lights above. And here is where we have our first departure from our personal desires and comfort zone. The forest part must be dense enough that we cannot see our chameleon. We are creating a place where our chameleon can hide from us.
The image to the right is a perfect example of what a Forest Edge should “feel” like. Did you see the juvenile panther chameleon? He could easily get lost in that cage and every night, he does. It is difficult to find him when he wants to hide and that is exactly what we want to make for him. This cage set-up resulted in an environment that allowed him to contentedly go through the steps listed above for a happy chameleon live.
Don’t worry about how you will create this in a screen cage right now. Please simply study our objective and understand what it is we are trying to accomplish. We will go over the “how” in the next module.
The Five Gradients
A gradient is a progression from one extreme to another. The most obvious is temperature. If you have a heat lamp in the top corner of your cage, your temperature gradient goes from the temperature of the closest perching spot to that bulb to the perching spot furthest away from the bulb. In a large enough cage, outfitted with branches to take advantage of the space, that lowest temperature level will be the ambient room temperature. By the way, do not consider the screen walls of your cage to be perching or climbing areas. Screen walls are poor climbing or perching surfaces. Don’t make your chameleon use them to get what he (or she) needs. So your temperature gradient may be, for example, from 85 to 72.
The power behind giving your chameleon this range to choose from is that you give the chameleon the opportunity to regulate his own temperature. As the day and night temperatures fluctuate your chameleon will need to find different temperatures in his cage to be content. Remember that your gradient will change with the day and nighttime temperatures as well!
If you are living in ambient conditions which are too cold for the species you are keeping then you have to consider solid side cages to hold in the heat. The colder the ambient temperature is the less space your gradient will be in. Having a 6 inch gradient from 85 to 72 obviously gives the chameleon only two choices and is like being by a campfire on a very cold night. Being close to the fire is too hot, but moving one foot back is too cold. You’ll need to lengthen your gradient using glass or other solid side cages which hold in heat.
Let’s go on to define the five gradients – White light, Heat, UVB, Humidity, and Exposure.
White light

The first gradient is white light. White light is the light our chameleon uses to see. We commonly provide this with full spectrum daylight fluorescent lights and LED light bars. The enclosure should be the brightest at the top of the cage and the light dissipates until it is the weakest at the bottom of the cage. In the middle, the dense foliage will offer dappled light and, so, you can see how your chameleon will be able to get the full daylight brightness in the open area up top, but enjoy the shade when it crawls into the middle of its fortress of solitude made of plants. Light is further adjusted by having a 12 hour day time and a 12 hour night time. And recent technology is making it easier to have a ramp up and a ramp down at the beginning and end of the day and so advancements continue to give us options. Advancement is a good thing because chameleons can see beyond our visible spectrum. Our products that are labeled “full spectrum” are not full visible spectrum for chameleons. So we are no where near done with our artificial light development.
When you are evaluating your cage set-up over space, look for bright areas and shaded areas. Over time look for 12 hours on and 12 hours off. A special note, the chameleon community has been historically plagued by having woefully under-lit cages. “Bright area” does not mean one bright point of light up on the top of the cage. It means the cage is bathed in light. There certainly is such thing as too much light, but I have yet to see a realistic cage set-up that has ever gotten close. When in doubt, add another LED light bar!
Heat

Chameleons need to be able to regulate their heat in order to keep their body temperature within a certain range. Too much heat can kill a chameleon fast; too little heat can degrade the immune system, which leads to disease and disorder. In nature, chameleons will move from sun to shade depending on what’s comfortable for movement, digestion, and body processes. Since we have no way to know what our chameleon needs at any given time, we will be designing a cage with access to a range of species-appropriate temperatures to allow your chameleon to regulate its own temperature.
UVB
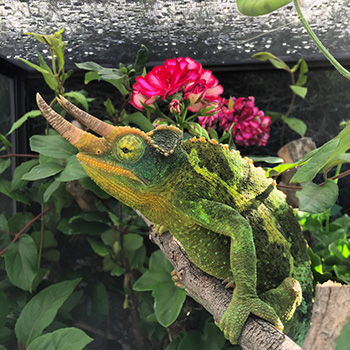
Within the sun’s ultraviolet rays, there are certain frequencies that we and our chameleons both use to synthesize vitamin D3. In captive husbandry, we have to make sure we regulate this wavelength so that it is at acceptable levels, accessible, and escapable when needed. The specifics of these requirements vary between species, and even then it is an ongoing discussion within the community. Most chameleons bask in the morning and hide in the afternoon. So should we just give them the amount of UVB they would get in the morning? Or should we provide the full amount of UVB and give them dense cover to hide from it to compensate? Whichever way you decide, it’s important to take UVB into serious consideration. UVB is measured on the UV Index. In our design we will be providing a UV Index between 3 and 6 at the basking branch.
Humidity
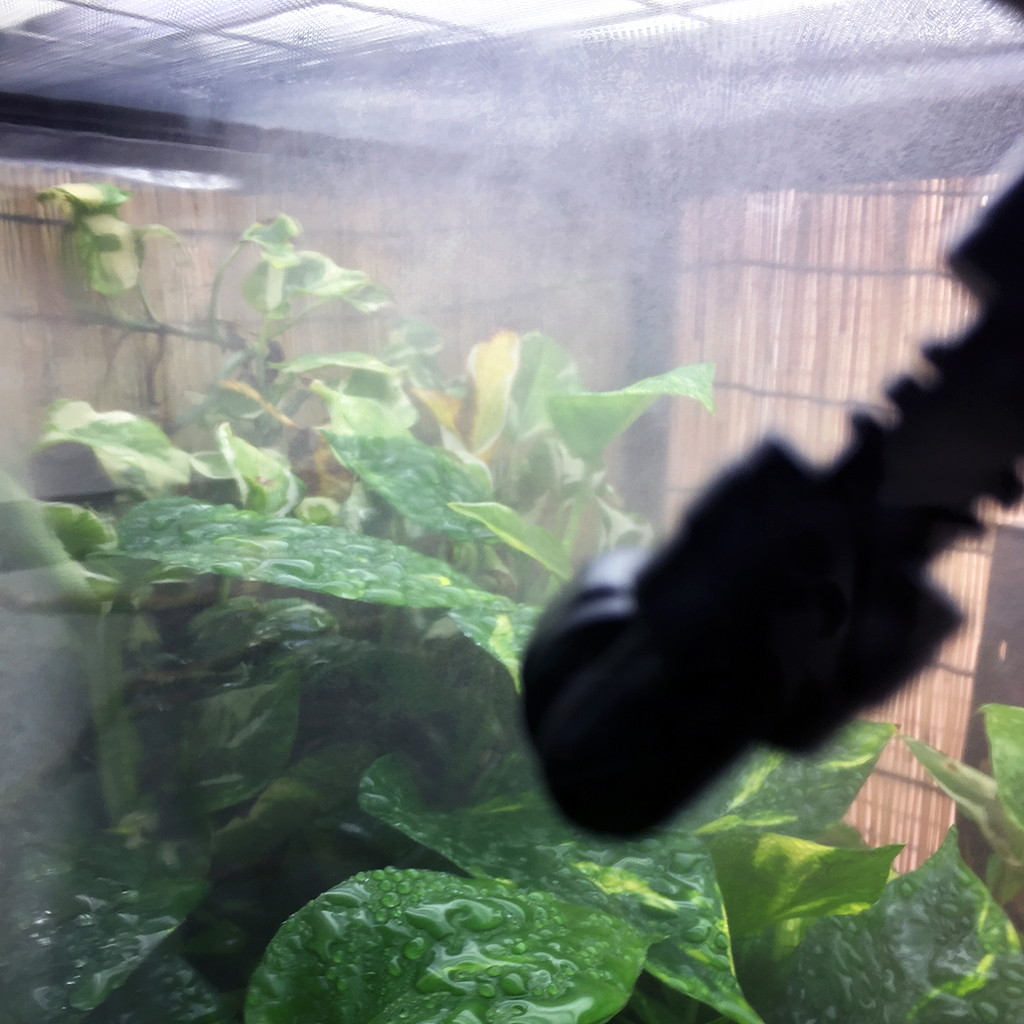
While the other two gradients have been over distance, the humidity gradient is over time. Replicating natural humidity cycles has been shown to help chameleons function properly, and brings them back to a more natural hydration behavior. To achieve a more natural humidity gradient, have the highest humidity occur at night, and the lowest humidity during the day. In our design, we will control humidity through foggers, misters, live plants, and solid cage sides.
Exposure

Each chameleon will have its own comfort level when it comes to showing itself to the world. Remember: chameleons may be predators, but they are also prey. Although those in captivity (especially captive-bred) are generally more comfortable being exposed, and may even choose to sleep in the open, it is still important to give your chameleon the choice. Even if a chameleon chooses to spend most of its time out in the open, the lack of a protected, hidden space will be detrimental to its health. Constant exposure with no way to escape will result in constant low-grade stress, which can impact your chameleon’s health. If you want your chameleon to feel happy, healthy, and safe make sure it has a good amount of cover.
This point cannot be over emphasized. One of the most often seen mistakes in chameleon caging is the lack of a suitable resting place in the leaves that is hidden from view. Just hop onto social media and scroll through all the cages. It is shocking how many cages do not have this basic necessity.
The Five Branches
Chameleons use branches to position themselves so the branches are our tools to allow chameleons to effectively use the gradients we have set up. Once we have the gradients then we need to have the physical structure allowing them access to those gradients. So we will add five branches to our checklist. These branches will each represent a life function being able to be carried out within the gradient conditions.
They are: A heat basking branch…A UVB basking branch…A sleeping branch…a drinking branch…and an eating branch.
Now, this doesn’t mean you just have four branches in the cage. You need a complete network of branches in your cage! But at least one branch in your network of cage branches needs to perform one of the four main duties. And it doesn’t mean they have to be different branches. You can easily have a branch for sleeping and a basking/eating/drinking branch which are connected of course by the extensive branch network in your cage. So, the “five branches” are really a branch function checklist that we will be going through to determine if the cage is suitable for a chameleon. The same branch can be used for more than one function if it is planned to do so.
In our design we will ensure there is
- Heat Basking Branch. A branch in the open that has appropriate basking temperature and UVB levels?
- UVB Basking Branch. A branch in the open that has appropriate UVB levels?
- Sleeping Branch. A protected area that hides a suitable perching branch that your chameleon can feel protected and safe.
- Drinking Branch. And a branch that gives your chameleon easy access to the leaves where your dripper drips or the mister sprays.
- Eating Branch. A branch that makes it easy for your chameleon to get at your food dish or place you release your feeders.
Heat/UVB Basking Branches

This branch allows your chameleon to perch in an exposed area of the cage, high enough to get the same kind of heat, light, and UVB exposure they would get from being in the sun. If you are housing your chameleons outside, this is as simple as giving a perching branch easy access to the top of the cage. If you are simulating the sun indoors, however, this spot will need to have equal exposure to your heat lamp, your UVB lamp, and a bright white light. It can sometimes be difficult to gauge whether your chameleon is getting enough exposure. To help with this, you can go outside on a sunny day; note how you have to squint because it’s so bright. Use that as your guide. If sunny days are unavailable (due to season, or climate, or you just really hate going outside), another way to gauge if you have enough light is to use live plants in your enclosure. If your plant is dying, it might be time to check up on your lighting.
Sleeping Branch

This is the branch where your chameleon will feel safe. The sleeping branch isn’t just used for sleeping; if your dog walks by, or a hawk is flying overhead, your chameleon will want a perching branch where it can hide. Chameleons are visual animals, so being able to feel like they are hidden from sight is a huge factor in their wellbeing. Ideally, this branch will be visually hidden, and will be long and thin, since chameleons know most of their predators can’t follow them onto a thin branch. Unfortunately, long, thin branches are not easy to put into a two foot long cage. Thankfully, creating an area that is visually isolated using dense plant leaves seems to work well.
Drinking Branch

Chameleons get hydration mainly from high nighttime humidity, dew, and feeder insects. Although this doesn’t seem like much, we still need to make sure they have daily access to water. Whether they take it or leave it is up to them. If you do nighttime fogging and/or misting to add a layer of dew on the leaves for when they wake up, make sure that you have a branch that allows for easy access to the leaves where this dew has collected. A dripper is a great way to aim your water at the most convenient leaves for your chameleon to reach.
Eating Branch
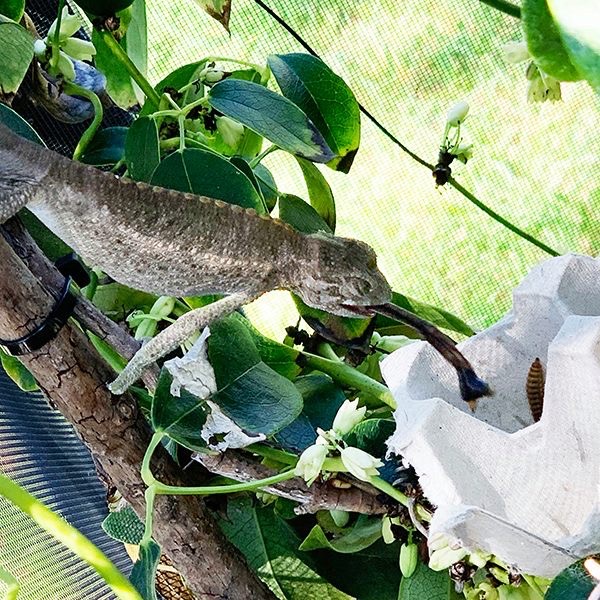
The eating branch is the branch with the fewest specifications. As long as there is a branch where the chameleon can have easy access to its food, you’re good! This doesn’t have to be one specific branch; some chameleons are just fine having their feeder run cup move locations from feeding to feeding. Other chameleons like to eat in the same location every time. It’s all about getting to know your chameleon’s personal preferences!
Having a designated eating branch that is conveniently placed where your feeder dish can be hung in the same position in the same place can be a way of building a relationship with your chameleon. They are generally pretty smart when it comes to food (especially Panther and Veiled Chameleons) and if you feed at the same time every feeding time you may very well find them sitting there waiting for your after not too long of keeping a consistent schedule.
Examples of Forest Edge Chameleon Cages
The best way to learn a method is to study actual examples. In all of these examples we apply the checklist
- Where is the basking branch? This is the open area where the chameleon can sit in the heat of the basking bulb and soak in the energy from the UVB bulb.
- Where is the security branch? This is the leafy hidden area where the chameleon can hide from view and feel secure.
- Drinking branch: this is a branch that gives easy access to leaves that are misted on.
- Eating Branch: This branch give your chameleon easy tongue access to your feeding station.
The five gradients of white light, heat, UVB, humidity and exposure require measuring and can mostly only be inferred by a picture. You as the keeper will have to ensure that the basking branch has the appropriate heat and UVB and that there are other perching options. Humidity is a separate parameter that is over time so much be verified by seeing the schedule used for misters, foggers, and drippers. The exposure gradient is wrapped up nicely in checking off the basking branch and the security branch. So in these examples we will check off the main branch functions. The network branches and hydration set-up can easily be added on top this solid foundation.
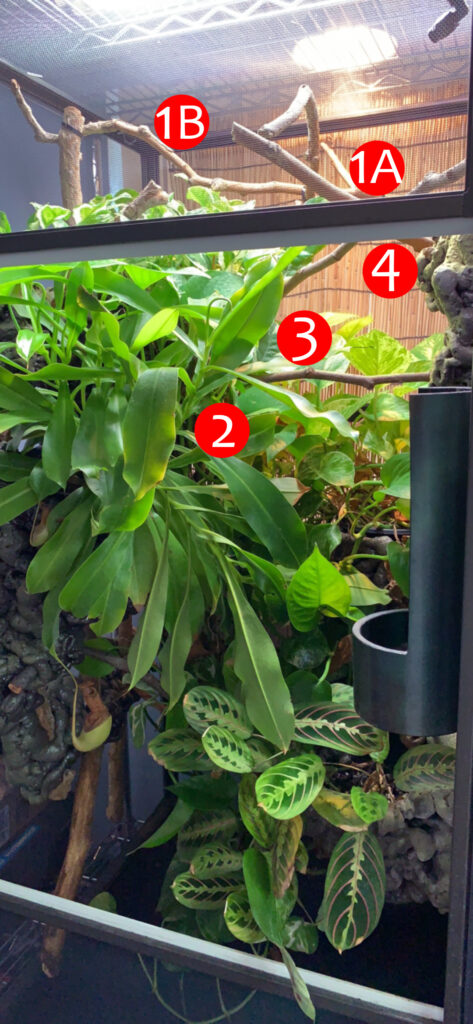
The 2′ x 2’x 4′ Tall Pillar Style Screen Cage. In this example you see an excellent chameleon cage set up that can be made from the industry standard 2′ x 2′ x 4′ tall screen cage. This particular one is the Dragon Strand Tall Screen Cage System. This cage will be one of the examples of shown step by step later in this class. Note that I used black pond foam to hide the plastic pots to create a more natural feel. This is not a requirement for creating a “forest edge” style cage.
Forest Edge “feel”. First notice the feel of the cage. You get the feel of a lush jungle of plants with a defined open area. This is the feel of a forest edge cage. A cage with a couple branches and a plant in the corner won’t give the feel that a chameleon could get lost in there. Can you imagine a chameleon getting lost in this cage set-up? And, yes, he can! During the nighttime he retreats into that mess of leaves and selects one of the many perching branches criss crossing the inside of that thicket hidden from view. He occasionally switches up sleeping positions and it take me a while to find him. That is the sign of an effective forest edge cage.
Branch Checklist. Now that it has a good forest edge feel let’s go through the five branch functions and verify that we have all of them checked off.
- Basking Branches. Label 1 shows the basking branch. In this case, though the heat lamp and UVB lamp are shining on different branches in the open area. This is as effective as shining UVB and heat on the same basking branch because chameleons are known to be able to identify the location of both heat and UVB so will deliberately bask in both areas depending on what they need. If you have the UVB and heat on separate areas ensure that each has a basking branch. 1A is the basking branch for the heat (see the heat lamp above) and 1B is the basking branch for the UVB (see T5 fluorescent fixture above).
- Sleeping Branch. You can see this branch and that is how we know it is reach full effectiveness. This cage makes liberal use of pothos and nepenthes plants (you’ll meet these in the upcoming plant module) to create a thick wall of leaves that hides the security branch. In fact, in this cage set-up, there are numerous branches hidden from view to give my chameleon many options. Note that this is a screen cage so the back of this cage being against a solid wall is key to creating this privacy. If the cage was not against the wall then the back would be expose and it would no longer be hidden from view.
- Drinking Branch. It isn’t enough to just send mist or water into the cage. It must hit a useable surface. This means a layer of leaves accessible by an appropriate branch. In this case, I have a number of branches that go from across the open area and into the leaves of the pothos plant in the top left. As the misting nozzle in the front right corner sprays the entire pothos plant, any of the sticks may be used to reach the dew on the leaves. And it certainly doesn’t hurt to have multiple access points. This increases the chances that the chameleon will walk past on its way to the basking branch no matter where it elected to spend the night.
- Eating Branch. All this requires is a branch within easy tongue distance of the feeder dish. While free release can work on a very controlled and supervised basis, our drive for creating a naturalistic cage also creates many hiding places. Therefore a Feeder Run Cup is a perfect tool for feeding. The design shown has a feeder run cup attached with magnets to the right inside. This is a convenient place to put the feeder run cup each the chameleon is fed. If you keep a schedule it is amusing how quickly they pick up on it and are ready for you to bring the feeders. The one thing I would do differently in this cage would be to flip it so the feeder station was on the left instead of the right. With a cage that opens from left to right I would open the cage only six inches, hang the feeder run cup and then be gone with minimal disturbance to the chameleon. In this design, the cage door has to be opened entirely which is concerning to the chameleon who now considers the closed screen door as part of their security.
Next is a check for network branches. Can the chameleon access all parts of the cage without climbing on the screen wall? In this case, the dense plant life consists of multiple pothos plants that create thick climbable vines. These count as network branches!

The 36″ x 18″ x 36″ Wide Format Cage. This example shows the smallest cage that I can recommend for an adult panther chameleon. With this set-up, it fulfills the Forest Edge requirements. I use this example to show how the Forest Edge may be effectively carried out on a tighter scale.
Forest Edge “feel”. This cage does have a lush feel to it. The variety of plant life gives a definite visual appeal. Let’s take a look at how it stacks up functionally.
Branch Checklist.
- Basking Branch. Label 1 shows the basking branch. In this case the UVB light goes all the way across the main basking branch and there is a section of that basking branch where a basking light shines. Within these small quarters it is best to be very careful to not over heat or over UVB your chameleon.
- Sleeping Branch. The secure hiding area can be accomplished with one plant. Though the bushier it is, the better. In this case, that one bushy pothos on the right hand side is hiding two perching branches behind its leaves that are big enough that a panther chameleon can hide its entire body.
- Drinking Branch. The top of the pothos is sprayed on in the early morning and when the chameleon climbs up to go bask it will pass the morning dew.
- Eating Branch. There is space enough on the left side panel to hang a feeder run cup from the top left side Dragon Ledge and this is in tongue range of the end of the basking branch.
Next is a check for network branches. This cage was designed for a baby panther chameleon to grow up in and so the next step would be to add in a network of very thin branches that are temporary so that they can be replaced with thicker branches as the chameleon grows bigger.
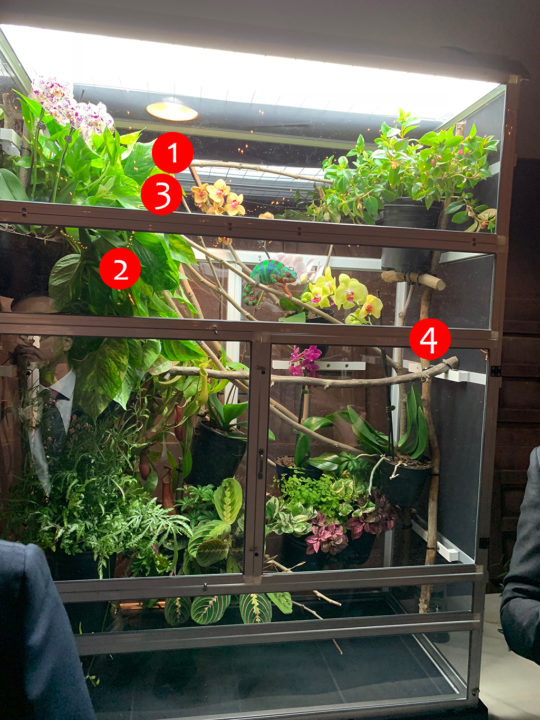
A 4′ x 2’x 5.5′ Tall Wide Format Cage. I showed an example of a small wide format cage and here is a large wide format cage. This cage is a prototype cage that expanded on the Dragon Strand Large Atrium design. It demonstrates what can be done with more space. The chameleon has both large areas to hide in and open space. .
Forest Edge “feel”. With all the extra space we can not only have a functional forest edge, but we can implement a forest edge that is aesthetic as well. You have both hiding spaces and open spaces, but they are just more expansive. The chameleon becomes more of a part of the environment rather than the centerpiece.
Branch Checklist.
- Basking Branch. Label 1 shows the basking branch.
- Security Branch. With all of the space to work with, this is just one of many branches the chameleon can use to escape view. This particular chameleon has a job as a greeter at a veterinarian’s office and so is not bothered by people at all. He is provided with many hiding places, but has not problem watching all the people walk by from his high perch. Of course, few chameleons have this level of tameness!
- Drinking Branch. In a cage this large the drinking surface will be the area where the misters are pointed. A strategic way to go about arranging the drinking is to either 1) make sure the entire cage gets a layer of dew in the morning or 2) note where the chameleon sleeps and make sure that area has a layer of dew in the morning. The idea situation would be #1, of course!
- Eating Branch. With all these options, eating can simply be a feeder run cup which has a hook and you can hang it anywhere near where the chameleon is perching.
Next is a check for network branches. Can the chameleon access all parts of the cage without climbing on the screen wall? In this case, there are wide areas that do not have branches. In a cage this large that may not be an issue. With so many perching options already we do not have to be as concerned about using every available corner of the cage.
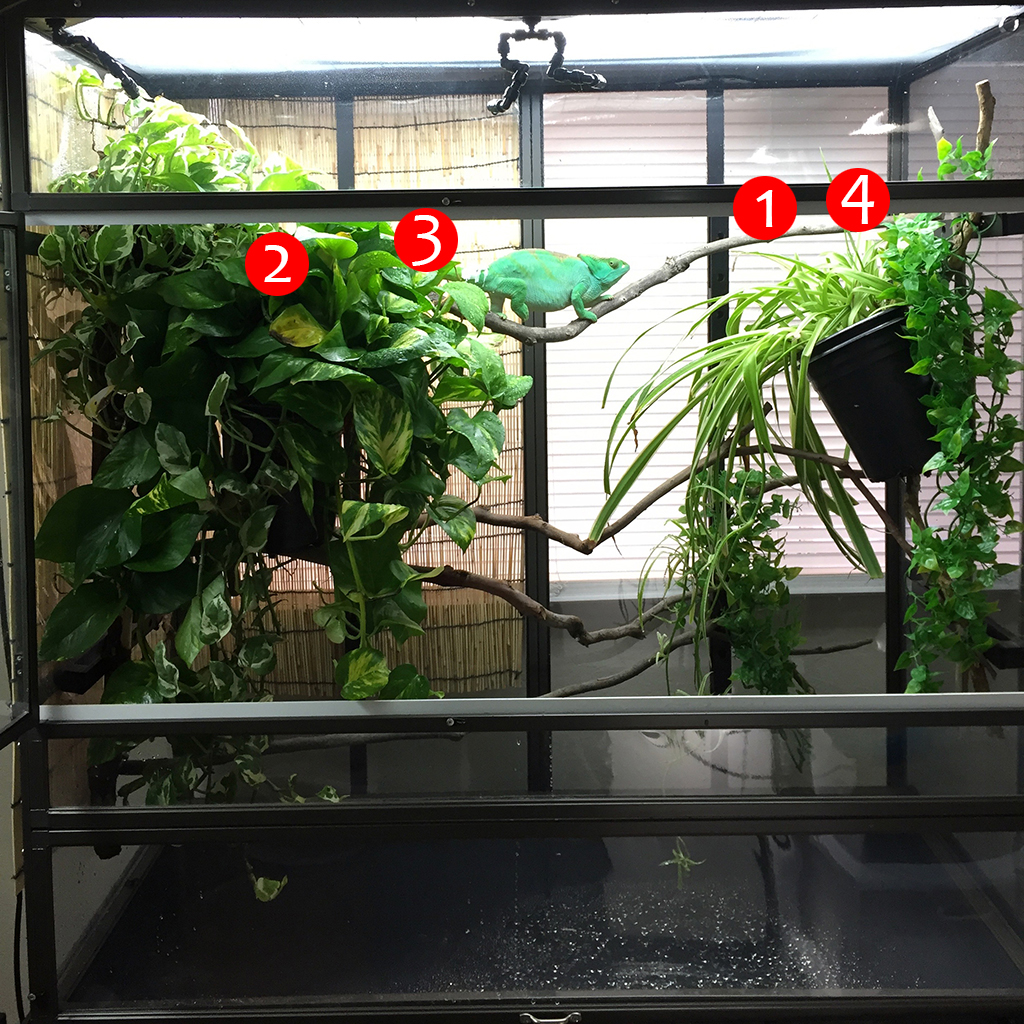
The 4′ x 2’x 4′ Tall Wide Format Cage. This Dragon Strand Large Atrium cage was a brumation cage for a Parson’s Chameleon to spend the winter. During this time there is not much movement. I wanted to show how we can achieve all the Forest Edge 4+4 elements with the minimum of cage items. All four branch functions were carried out by one branch.
Forest Edge “feel”. The basic requirement of the Forest Edge is the ability to be hidden and the ability to bask in the open. In this cage, the hidden area was made up of a cluster of Pothos plants.
Branch Checklist. All four branch functions are handled by one branch that spans the entire cage from the thick pothos clump to the area where a chameleon feeder run cup can be hanged
- Basking Branch. Label 1
- Security Branch. Label 2
- Drinking Branch. A misting nozzle mounted in the middle front of the cage can easily reach the Pothos clump. Note, though that none of the mist will ever reach the soil so watering is required!
- Eating Branch. In this open area a chameleon feeder run cup can be hanged for a convenient feeder station
Next is a check for network branches. Can the chameleon access all parts of the cage without climbing on the screen wall? Parson’s Chameleons do not move much if they are happy – especially during their cool down period. If this was a panther chameleon it would be appropriate to add more connecting and perching branches.
Conclusion
Now we know what we have to include in a chameleon cage. Once we understand the significance of each we have an eleven item checklist to verify that we have a proper chameleon cage.
Remember, while the five gradients are relatively separate from each other, the five branches don’t actually have to be five distinct branches. One branch could start in a densely covered area and end up at the top of the cage, making it both the sleeping branch and the basking branch. If dew collects on the leaves around where your chameleon sleeps, then that sleeping branch is now also a drinking branch. The important part of these branches is not that there are exactly five of them in your cage, but rather that there are spaces in your cage where all five of these purposes are fulfilled.
In the next module we explore the weather conditions we want to create!
Navigation
This module is part of a class on Setting Up Your Chameleon’s Cage where you learn how to build up a complete chameleon environment from start to finish. From this point you can either go back to the home room and see the other modules in this class or go on to the next module which describes how to create weather conditions your chameleon will thrive in!

