Veiled Chameleon Care Summary
The Veiled Chameleon Care Summary distills the most important aspects of husbandry care into an easily referenced handout. But chameleon care is, unfortunately, much more involved than can be presented on a summary sheet. Therefore, you may use this sheet as a reference and return to this page where we will go over each and every aspect that is on the summary sheet in detail.
Note that there is a QR code on the front page. This allows you to print a copy and have it to show potential customers at a show or clients at a vet office. If they would like to get a care guide of their own then they just have to access the QR code from their smartphone and it will take them to this webpage where they can download one.
Introduction to the Veiled Chameleon
Veiled Chameleons compete with the Panther Chameleon for being the most commonly found species in captivity. Their general hardiness combined with ease of reproducing has made this chameleon accessible to many people. Physically, they are an impressive chameleon with bright colors and a huge casque on their head.
Chamaeleo calyptratus, the Veiled Chameleon, is native to Yemen in the Arabian Peninsula. The species is actually comprise of two subspecies, Chamaeleo calyptratus calyptratus and Chamaeleo calyptratus calcarifer. C.c.calcarifer is non-existent in captivity and any reference to Chamaeleo calyptratus, at least at this point in time, refers to the C. calyptratus calyptratus subspecies.
The Veiled Chameleon is found during the wet season in “Wadis” which are valleys carved into the mountains. The rains transform these valleys into a lush oasis of plant life and rivers hidden away from the harsh desert environment that Yemen is usually thought of. Upon hatching into this paradise, the veiled chameleon babies are in a race against time to grow, mate, and lay eggs before the dry season comes and turns the oasis barren again. Thus, nature has given these babies a voracious appetite and the ability to become sexually mature within six months. During the wet season they live in vegetation so dense that travelers searching for them have difficulty. But when the dry season hits and the trees lose their leaves adults can easily be seen as evidenced by numerous videos posted online. Unfortunately, these videos do not show the proper living conditions and are actually showing chameleons on their way to dying from hunger and exposure.
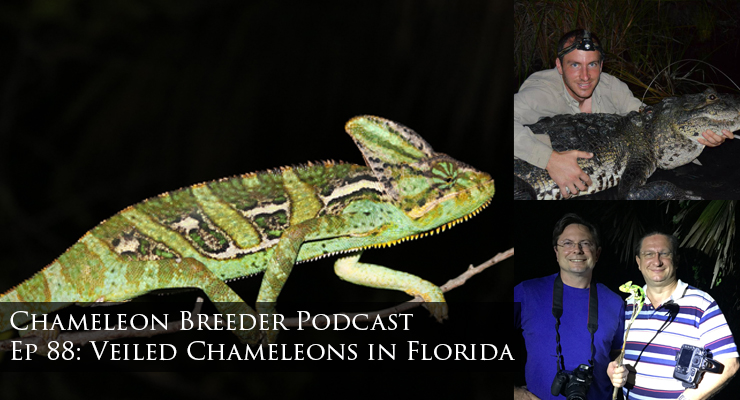
Veiled Chameleons are hardy chameleons and have established themselves in Florida and there are reports of feral populations on Hawaii. The bloodlines of these populations are limited and there are characteristics that lead some to believe we are seeing results of inbreeding.
The pet trade remains active with Veiled Chameleons and they are commonly found in the reptile section of pet stores or at reptile shows. Wild caught specimens from Florida are available, but fresh bloodlines from Yemen have been difficult to obtain due to political unrest and civil war which continues at the time of this writing.
Personality
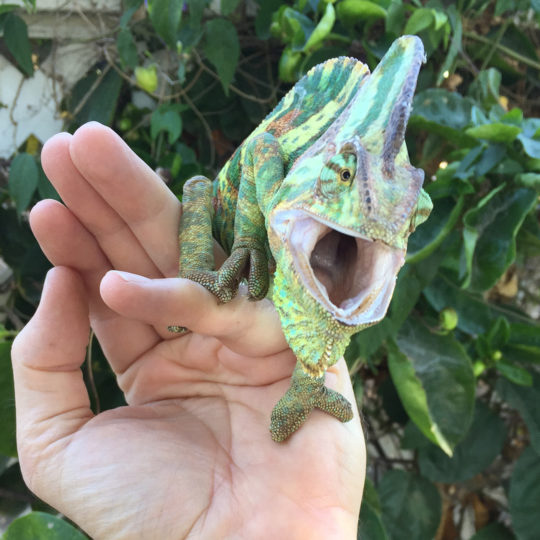
Veiled Chameleons have dramatic and distinct personalities. They are often described as cranky and aggressive. Some, though, are more shy than aggressive and a precious few are actually friendly. They can be tamed to some extent which is determined by their individual personality. As with all chameleons, each one is an individual. The defining characteristic of the Veiled Chameleon is how pronounced their personalities are!
Interaction with their keeper is highly dependent on their personality. It is often difficult to get them out of their cage as they gape, hiss (which is really a loud breathing), and are not shy about biting the invading hand.

The author with a Veiled Chameleon found in Florida
The Veiled Chameleon Lifecycle
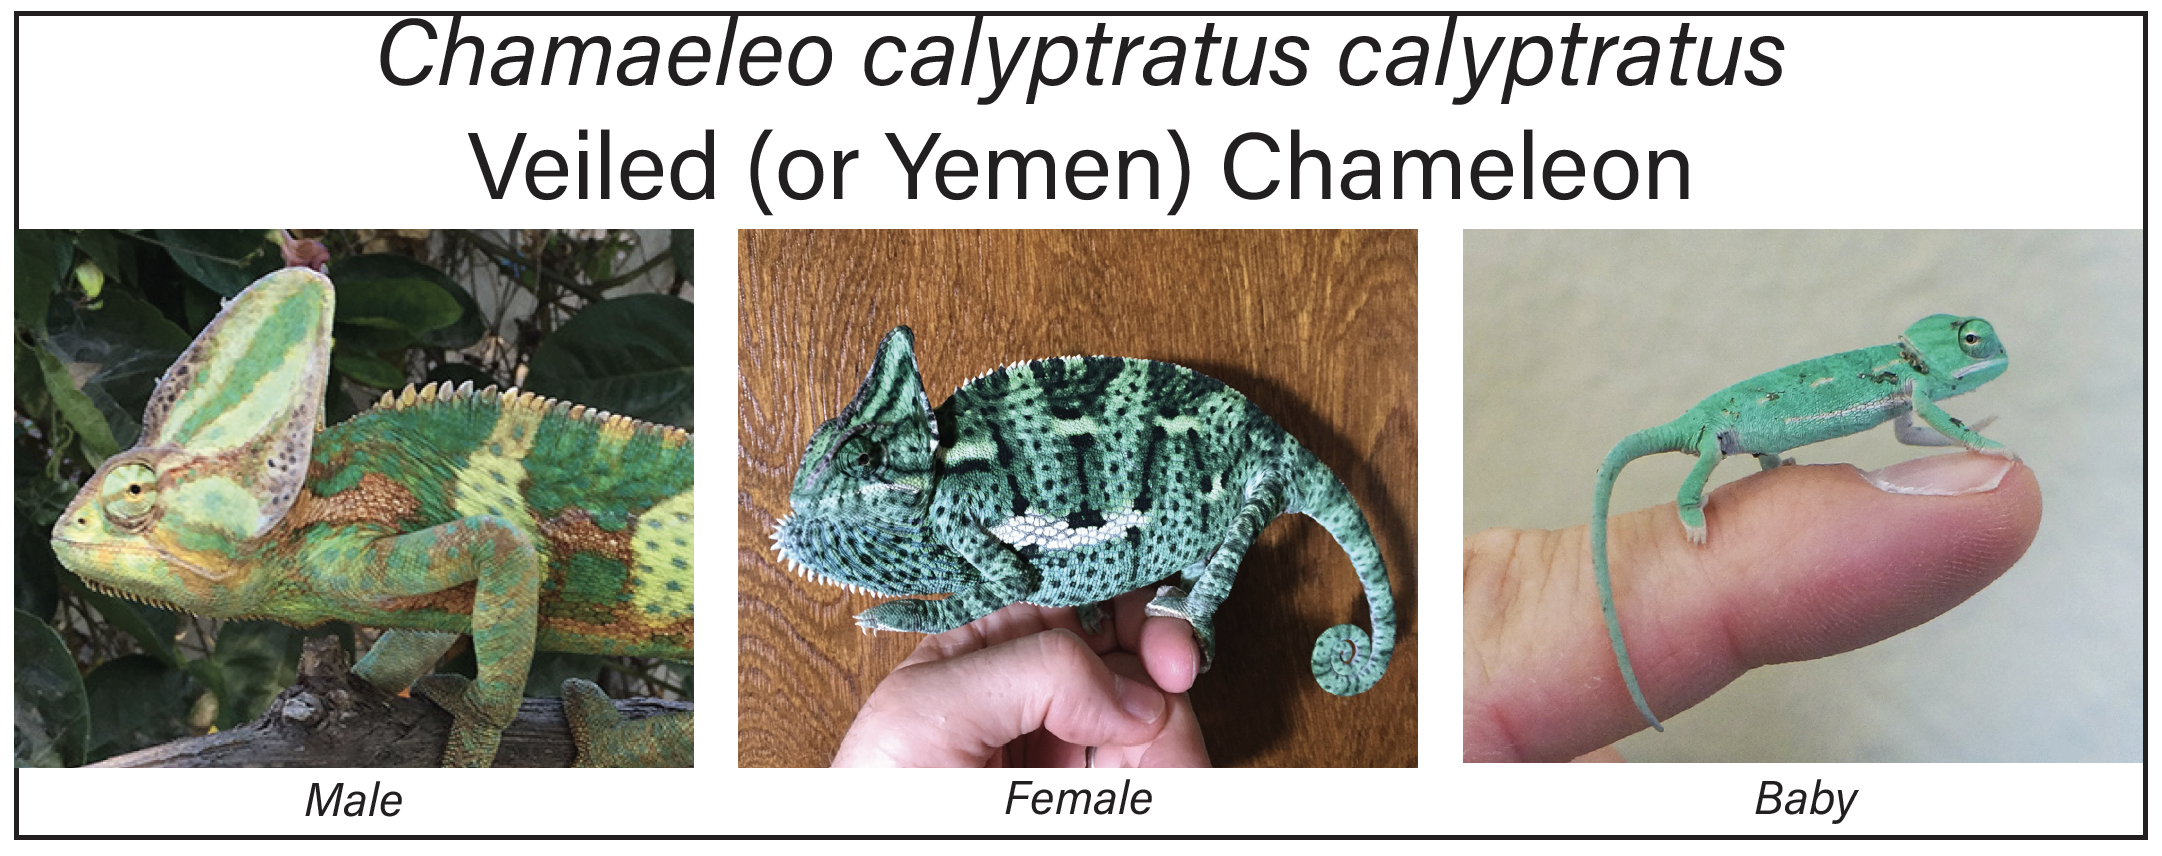
Male and Female Veiled Chameleons
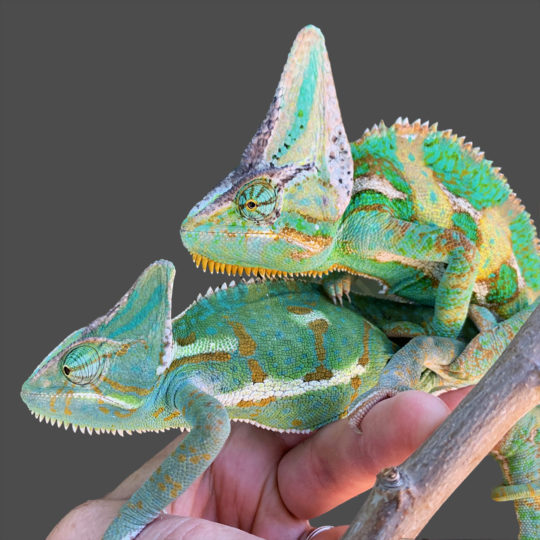
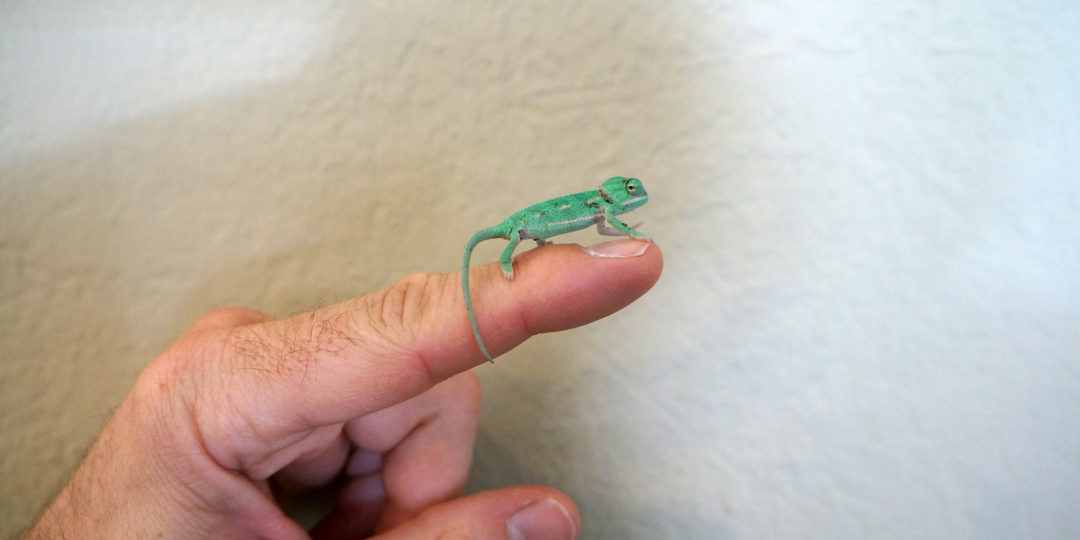
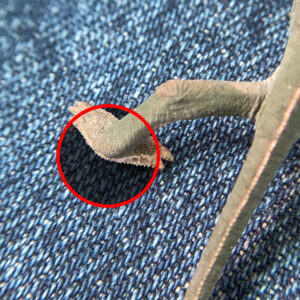
It is simple to tell males from female from hatching. The most distinctive mark is that males will have a tarsal spur which is an easily noticeable growth coming from the back of their rear feet. As the chameleons mature the males will become more brightly colored and their casque will become more defined. Males will grow larger than females.
Females are prone to lay eggs. Although their bodies are designed to lay eggs and they are able to do so without an issue, poor captive husbandry complicates the situation. The voracious appetite coupled with our desire to feed anything that is hungry produces egg binding which can be deadly. If you have a female then follow the husbandry requirements closely.
The image shows the difference from a fully grown adult male (top) and an adult female (bottom).
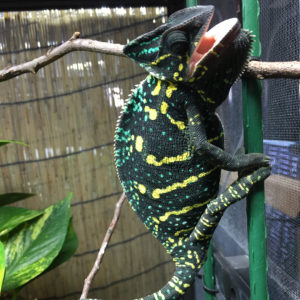
When a female Veiled Chameleon is gravid (successfully mated) she makes no doubt about it and males who do not get the hint are greeted with a dramatic flaring, gaping, and black body with yellow and blue spots.
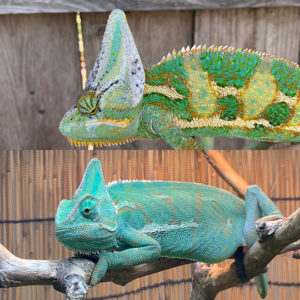
A male (top) and the female (bottom) showing non-gravid colors. This female has actually just recently laid eggs when this picture was taken.
Morphs
The Translucent or Pied morph of veiled chameleon is a color variety that has been encouraged in captivity. It is characterized by patches of white, pink, and black colors. Although there have been concerns of its ability to survive normal UVB, breeders of this morph report that there appears to be no difference in behavior or health between normal and translucent animals.
Other morphs have been named for differently colored individuals, but none have established themselves significantly.


Cage Type, Size, and Set-up
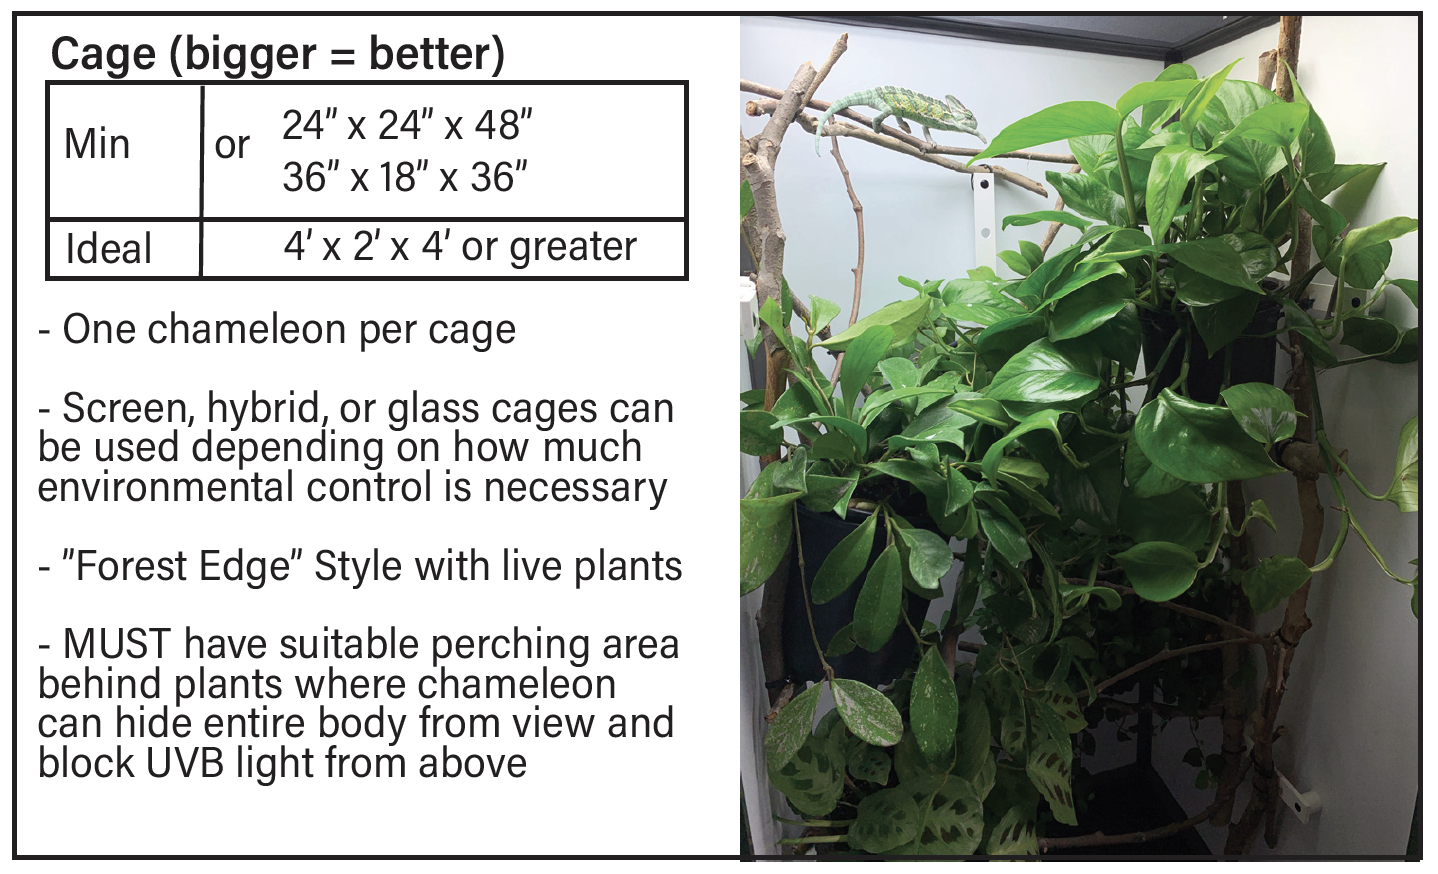
Minimum cage size:
2′ x 2′ x 4′ or 36″ x 18″ x 36″
Ideal cage size:
4′ x 2′ x 4′ or Greater
Cage Size. The minimum cage size for both males and females that allows the creation of a suitable environment is 2’ x 2’ x 4’ tall, but males, especially, get to a size where a wider cage would be appreciated. The minimum sizes of 2′ x 2’x4′ and 36″ x 18″ x 36″ were chosen because they are the closest available commercially manufactured cages. The important thing is not really the dimensions, but what you do with the inside. Of course, there are physical limits to what you can create in a smaller cage and it will be impossible to get around the fact that your chameleon is a certain size and requires certain size gradients that will all have to fit with in the cage size you select. If you have the option to build your own cage it is worthwhile if you are able to make a cage bigger than is available commercially. With cages, bigger is better..
One chameleon per cage
One Chameleon per Cage. A time tested rule for chameleons is to house one per cage. It is human of us to want to pair things up or think of friendship, but chameleons are different. They have no concept of family or community in the way we think of it. Over the decades, newcomers test this over and over and the results always return back to one chameleon per cage. If you would like to dive deeper into the details of cohabitation and why it does not work in captivity (when they can be found around each other in the wild) then you may listen to these dynamics on this podcast episode: Ep 107 Keeping Chameleons Together
Bottom line – House Veiled Chameleons separately.
Screen, hybrid, or glass cages can be used depending on how much environmental control is needed
Cage Type. The cage type used depends on your environment. The more screen panels the more closely the inside environment will match your ambient temperatures. Screen cages work because Veiled Chameleons are comfortable in the mid 70s F and that is a common temperature range for human houses. But humidity levels are often the reason why keepers need to go to a hybrid model which combines solid and screen paneling. Glass cages also work, but it is difficult to find a glass cage which is big enough to house a Veiled Chameleon. Anything other than a screen cage is a new concept in many online communities. If you intend on being part of a community that believes that only screen cages are appropriate for chameleons then they will have constructed a husbandry revolving around working with a screen cage. if you have absorbed enough information that you recognize the value of solid side enclosures, realize you will need to find the online communities with people experienced in solid side enclosures to support you. You can start looking into hybrid cages with this podcast episode: Keeping Chameleons in Hybrid Cages
“Forest Edge” style with live plants
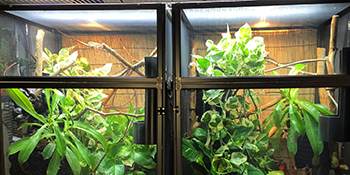
Forest Edge Style. Veiled Chameleons are housed in the Forest Edge style cage interior. Even though they seem to have aggressive personalities, this is often just how they show their shyness. A forest edge cage provides the open basking area and the densely leafy area where they can retreat to, hide, and feel safe. This retreat area is critical for their well being. Notice in the pair of cages shown here that there are distinct open and leafy areas. This is what a Forest Edge cage will look like. The most overlooked aspect of a chameleon cage is the visual retreat where the chameleon can hide away when they desire privacy. This is critical for creating an effective chameleon environment. Please reference the Forest Edge 4+4 method to ensure you have the required elements.
MUST have suitable perching area behind plants where chameleon can hide entire body from view and block UVB light from above
Security. This is the most missed element of chameleon cage set-up. Your chameleon needs a feeling of security. They get this by having a dense plant layer in the middle of their cage. This leaf layer will need to be sufficient for them to perch with the majority of their body hidden away from view and it also must be dense enough to block the UVB from the UVB bulb above. Security is one of the elements covered under the Forest Edge 4+4 concept which was linked to above.


Bill Strand
Setting Up a Chameleon Cage
In this podcast episode you will be guided through the process of setting up a chameleon cage using the Forest Edge 4+4 method.
Veiled Chameleon Cage Build Guides
With here being so many options and each cage needing it own special quirks to make it work, a simple shopping list is insufficient. Therefore, there are build guides here that show a specific cage being built up and the links to purchase the products being used.
Ambient Temperature
Daytime: 72 – 78°F / 22-25°C
Nighttime: 55 – 65°F / 13 – 18°C
Ambient temperature is what most of the cage will read. If you have a screen cage this reading will be suspiciously similar to your room conditions. The basking bulb creates a warm microclimate that will dissipate in a relatively short distance.
Veiled Chameleons have a curious lifecycle. They are hatched into a lush paradise, yet are killed by the harshest of conditions 6-9 months later. Though, somehow, they have developed the ability to withstand temperatures over 100°F/40°C and can survive down to freezing. Of course, we want to give them what is optimal temperatures. For this we look deep inside the trees they spend most of their time in. Travelers to Yemen have found a very comfortable mid-70s environment which corresponds quite nicely with our comfort level! Thus room temperature is good as an ambient temperature for Veiled Chameleons. At night time, in their homeland, there is a 20F drop in temperature. This drop equates to a restful night’s sleep and that is required for optimal health and longevity so it should not be dismissed. The fact that they tolerate having warmer nights than the Yellow-crested Jackson’s Chameleon (which comes from the same basic elevation) better does not mean it is good husbandry. A nighttime drop in the 60s, or, even better, the 50sF would be the target for deep sleep. To be clear, there is no need for external heat at night. In fact, I would suggest erring on the side of colder than warmer when thinking about night time temperatures. It is a common misconception that Veiled Chameleons need warmth all the time. While it is true they are reptiles and ectothermic (cold-blooded), they are designed to survive the cooler highlands. And this means cool nights!
Nighttime drops are often a challenge for keepers to produce. Serious chameleon enthusiasts keep the chameleon in a room with a window open or even a window-mounted / free standing air conditioning unit.

By studying the annual temperatures of a town nearby the range of the Veiled Chameleon we can get a fairly accurate view on the temperature range the Veiled Chameleon would be expecting. This is not a hot, arid area as is often thought!

Bill Strand
Ep 159 Nighttime Temperature Drops with Petr Necas
To learn about why nighttime drops are important and worth putting in the extra effort listen in on this podcast episode where we discuss this topic.
Basking Temperature
Basking Temperature: 85°F /29°C
A low nighttime temperature is normal and healthy for your Veiled Chameleon. But your chameleon will need to warm up in the morning to get a good start on the day. In the wild, chameleons look to the sun rise and bask until their body temperature is sufficient for optimal hunting, digestion, and general function.
In captivity, we give them this warm up through a basking bulb which is usually an incandescent bulb shining on their basking branch.
We need to be careful when setting up this bulb as it is very easy to burn your chameleon. Chameleons do not seem to have a keen sense of when they are being burned. Veiled Chameleons, especially, are prone to this due to their high casque that is much closer to the light than their body. And this is the reason that we will be encouraging basking bulbs to be mounted above the cage instead of on the cage top. The closer to the bulb, the more difference in temperature can happen in an inch. The ideal scenario is to have a higher wattage bulb further away. This produces a wider, and “gentler” heated area that has no burn risk.
For temperature we are looking for something in the low to mid 80s. But the exact temperature is not that important. It is more important to set it up so you feel a warm and gentle heat on the back of your hand when you place it where the top of the head of your chameleon would be when he is basking. Your main purpose is to set up a safe temperature to start with and then you will adjust the bulb distance based on your chameleon’s behavior. If your chameleon shows the following behaviors, bring the bulb closer
- huddling under the bulb for more than 30 minutes
- hanging from the top screen panel under the bulb
- remaining dark and lethargic. After basking, they should take on resting colors.
There is a huge warning for Veiled Chameleon owners. Although all chameleons can fall victims to burns from their basking lamp, Veiled Chameleons are especially prone to this due to their high casque. You must ensure that the area where their casque extends into is still a safe temperature. The issue with relying on behaviors as a signal to move the bulb further away is that they generally are physical damage to the body such as gray burned areas, open wounds, and melted back spines. And it is concerning how long this kind of situation goes on before the keeper realizes what is going on. So this means the chameleon is basking even though it is too hot. Thus it is better to start too low rather than too high. The low 80s is safe level to begin with. Hold your hand there for a minute. Is it a pleasant warming experience? If so, then that is a good place to start.
Our other concern is that abnormal clutch development in females is tied to too much heat and too much food. Both heat and food energize the chameleon’s body and we have shown in the community what happens when you do this. Female chameleons produce so many eggs they are called marble bags. And there is a disturbing trend among some veterinary offices to do proactive spaying of chameleons to remove egg binding risk. The solution is to lower basking temperature and feed less. This is the reason behind my recommendation of 85°F maximum when the general advice is 90°F or greater. This is a husbandry trend that is slowly turning around. Veiled chameleon females at lower temperatures and feedings are much less likely to produce infertile clutches and the clutch sizes are reasonable. The reason why this has not overtaken the older information yet is because the segments of the community experimenting with this is still working on nailing down the exact parameters. Going too low in temperature and food intake is a health risk so we need to repeat it across a wide number of chameleons with a wide number of keepers to ensure the numbers are correct. Currently, these groups are working with basking temperatures of 80°F. The recommendation of 85°F here is to reflect that I want to see more repeating of the successes with no issues before 80°F becomes part of the care summary. An 80°F basking site has produced excellent results so far. This is a critical topic and we are in a significant community transition.
Humidity
Daytime: 40-50% RH
Nighttime: 80 – 100% RH
Veiled Chameleons experience high humidity nights and mid to low humidity days. A nighttime humidity of 80% to 100% and then a drop to 40-50% during the day will allow them to engage in their natural humidity cycle. The exact numbers are not critical. There are two important aspects.
1) during high humidity times keep the air moving. Often cages are modified to enclose sides to impede airflow so a fogger can increase humidity. In this case, have a ceiling fan or computer fan mounted to the top of the cage makes sure that the “fog bank” circulates. Stagnant air, regardless of how humid, is unhealthy.
2) All surfaces must be dry during the day. Even if humidity is higher than the numbers listed, if the surfaces are dry then there shouldn’t be a health problem. It is when surfaces, such as the branches the chameleon climbs on, are constantly wet the feet get sores and bacteria/fungus/mold is able to take a hold.
You may have a hard time reaching the high nighttime humidity. This is where screen cages start to show their weakness. There are two methods for increasing nighttime humidity. The first s to use a fogger on the cage at night. The second is to enclose the sies, back, and main door with solid PVC panels, shower curtains, or even insolative heat-shrink window film.
Lighting
Veiled Chameleons take the standard bright light that we put on our chameleon cages. A four or even six bulb High Output T5 fixture the width of your cage with 6500K fluorescent bulbs will light a 4’ tall cage nicely. A 12 hours on and 12 hours off cycle is used. You may replicate the annual increase and decrease of daylight as it is in Yemen, but since the lifecycle of the Veiled Chameleon generally ends at the end of the wet season, evolution has not had a chance to utilize day length as a marker for any behavior (as far as we know).
Your chameleon will need it bright inside his cage. The biggest cage deficiency behind no hiding place, is insufficient light where, when you look at the cage, the chameleon looks like it is in a cave with a skylight. A bright cage will allow plants to grow and your environment to be vibrant.
Natural sunlight through a window is excellent, but proceed with caution. Sunlight tends to be too powerful and could overheat your chameleon. Be careful with sunlight.
Chameleons need it dark at night so do not use any nightlights. You may have been told to get a red heat lamp to keep your chameleon warm at night and that they can’t see the red light. The fact is that chameleons want a night time drop in temperature at night. Veiled Chameleons can easily enjoy it down to the 50sF at night. And they can see the red light just fine. Do not use these red lights.
UVB

The most effective and reliable way to producing UVB for your chameleon is with linear T5 high output fluorescent tubes. These bulbs may go into a multi-bulb fixture, but are most effective in a single bulb reflector. I highly recommend using a single bulb reflector for your UVB source as it gives you not only the full power of the bulb (your UVB gets soaked up by other bulbs), but it gives you full control over the UVB strength that hits the basking area depending on how high you raise the fixture above the cage. But if a multi-bulb fixture is the only option then you simply get a high power UVB bulb.
Experiments have shown that a UVI of 3 at the Veiled Chameleon’s basking branch allows for sufficient vitamin D3 synthesis. The best way to dial this in is with a Solar meter 6.5 (or 6.5R). Each bulb and reflector combination will give slightly different results depending on how effective the reflector is at focusing all the UVB light into the cage. For this care sheet I have standardized my testing with the Arcadia Prot5 line as it is a bulb and fixture combination. Thus, if you purchase this light you will get the same hardware I have tested with. The care summary lists distances from the bulb to the back of the chameleon when they are sitting on the basking branch. This is all through the screen top panel. (Screen filters out some of the UVB and so any chart you use needs to take this into account). The distance I give is an approximate distance. The actual UV Index level at that distance will change depending on which reflector you use, age of the bulb, and time that the bulb has been running when you measure. The best approach is a Solarmeter. These charts are for those who do not have one available. It is important to note that the first inches off these lamps are at very high levels and so, with the practical exception for the T8 reptisun 10.0 bulb/fixture, the rest should be suspended a couple inches above the top of the cage. A good way to do this is to put your basking branch 6″ below the top of the cage and suspend the UVB light whatever distance is listed above the basking branch (plus chameleon back height).
The chart on the care summary lists both the distance the fixture should be raised above the cage to avoid the highest UVB levels from getting to the chameleon and a second number telling how far from the top of the cage a chameleon’s back should be to get the proper UVB levels.
For example, If I am using the Arcadia ProT5 6% – or equivalent – then I would have the fixture propped up 3″ above the top of the cage and the basking branch situated so that the back of the chameleon was 4″ below the top of the cage. Of course, with male Veiled Chameleons, their casque rises substantially above their back height. So, is that casque in danger of getting too high a UVB dose? Well, this is the benefit of raising the UVB fixture above the cage. Yes, the casque will be exposed to higher UVB. But since we have ensured that only the safe amounts were allowed inside the cage, the towering casque is not of particular worry.

Setting up the lighting and hydration schedule
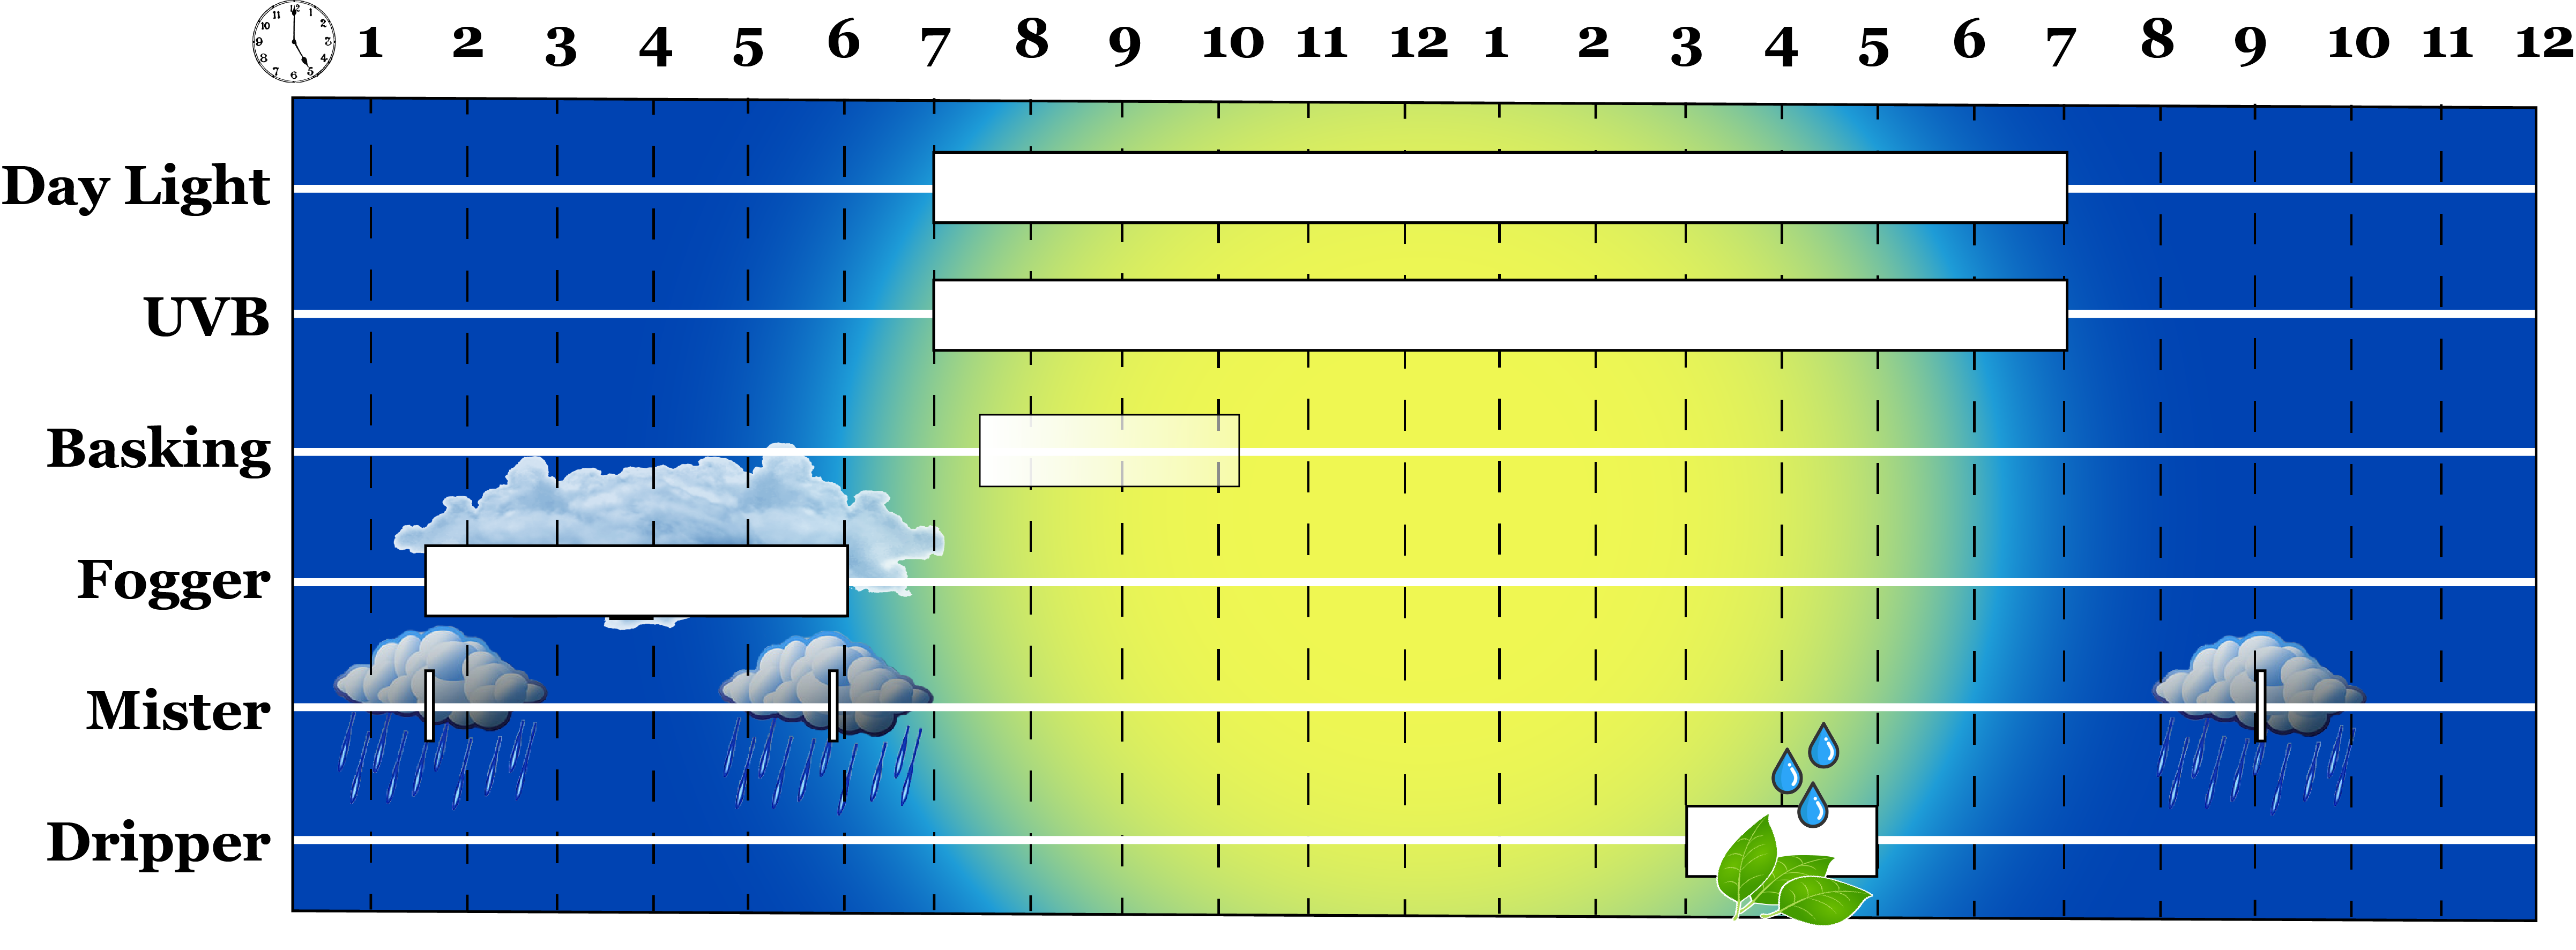
When we set up our daily schedule we are attempting to replicate the wild conditions that the chameleon has grown to expect. Let’s start at midnight.
At midnight the chameleon has been asleep for many hours. It is dark and, although the moon waxes and wanes, chameleons will seek out dark places to sleep. They see light of all colors just fine and any light can disturb their rest. This includes red light and other lights designed for reptiles. These lights do not fool chameleons. They recognize them as lights and it will disturb the chameleon’s sleep. Do not use any light at night.
As the early morning progresses the humidity rises. Fog banks can start to form and the chameleon is breathing in moist air. Pictures from Yemen show thick clouds obscuring the valleys, or “wadis”, that the Veiled Chameleons live in. This high humidity forms an important part in their natural hydration. To simulate this, we turn ultrasonic humidifiers on around 1- 2AM. The fog from the humidifiers tends to bounce off of surfaces and roll out the cage so we run the misting system for a a minute to coat the cage in a layer of water. This helps the fogger be more effective and the fog tends to stick around. The fogger is left on until just before the lights come on so the chameleon can breathe in all that humidity. Just before the lights come on the misters are run for another couple of minute to make sure that the chameleon wakes up to surfaces covered in “dew”. This is a natural source of water for them even in their dry season. Once the dew is laid down the lights can come on.
Around 7AM the daylights come on. This can include the UVB light if they are the same fixture. If they are separate fixtures then save turning the UVB light on to correspond to when the basking bulb is switched on. I like to leave the daylight bulbs on for 15 or so minutes to give the chameleon a chance to leisurely lick whatever dew they want. I then turn the basking bulb on so they can warm themselves up.
As the ambient temperatures start to warm there is no longer the need for a basking lamp and it is shut off. The actual time that the basking lamp is on will depend on your chameleon’s needs. Watch the behavior. If the routinely get the warmth they need in 30 minutes and then climb away with content colors to hunt then reduce your basking time to that time that they make use of the warmth. If they need the warmth for a longer period of time then leave the basking bulb on longer. Watch your chameleon and they will tell you what they need. With a screen cage there is usually no issue leaving it on for the day, but if your ambient daytime temperatures start getting to the high end of their comfort, you should shut the basking lamp off. In solid walled enclosures, heat may be retained and you will be able to shut the basking bulb off sooner. On my chart I am limiting the basking lamp to a couple hours. Considering the epidemic of over energized veiled chameleons I think it wise to use two hours as a default and continue heating after that only if there is a specific reason to do so.
Sometime during the day start your dripper. This is a backup hydration strategy just to make sure they have enough water. While it is true they do not have drippers every day in the wild during the dry season, they also are not needing to reconstitute dry calcium powder on all their feeders. The advantage of running a dripper is that it is completely optional for them and, as a bonus, it also allows you the opportunity to ensure your plants get watered. Place it above a different plant each day and through out the week, all plants will get watered. It is not critical when you start the dripper. In this schedule I have it in the late afternoon so that the chameleon can rehydrate before the evening rest. I suggest starting the dripper an hour or so after feeding them so they can replenish what they need. In the wild, their food is a source of hydration.
Once the chameleon settles in and goes to sleep I like to have a couple minutes misting just to set up the night humidity.
You’ll notice there are no daytime mistings. Although this is common in chameleon husbandry I am transitioning my mistings to the sleep hours. Chameleons have been consistent in their communicating that they do not like being sprayed. I have given up deciding I know what is best for them and started to listen to them. The morning dew and the afternoon dripper provide the necessary hydration in a natural way. With those provided there just isn’t a need to force them into a shower in the middle of the day.
Feeding

Veiled Chameleons are voracious eaters and, as such, it is important that their food intake be monitored once they become adults.
The job of the babies is to grow as fast as possible so, as babies, juveniles and sub-adults, they should be fed everyday as much as they can eat. Under optimal conditions this stage can be from 0-6 months. In captivity, this can sometimes be extended to 9 months depending on the environment they grow up in. The idea is that we feed them as much as they can eat as long as they are growing in length. As soon as they start growing in girth we know it is time to cut back on the food intake. Selecting an exact month age as to when this happens is problematic as different keepers will experience different maturity dates.
Once they are adult you can cut it further back to up to five well gutloaded and supplemented food items every other day. The exact number is not critical. This is a general guideline as each meal will differ s far as how big the feeders are and what type they are. The important thing is to be mindful of how much you are feeding them and to realize they will eat way more than they need.
Obesity in Veiled Chameleons is a common and serious ailment. And it can be deadly for females. Excess food will result in more eggs being developed and the fat pads around the hips enlarged. The enlarged fat pads can put pressure on the oviduct and make it difficult to pass the eggs. With the egg load too high and unable to pass the chameleon can easily die from egg binding. This is preventable through a disciplined diet. Once it is obvious that the female is gravid, though, you can increase the food items to as much as she will eat. It is important to give her the all the nutrients necessary to create healthy eggs. This should only last a month. Once eggs are laid, give her a week of as much as she will eat to recover. And then you can return to the 3-4 pieces/every other day routine.
So, how do you tell when a Veiled Chameleon is an adult? The good news is that there is a wide margin of error here. Once you notice fat pads bulging out of the casque or the body going towards being barrel shaped, then you can reduce the diet and your Veiled Chameleon’s body will eventually bounce back to healthy. The longer it takes for you to figure out your chameleon is going towards an unhealthy weight, the longer it takes to shed those grams, but this is not a life shortening condition if you catch it early.
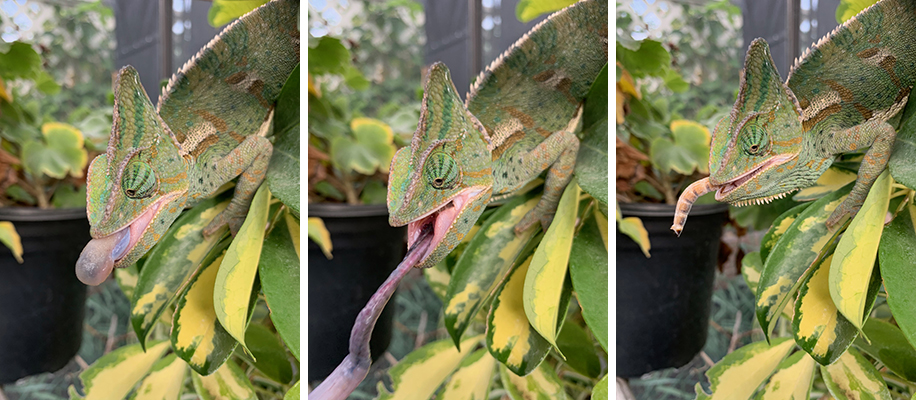
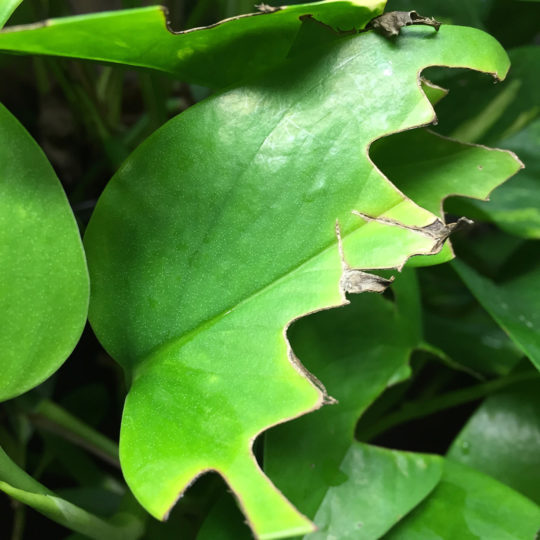
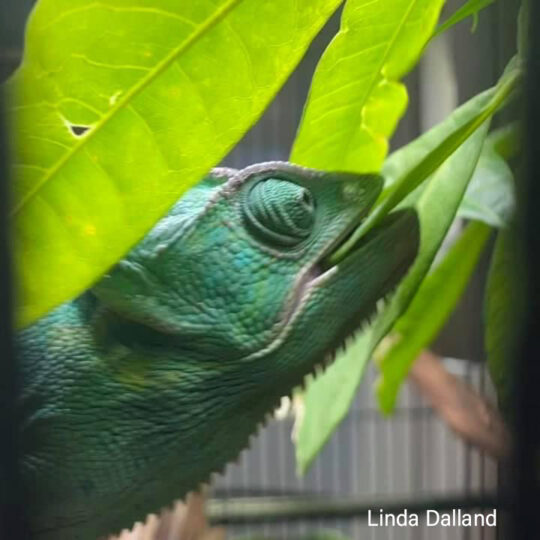
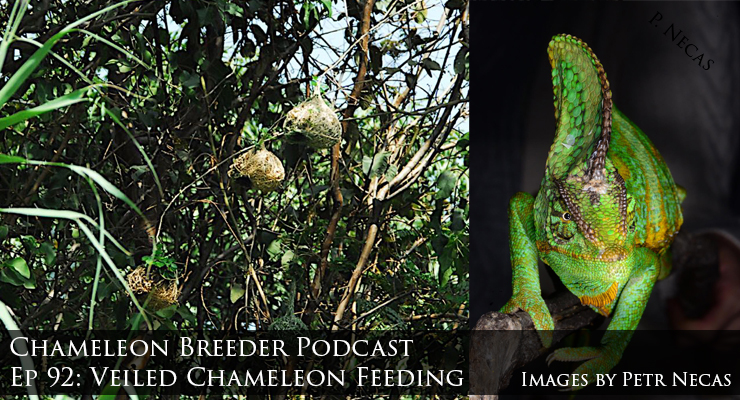
Plants. Veiled Chameleons are one of the few chameleon species that are known to graze on their cage plants. In the wild, their food, as babies, is reported to consist of caterpillars and soft food items. The plant matter is used as roughage to help the mass move through the digestive system. One common hypothesis is that Veiled Chameleons get moisture from the leaves. This does not make logical sense as Veiled Chameleons are alive only during the wet season. There is no reason to need to eat plants for moisture. As far as getting nutrients from the plant matter, insects are plentiful so there is no nutrition that we know of that they need from these plants. So the roughage explanation is the most likely of our proposed reasons for Veiled Chameleons to eat plant matter. In your cage you may find your pothos or umbrella plant having a triangle bite taken out of it. This is normal and not dangerous. Though do not offer fruits. Even though Veiled Chameleons will eat greens and fruits they are not necessary to feed. Especially avoid feeding fruit which is filled with sugars.
Do not take the measure of what a Veiled Chameleon will eat to equal what is good for them. They will eat just about anything – even things that are not food. They are an eat first, ask questions later type animal.
There is much work being done to refine the female diet to keep them healthy and relieve them of infertile and oversized clutches of eggs. This exploration is in progress and the Chameleon Academy will be updated as more information is known. I reviewed this case in a podcast which you can listen to here


Bill Strand
April 6, 2020: Female Veiled Chameleon Feeding
https://chameleonacademy.com/april-6-female-veiled-chameleon-feeding/
Supplementation
Introduction to Supplementation
Supplementation is one of the least defined aspects of chameleon husbandry. We literally do not know what they need. We are guessing. The best we can do is try to get as close to their natural processes as possible and test regimens out.
There will be a number of approaches that work. The bottom line test is whether it produces a healthy, long lived chameleon. If it does then it is valid!
The Chameleon Academy Supplementation Approach
The supplementation routine chosen for our recommendation is designed to use be as close to nature as we can with what we know now. According to what we (think we) know, chameleons do not get a significant amount of vitamin D3 or vitamin A (Retinol) in their diet. Vitamin D3 comes from UVB and Vitamin A comes from…somewhere. We are still working out those details. Thus it is simple to know how to remove dietary D3. We provide sufficient UVB exposure. Removing preformed vitamin A from the diet is a bit tricky as some breeders can have generations of healthy babies with no dietary preformed vitamin A, while others will encounter birth defects, low survivability, and eye health issues unless preformed vitamin A is added. Thus, vitamin A remains a major hole in our understanding of chameleon nutrition. The most obvious suspect is the carotenoids within the gut-loaded insects. Many animals use these to create vitamin A. A study done showed that beta carotene, the most commonly converted carotenoid in humans, was not, at least in isolation, converted by panther chameleons. More study will have to be done to determine which of (or if) the other carotenoids are being converted. The most obvious source of retinol in the wild is in the organs of vertebrates. So it is not far fetched to assume a larger chameleon would get a smaller lizard, bird, or rodent. What this means is that we don’t know. The data we do have is that it is not uncommon for chameleons to have medical conditions that are fixed by giving vitamin A. Therefore, until we know more about this mystery, it is reasonable to provide small amounts of preformed vitamin A in the supplementation.
Prerequisites
The Chameleon Academy supplementation schedule relies on 1) the presence of UVB in the strength of at least UV Index 3 for D3 conversion and 2) a rich gutload of feeder insects.
The Pre-Requisite of UVB levels at UV Index 3
The Chameleon Academy Supplementation Routine relies heavily on the chameleon producing its own Vitamin D3 from UVB exposure. This uses the natural body mechanisms designed for this purpose. This is highly desirable as vitamin D3 is fat soluble and can be overdosed and can cause serious health issues. Going through the natural process has a natural cut off where the body will stop producing D3 when it has enough. It maintains optimal levels in a way that we have no possible way of replicating. With sufficient UVB, dietary D3 may be removed from the regimen. But there is a balanced relationship between D3 and vitamin A. Thus I support giving vitamin D3 when we give vitamin A. It is reasonable to give dietary vitamin D3 along with preformed vitamin A because this is what would happen if a vertebrate was caught and eaten.
The Pre-Requisite of Gutloaded Feeders
In all instances, feeders should be richly gutloaded with a variety of fruits and grains. They must be cared for with proper heat and even, we are learning, exposure to UVB. This creates the most healthy, nutrition packed feeder for your chameleon. Supplements are just that – a supplement to a properly gutloaded, healthy feeder insect. Supplements will not make up for a poorly fed feeder insect. Every supplementation routine requires a properly gutloaded feeder insect.
Supplementation for Every Feeding
Calcium will be given every feeding. Calcium is all around our world. Chameleons take in calcium through diet so this is the natural way they get it. And unused calcium flows through the digestive tract and out the other end so there is not a danger of overdose due to feeding too much calcium. Therefore we will dust each feeding with calcium.
The every feeding supplement should be, at least, plain calcium. You can also add powdered bee pollen to the calcium. I use the Arcadia EarthPro-A supplement as the every-feeding supplement because it includes both calcium and bee pollen with no vitamin D3 or A. If you want to use bee pollen and calcium powder then they need to be mixed together. Bee pollen does not stick to feeder insects on its own and mixing bee pollen powder with calcium powder or crushing up bee pollen granules with calcium powder will produce an effective (and well tested) every day powder supplement. The ratio of bee pollen to calcium is not that important. I have used anywhere from 50/50 to 25% bee pollen. If bee pollen is not available then the third choice would be to dust with plain calcium. Remember to get calcium without D3.
Supplementation Twice A Month.
This supplement will provide vitamins and minerals outside of calcium. The main vitamins of interest are vitamins D3 and A as discussed before. since vitamin D3 is provided via UVB light (assuming the proper cage conditions are put in place) we only need vitamin D3 in the supplement to provide. balance to the vitamin A. It is the vitamin A that we are mainly looking for. I recommend low levels to given and so select my supplements with this in mind.
We have to be careful on this one as many manufacturers claim to have vitamin A, but what they really have is beta-carotene which is that carotenoid that we humans use to convert into retinol. We chameleon keepers have that study that, unfortunately, suggests that beta carotene is not effective for us. Though this study was done for panther chameleons. We do not know how similar chameleons from other genus are. So you have to look at the ingredients list to verify that is really in there. I am recommending a multivitamin that has a maximum of 200k IU/lb of vitamin A and 20k IU/lb of vitamin D3. While we really do not know how much vitamin A is safe, this dose level has been commonly used and has been shown to be safe for Veiled Chameleons. Though I usually actually use supplements with less than this level, which has proven effective as well. The presently accepted ratio in veterinary medicine is 10:1 vitamin A to D3. This is why most supplements provide these vitamins in this ratio.
As you look on the backs of your supplement containers remember that vitamins are presented in either IU/lb or IU/kg. Make sure you are comparing the correct units! For example, if you want to express IU/kg in terms of IU/lb you would divide the number by 2.2. Going the other way, if you want to convert IU/lb into IU/kg you would multiply the number by 2.2.
The supplements available with both D3 and A are as follows:
[supsystic-tables id=16]

A nutrition regimen consisting of a calcium supplement with no vitamin D3, a multivitamin with both vitamin A and D3, a UV Index of 3, and richly gutloaded feeder insects will provide nutrition for a chameleon over each of its life stages.

Supplementation is just one component of the nutrition strategy. You must also have both a UV Index of 3 and feeder insects that are richly gutloaded for the Chameleon Academy supplementation regimen to work properly.
Veiled Chameleon Natural History
Below are a number of podcast episodes where I published interviews I had with people that were both chameleon enthusiasts and had been to Yemen to see Veiled Chameleons in their natural habitat. I had spent years planning for this episode and it took that long to put together a list of the major names in early Veiled Chameleon history. Throughout this series you will hear from the following people:
Petr Nečas: One of the earliest breeders of Veiled Chameleons in the Czech Republic. He took numerous trips to Yemen in both wet and dry seasons to visit the Veiled Chameleon in their natural habitat. He is prominent in these interviews as he is one of the few who meets these requirements. His reports back have formed the basis of my understanding of Veiled Chameleon natural history.
Ron Tremper: Ron is the reptile breeder who imported captive hatched babies from Petr and firmly established the Veiled Chameleon in the US.
Martin Wendsche: A reptile enthusiast who travelled to Yemen and added his insights and photography to this series
Peťko Dvorák: A chameleon enthusiast who has travelled to a number of countries to view chameleons in the natural habitat. He adds his observations as well.
Mike Rochford: A biologist with the University of Florida working with Veiled Chameleons as an introduced species into Florida.
And, by listening to these first hand accounts we get a multi-dimensional insight into the species. When peace comes to Yemen I look forward to the opportunity for more people tp be able to add their direct observations to our community knowledge. Until then, please enjoy listening to this series on the amazing Veiled Chameleon. You may click on the players to play the audio directly on this page. You can also find the Chameleon Academy Podcast on any podcast app and listen there. The best experience, though, is to download the free Chameleon Academy app (on either iTune or the Google Play store) that gives you easy access to the 200+ episodes of chameleon education.
Bill Strand
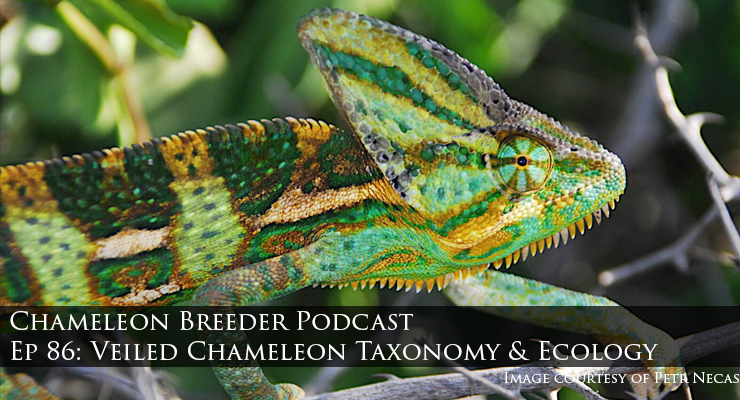
Ep 86: Veiled Chameleon Taxonomy and Ecology
Bill Strand
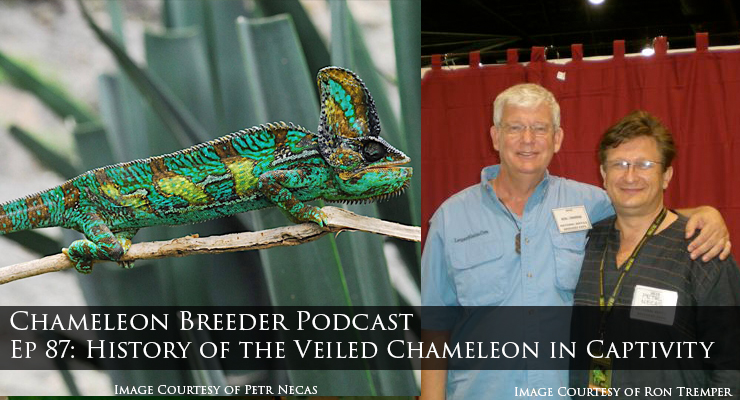
Ep 87: History of the Veiled Chameleon in Captivity
Bill Strand
Ep 88: Veiled Chameleons in Florida

Bill Strand
Ep 90: Veiled Chameleon Husbandry – Natural Environment & Cage

Bill Strand
Ep 91: Veiled Chameleon Lighting
Bill Strand
92: Veiled Chameleon Feeding
Breeding Veiled Chameleons
This is an egg laying species. Mating consists of the standard male bobbing his head and the female communicating whether she is receptive or not. A receptive female will allow the male to mount her. A non receptive female will gape, threaten, and bite the male depending on his level of insistence. If the female is gravid she will take a black color with yellow and blue spots to accompany the unmistakable body language saying she is gravid.
Gestation after a successful mating is about one month at which time the female will dig a hole to lay her eggs. The laying site should be in soil or a sand/soil mixture that will hold its shape. The laying receptacle can be a regular flower pot or bin of soil. It is important that this bin not be more than around 6” deep. The ideal egg laying is where the female has her head just above the ground when she has turned to deposit the eggs in the hole she dug. She is looking for a solid surface under the ground (presumably the harder layers under the earth) to lay her eggs against. If given “perfect” soil conditions and no “imperfect” hard layer to lay against she will continue to dig which results in a tunneling behavior and the danger of tunnel collapse. The behavior of digging deep has been misinterpreted as the desire to dig deep and keepers then fall into the trap of giving the chameleon much deeper bins and that much more to exhaust themselves digging through.
Although wild clutches range about 20-30 eggs, the imbalance of food in captivity leads to massive clutches of 60 or more. Huge clutch sizes are not healthy for the female so healthy food intake before she is gravid is important. There have been a wide range of incubation strategies and temperatures that have proven successful with incubation times that range from six to 16 months. Incubation in the upper 70s F has proven reliable. Though, Veiled Chameleon eggs are quite hardy and many people simply incubate in a closet or under their bed.
The babies hatch ready to eat you out of house and home.
The ease and the numbers at which Veiled Chameleons reproduce has driven prices and demand down quite a bit to the point where most experienced breeders do not breed Veiled Chameleons. Breeding Veiled Chameleons is an easy way to try chameleon breeding, but it is also a difficult way as the number of babies becomes very expensive quickly. If you intend to try breeding make sure you have a sales plan. The babies can be aggressive with each other so make sure you also have a housing plan if you have to separate babies.
As much as I love raising up baby chameleons and think it is an enormously fulfilling project, I need to discourage anyone from breeding Veiled Chameleons unless you have a way of placing 30-60 or more babies. You can sell them wholesale to pet sores, but the life they will live out is often subpar. There are other species that are better candidates if you want to try breeding for the experience.

Male and Female Comparison
A male (top) and the female (bottom) showing the difference in profiles. In females, the casque is less pronounced, the colors not as bright, and she lacks the tarsal spur on the back of the rear feet.

Hatchling Male Hind Spur
The male has a “tarsal spur” which is a growth coming from the back of their rear feet and is visible at hatching.
Hatchling Female Hind Foot

Adult Female Hind Foot
Raising Veiled Chameleons
Food
The biggest challenge in raising up a clutch of baby Veiled Chameleons is the speed at which they grow. When they hatch they are on a race to mature to breeding size, mate, and lay eggs before the dry season hits. So you need to be ready with an enormous amount of food. Ideally, the clutch size would be 30 or below, but, in captivity, clutches can reach 60 to over 100. We discussed the threat to the mother’s life before. At this time we are going to address what you are now faced with when these all want food! Get your fruit fly cultures going a month before you think the eggs may hatch and be ready to invest heavily to bring more in to keep up with the growth! A single baby Veiled chameleon is a joy to work with. 60 tends to be overwhelming. Baby Veiled Chameleons will eat anything that moves and fits in their mouth so stock up on anything small. Commonly available examples include Fruit Flies, Bean Beetles, and Pin-head crickets.
Caging
Like all chameleons, Veiled Chameleon babies are best raised individually. Raising them in groups exposes the babies to bullying and intense competition. There was a study that was circulating reporting the differences in behavior between individually raised and group raised babies. The conclusions were surprisingly off-base. They essentially proved that if you raise a bay fighting for their meal and place in the cage that they will be aggressive. And then made an illogical leap of logic that this was desirable. If you have heard of this study then you can read the entire response here (Socialization response). The fact is that the proper husbandry in raising baby chameleons is raising them individually. The cost that goes into creating a set-up that allows 60+ Veiled Chameleons to be raised individually is prohibitive when you take into account that you will not be able to sell the babies for more than their monthly food bill. And so most, if not all, Veiled Chameleons are raised in groups in plastic bins. That this is the most convenient for us does not change that it is a compromise on proper husbandry. The reason this is important to talk about is that this website is dedicated to optimal husbandry practices and has to answer to the industry standard of not giving optimal parameters. Group raising is a practice which breeders have developed skills in maintaining and making successful. But it is successful only in producing babies to be sold. It is still not the best for the babies’ health. And any new breeder needs to decide how serious they are about this project.
Lighting and heating
Lighting and heating parameters are the same for babies as they are for adults. The significant change is that with smaller cages you have less area for all the lighting energy to dissipate and so you must use the equipment differently to achieve the same conditions. For example, the T5 lighting may produce enough heat that a basking bulb is not necessary. What you need to do to create the desired conditions is entirely dependant on your ambient conditions and the size of the cage.
Hydration
Baby chameleons dehydrate quickly and so special attention needs to be maintained with babies to make sure they are getting the water they need. Extra attention needs to go towards the common tools of the trade 0- especially misters. The power of pressurized water inside the small area of a baby’s cage against the small body of a baby could be physically traumatic. Make sure mister placement is such that the risk of this is eliminated. In the past I have mounted misting nozzles above the cage so they spray through the top screen panel. The added distance reduced the spray power hitting the baby if they are in the open.
Care must also be taken when using a fogger as it is easy to keep pumping fog in well after 100% humidity is reached. As with all our tools, the fogger must be used properly as well.


