Co-ordinating Misting, Fogging, and Dripping
One of the more complex systems to put together is the hydration cycle. For this we need to co-ordinate the timing of misters, foggers, and drippers.
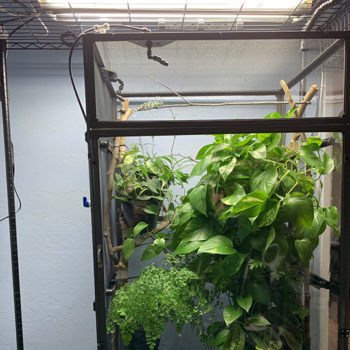
The official environmental schedule we are targeting is below
If you do not have all three items (mister, fogger, and dripper) then the priority is as follows
- Mister
- Fogger
- Dripper
Installing a Misting System
Timer
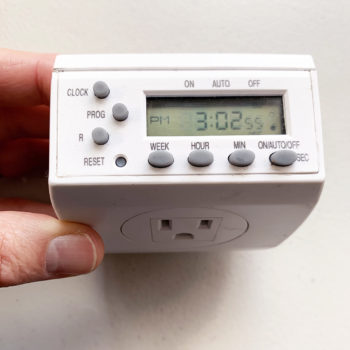
The timer module becomes a serious consideration as we need specific control over when the mister goes on and off. You will need what is called a “seconds” timer. Mist King and Cli-Mist mist systems come with this kind of timer. Less expensive systems come with a cyclic timer which is not useful for our purposes. An additional timer must be purchased if you got a system that have only the settings of “how long” and “how often”.
The seconds timer which comes with the Mist King and the Cli-Mist system is ideal for our purposes. We want fine control over our mist as the first minute is the most effective and beyond that is just adding more water to the drainage tray. Many keepers still use their mister as a shower system and spray multiple times during the day. Under this approach, a great amount of water is used up, but not necessarily used by the chameleon. Misting can be used to lower temperature or raise humidity. But, under the naturalistic method we are promoting here at the academy, we will be using misters three times a day for a minute or two at a time and we need full control over what time these mistings start and end. A seconds timer gives us this control.
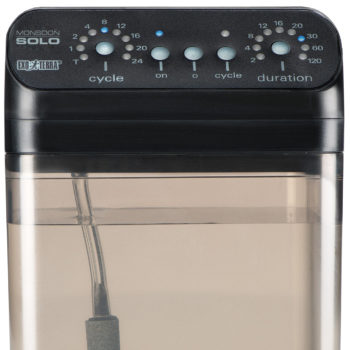
If you have a cyclic timer then your level of control diminishes greatly. It will give you the option of, for example, misting for 1 minute every six hours. This makes it difficult to coordinate with the fogger or any other element of the cage. If you do have an Exo-Terra Monsoon or any other lower cost mister you will probably get a cyclic timer. You can make this work by setting it to go off for 60 seconds every hour and then hooking the entire system to an appliance timer. So When the power comes on, the mister will go on for the 60 seconds and then wait for the next hour mark which will never come as the appliance timer will shut off power in 15 minutes (the standard appliance timer resolution).
My favorite implementation of the fogging and misting is using a dual station seconds timer which will use a common clock. With this I can coordinate the mister and fogger without worrying about syncing the master clocks between two timing devices.
Selecting a Water Basin
You will need a water basin to feed your mist system. This can be any plastic containers you can drill a hole in for the bulkhead to be installed. A standard bucket will do the job. You will want to have a lid for the bucket to keep debris and curious insects from falling in.
This system illustrates a proper water reservoir set-up with the water source higher than the pump. Gravity keeps the water pressing on the pump input and so the pump will not have to work to prime itself and function. Make sure your water reservoir has a lid and wash it out on a regular basis.
You will see pictures of set ups which have the pump higher than the water reservoir. In fact, you will notice many of my photos have this set-up. This is a case of do what I say, not what I do. The concern is that the pump may have trouble priming itself if it has to suck water up. I am willing to take the possibility of the pump not priming itself every time for the convenience of being able to switch out and clean my water reservoirs quickly and easily. This is a decision I make and, if you elect to go this route, one that you will have to make yourself. If you have a problem with the pump the first thing your misting manufacturer will tell you to do is put the pump where it is gravity fed. And, thus, I must recommend to you that you follow the gravity fed method because it will be more reliable.
The official way of hooking up to a water basin, if not included, is with a bulkhead that comes with Mist King or Cli-Mist systems. This bulkhead requires you to drill a hole in a container and then tightly screw on a bulkhead to create a water tight seal. This bulkhead will allow you to hook up 1/4″ tubing from the bottom of the container. This one has a valve included to allow for pump maintenance. Without the valve there would be no way to disconnect the pump without a stream of water gushing out!
Mounting the Mist Head
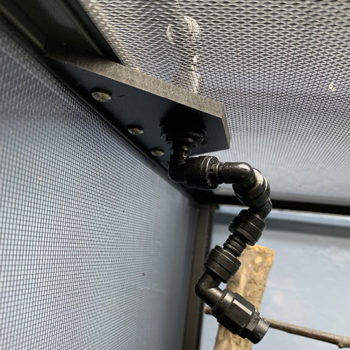
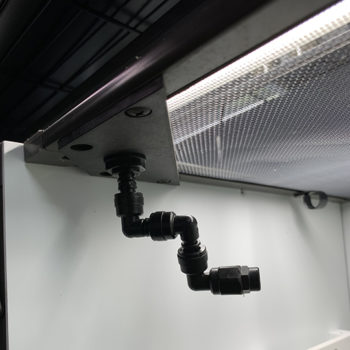
Mist nozzles come with mounting hardware that screws into the aluminum frame of the chameleon cage. There are three main available mist nozzle mounts. 1) Hydration Mount from Dragon Strand: mounts anywhere along the inside top frame and includes an additional entry point for a 1/4″ tubing input.
2) Misting Wedge from Mist King: Corner mount wedge or one mist nozzle
3) Misting Plate from Cli-Mist: corner Mount plate for one mist nozzle
With all these mounts it requires you to drive a self-tapping screw into the frame. This really isn’t that hard to do, but it is much easier to do if you install the misting hardware before assembling the cage. Trying to get a screw started upside down is definitely possible, but is a special kind of experience that is sure to generate creative speech.
If you are using a Exo-Terra Monsoon or any other mister with suction cup mounts then you will need to 1) get the mist head inside the cage and 2) create a suitable mounting surface. The Dragon Strand Hydration Mount has a grommeted hole for 1/4″ drip system tubing which can be used for getting the mister tubing in the cage cleanly. If the cage does not have PVC or acrylic sides then you can create a mounting surface by cutting a small triangle out of a smooth plastic sheet (PVC, etc…) and screwing it inside the cage with stainless steel screws just like was done with the hydration mount. The big issue is the angle of the Monsoon nozzle being straight out from the mounting surface and there being no easy way of creating a mounting surface in the screen cage on the walls where the mister would need to be. The hoops needed to jump through to use the Monsoon on screen cage is, frankly, not worth it. The Monsoon mist system was designed for glass cages and works fine in those. It will work well in a hybrid cage which has a solid wall. But for a screen cage just get a Mist King or Cli-Mist.
The standard way of mounting a mist head is using one of the few plastic wedge products on the market. The Dragon Strand Hydration Mount allows mounting anywhere along the aluminum cage framing while the MistKing/Climist wedge allows mounting only in the corners. Corner mounting is adequate in cages up to 24″x24″ footprint, but for wider format cages, the Dragon Strand mount is the more appropriate tool. Just remember that your misting system may not come with a mounting method for your cage and you may need to purchase that separately.
Parallel vs. Serial Distribution
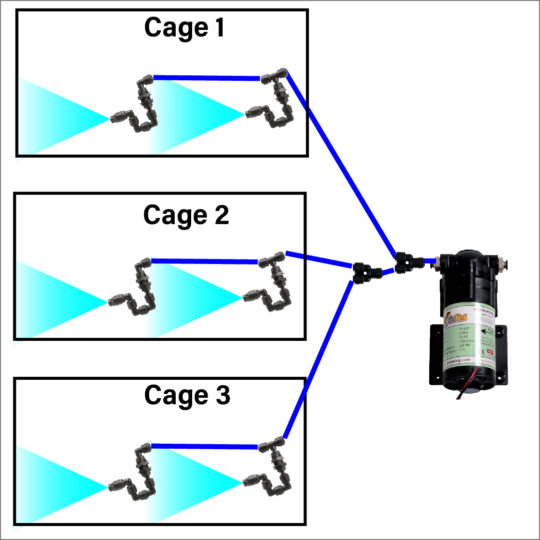
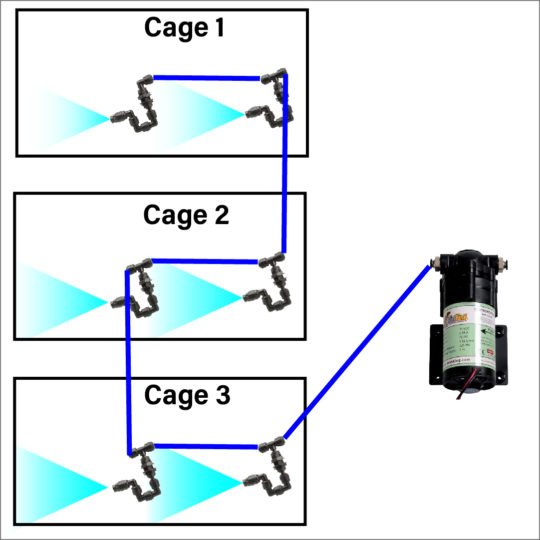
There are two ways to link up multiple nozzles if you are running it to a cage bank. These are called serial and parallel connections. A serial connection is where all the nozzles are in one line. A parallel connection is where all the nozzles are on their own line and all meet together at the output of the pump. To get maximum pump pressure to all the nozzles so as much parallel connection as possible. Pump pressure decreases the further you get from the course. Of course, there is a limit to what the pump can put out, but its job is to maintain a certain pressure at the output of the pump. If you have 20 mist heads in a line (serial) the last one will have noticeably less pressure than the first. But if you have five lines of four nozzles each in parallel, each nozzle will have roughly the same pressure.
NOTE: Whenever making tubing connections, press the tubing firmly into the connector. When you first turn on the system you may have connections leaking. This almost always comes from people pushing the tubing in and not pushing in hard enough to make the full connection. Don’t be shy. Shove it in!
Mist Strength
The skill in setting up the misting system is to adjust for the strength of the mist head. The mist comes out at pressure and can blast a poor unsuspecting chameleon. This is not an issue in larger cages where the mist head can be placed where there are no perching branches and has become a gentle mist by time it has reached chameleon perching area. But in smaller cages you must be very careful as to where it points. If you are using a mist system in a smaller cage then you can reduce mist strength by attaching more mist nozzles for different cages. The mist strength will go down the more mist heads are connected.
Installing a Fogging System
A fogging system replicates the fog bank which hydrates chameleons during the night. As fogging systems are readily available that are completely contained, installation is as simple as placing it near the cage and adjusting the tubing or PVC piping to fog into the cage.
If you are using the wire racks that we use for demonstration here, there are convenient wire baskets that hang on the edge of the shelves that make for perfect fogging system mounts. Your major consideration is that you have a basin of water and it is best to have that away from your electrical systems. Where ever you end up placing it, ensure it is safely away from electricity.
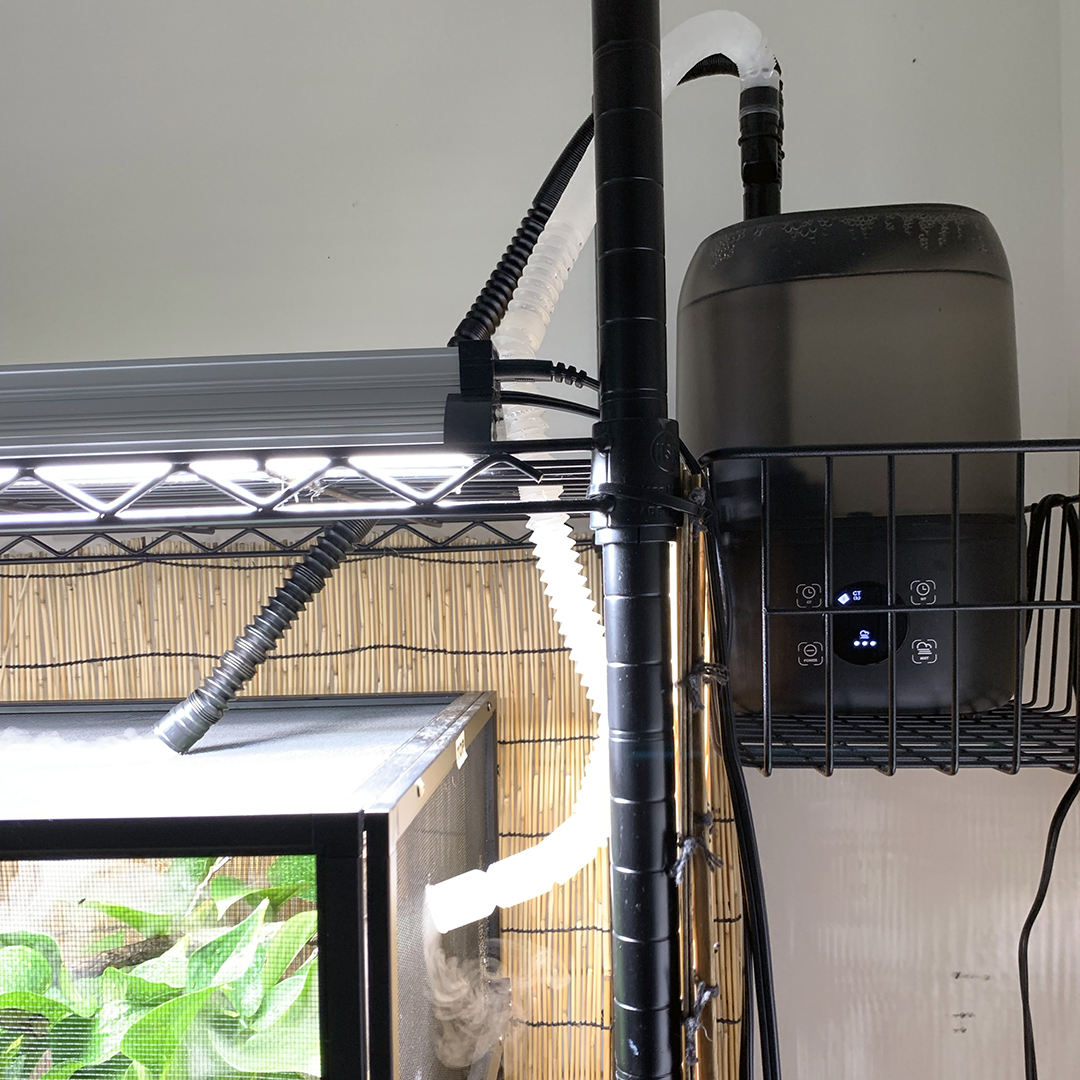
The fogging system I prefer is this 4 liter top fill fogger
Installing a Dripper

A dripper can take the form of an inexpensive plastic container with a regulated nozzle to a very inexpensive party cup with a pin hole in the bottom. Whatever it is, the challenge with the dripper is that it is a basin of water that must be on the top of the cage with the lights. This is just fine as long as everything works itself out. But the nature of constantly replacing the water means there is risk of spilling on a heat lamp or any of the other electrical items.
If you are placing the dripper on top of a cage screen panel you will need to make sure it is supported as the screen is not meant to hold the weight of a container of water.
Navigation
This module is part of a class on Setting Up Your Chameleon’s Cage where you learn how to build up a complete chameleon environment from start to finish. From this point you can either go back to the home room and see the other modules in this class or go on to the next module where we dive into how to place your chameleon cage within your house!


