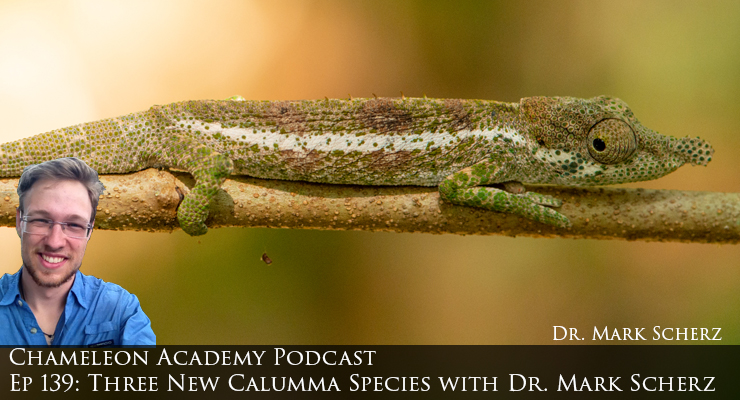
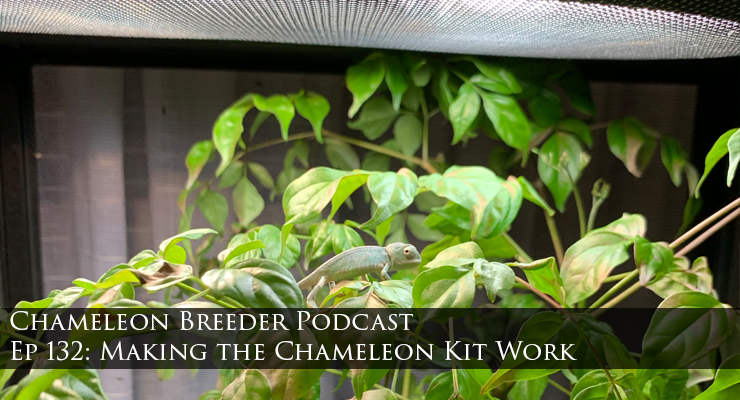
Ep 132: Making the Chameleon Kit Work
Listen Here!
Transcript (More or Less)
You just got home from the pet store or reptile expo with your chameleon and chameleon kit and the online community has passionately informed you of the things that need to change. You tally them all up and they amount to,…well, everything. And with ten voices chiming in from every corner, including that crazy guy who keeps telling you to go back in time and research more, what do you do first? In this episode you have one voice and we will get things sorted out in a orderly and logical fashion with a little learning fun thrown it!
Today my episode will be very specific. I am talking to the people who have purchased the Chameleon Kit from ZooMed. This is the set-up which is the most commonly brought home. It is not meant to be the final cage set-up for your chameleon even if that is the way it was presented to you at point of sale. I am sorry for how that works. We in the chameleon community welcome a great many people who are now having to deal with the realization that the advice they got upon purchase wasn’t the most solid.

If you were linked to this podcast it was probably from someone who wants to help make the transition from this simple set-up to something that will last for the chameleon’s long life time. After listening to this podcast episode I’d like to send you back to that person or group so you can continue the process. In this episode I am going to specifically work with what is in the kit and help you get it set-up as good as possible for your chameleon to be taken care of while you work on all the upgrades.
If you found this on your own then at the end of the episode I will refer you to other episodes of the podcast that will take you the next steps.
Chameleon are not that simple to set up. But if they are set up properly they are very hardy and enjoyable pets. The problem is that for pet stores and reptile show vendors to sell their chameleons it would really help if there was a cheap all-in-one boxed kit with a chameleon on the front that they could sell to you with your chameleon to get that money exchange and you on your merry way.
Enter the mechanisms of capitalism and lo and behold that product appeared.
Today I am going to talk about the one set-up the majority of new keepers are sent home with from pet stores and even reptile shows. The Zoo Med Chameleon Kit is a box that suggests it has everything you need and that is the way it is sold. So it may be a cold surprise when you are told that everything needs to change and then the advised expenses start climbing. And you are left confused as to what to do. Even if money was not an issue, who should you listen to? Pet store employee, who is trained to know the right stuff, tells you one thing and then internet mob screams something different.
It is not uncommon for people to have changed up their set-up three times and just gotten sick of hearing so many different opinions.
So that is what this podcast episode is about. Just me and you, your chameleon and the Chameleon Kit. And I will go through what is important and when so your little guy or girl can have the healthiest life possible. And, who am I that you should listen to me? Excellent question and definitely one you should be asking whenever accepting advice. That will help filter the cacophony of voices wanting the pleasure of your attention. My name is Bill Strand and I have been involved with chameleons for about 40 years and active in chameleon community education for 20 of those years. Part of that is continually diving into what we don’t know and challenging what we do know. And, with this podcast, you have found my main outreach to share chameleon related information. So, assuming that has passed the test for being worth the time to listen, let’s get on to helping you sort out that kit you have been sent home with.
First, Let’s go over what comes out of the box:
- Cage
- Vine
- Carpet
- Plant sprig
- Repticalcium
- Reptivite
- Thermometer
- Light fixture
- UVB bulb (13 Watt)
- Daylight Blue heat bulb (60 Watt)
- Reptisafe sample
Cage:
The cage is a 16”x16”x30” screen cage. This is an excellent cage to start off with and is appropriate for a single chameleon up to about 4” in body length, or, what we call snout-to-vent. This doesn’t count the tail which tends to break the curve. There comes an issue if you purchased a chameleon larger than this or you have come home with a pair. Yes, the sales person should have known better, but here we are. We’ll look into this more after we go through all the other goodies in the box.
Lights:
The next thing we have is an innovative light fixture which holds two lights. The lights included are the Daylight Blue 60 Watt basking bulb and a Reptisun 5.0 13 watt mini compact fluorescent bulb. This will be the subject of great discussion in a little while. For now, it is enough to know that chameleons need light to see, light to bask in for warmth, and UVB rays so their skin can create vitamin D3 just like ours does. Without vitamin D3 they can’t absorb calcium, their bones do not harden and they die a slow painful death so this particular issue raises a great deal of passion and urgency in the community. So, yes, we will discuss this in detail coming up.
Cage Accessories:
We have a handful of cage accessories including a nice long twisty vine, a spring of plastic plant, and not one, but two, carpets for the bottom of the cage. So we will have fun putting that together I am sure
Nutrition:
Next we have some sample packs of powders. The first is Calcium without D3, Reptivite vitamin powder that does have D3, and a water conditioner.
Thermometer:
And finally, we have a thermometer with a probe that can get wet. Party on, dudes!
And I have to mention that chameleons cannot be kept together in this cage. If they are old enough to be sold at the retail level then they are beyond the age that you can get away with keeping them together because they are babies. And there is no such thing as a bonded pair. This is just the inexperience, or greed, of the pet store employee talking. So if you have two either take one back or else prepare to set up two enclosures. This is beyond opinion. If you are unsure what to believe because the pet store person said they can be kept together (and deep down you want this to be true) I have to just pull rank here and say they are wrong. Absolutely wrong and I’d be happy to say it to their faces. I have an entire episode on co-habitation if you want details on this. Episode 107.
Okay, so you put this all together, throw some crickets in the cage, and life is good! But, there is a lot more to this podcast so this is the part of the movie where the hero finds out that all is not good and that a complete transformation is necessary. And like that hero, at the end of this movie, you will have travelled a fascinating road. So let’s take that first step.
First of all, let’s set up the cage you have and explain the equipment you are dealing with.
To start with setting up the cage, you assemble it according to instructions and then we have to do something with the inside. Just set the carpet aside. I have no idea why that is in this kit. A solid floor is a much better bottom for a chameleon cage. The floor to the cage is fine.
Inside the cage, the included vine will come in handy, but the sprig of plastic leaves is of very little use. In a chameleon cage we need to create a forest edge which means a open area for basking and an area with dense plant leaves that the chameleon can feel safe and hidden. There is no way to do that with what is included in this kit. So your first mission is to put a plant inside this cage that has leaves the chameleon can hide in and feel safe. Luckily, these kinds of plants are found in most indoor plant retailers. You are looking for one that, with its pot, reaches almost 30”, which is the height of your cage and has a lot of leaf cover. Specific species to look for that would do this are the Umbrella Plant (Schefflera arboricola), the Weeping Fig (Ficus benjamina), or the China Doll plant (Radermachera sinica). But it has to have a good head of leaves on it to be of use. So you may be spending $30 for a good size plant. This is worth it for what it does for the chameleon so budget for that amount. If you are unable to find a plant that is tall enough you can make a trailing vine like a pothos work by also buying a plant stand that will move the plant up and let it trail down. The plant species isn’t critical. It is the leaf density and if it is enough for the chameleon to hide in or behind. This will also be your drinking surface. Once the plant is in you can use that vine and wrap it around in side to give as much access to the cage corners as possible. And the plastic plant sprig? Hopefully you don’t need it, but it can provide extra coverage if your live plant is light on leaves in a certain area.
For branching you can get sticks from outside. How you mount these sticks depends on how long you intend to use this cage. If you have a carpet chameleon then you’ll be able to use this cage for its entire life and we can talk about permanent solutions to trick out the cage. If you have a Veiled, Panther, or Jackson’s you will be growing out of that cage within single digit number of months so it would be best to simply buy the equipment you would need for the upgrade cage. For temporary set-up you can jam a stick in between the screen sides so the screen tension holds the stick in place and you can use push pins through the screen to hold the stick in place. Anything that puts stress on the screen which was not meant to be lo0ad bearing is a hack and you would want to steer away from it for a set-up you intend to keep around for years.
Okay, now we get to the trickiest part of this and we will have to be clever as to how we execute this. The lighting included in this kit has a 13 watt compact fluorescent UVB bulb and a basking bulb. We need to arrange for the chameleon to have a basking branch that runs under both of these at a somewhat precise distance.
Here is a quick introduction to UVB and UVB lamps. UVB is the wavelength of sunlight we use to create vitamin D3. It is also the wavelength that causes sunburn and cancers. So there is a thin slice of amount of UVB which we want our chameleon to bask in. Not too high of numbers and not too low of numbers. Artificial UVB lamps need to be used with care because each one has a different gradient that they produce. This refers to how quickly they change value. If I wanted my chameleon to bask in the UV Index level of 2 to 3, but not more than 6, I need to find a lamp which has a big enough space for my chameleon to fit its body. So the technology that really works well for us is the linear T5 UVB Fluorescent lights. I can raise it above the cage so that my basking branch starts at 2 to 3 and the top of the cage 6” up is still under UV Index 6. So I
have a gradient of 6 to 9 inches that I can use. The reason that the Compact Fluorescent Bulb that is included in this chameleon kit is so despised is because the top of the cage, right under the bulb, can be UVI 33 which is blisteringly strong. 1 inch down it is 9 which is still too strong. 2 inches down it is 4 which is starting to be useful. 3 inches down it is UV index of 2 which is good for babies. And 4 inches down it is UV Index of 1. So, yes, I can get my range of UVI 2 to 3, but it literally is only with a half inch slice of space three inches under the screen. And above that is at dangerous levels. So these compact bulbs do have a UVB gradient. It is just packed in such a small physical space that it really can’t be used effectively. So, until we get to the upgrade part, run and bend your vine so that the top of your chameleons head can be 3 inches from the screen top where the UVB bulb is. This will give you one small space in the cage where the UVB is good. Luckily, chameleons seem to be able to search out and bask in UVB so we will rely on our little friend to find that one sweet spot in the cage and get what he or she needs.
The heat bulb is also in the same situation. With 60W the useful distance is where you can hold the back of your hand under the light and it is warm and comfortable to you without being painful or uncomfortable due to heat. And you will need to run a vine at the distance that feels the best to you.
A word about the blue light. It is a daylight bulb, not necessarily a blue light bulb, but we really want white light. This blue light can be kept as a heat bulb for future use, but we will definitely be adding a fixture that has white light daylight bulbs in it.
And now we get to nutrition and those powders. The reptisafe water conditioner is…well, I have never used it. I don’t know why it needs to be there. You can use it by following the instructions or not. That won’t have an effect on your chameleon. Beyond that, you have two powders. The first is the ReptiCalcium without D3. This is just calcium powder. This is vitally important because our chameleons need calcium to grow their bones and for proper organ function. Our feeder insects, like crickets, are not only poor in calcium, but they are high in phosphorus. Our chameleons need a 2:1 calcium to phosphorus ratio meaning we need to put enough calcium powder on the crickets to counteract the phosphorus levels. Now you next question is how much you need to dust. And this is not an exact answer and can’t be. With all the variables in how much is dusted, how much sticks, and how much as fallen off by time it is eaten there isn’t a good solid way to measure how much is needed. But, so far, us dusting our feeders every feeding with calcium has worked to raise healthy chameleons. So don’t worry so much about amount. The only thing you have to worry about is how much you feed your chameleon. If it is a growing baby then you can feed as much as they want every other day. If it is an adult you need to back off to 3 to 5 feeders every other day. As cool as they are when they eat and as much as they seem to just want to keep eating – especially the veileds- they are prone to obesity if we let them so we don’t let them.
The Reptivite with D3 is a vitamin powder. This is a tricky beast. It has vitamin A and vitamin D3. Both of those vitamins are fat soluble so there is possibility of overdose. So we want to give enough, but not too much. Now, because no one knows and our information is full of holes, it leaves room for people to have passionate opinions that are contradicting with warnings of horrible death if you listen to anyone else. So pick a routine that makes sense and stick with it even though other people are going to weep and gnash their teeth. I am sorry, but no one agrees so you will just have to pick one voice to listen to. Here is the difficulty. Your chameleon gets D3 from the UVB. Since the UVB is difficult to work with we don’t know if our chameleon is getting enough. We can use the Reptivite with D3 to supplement what he gets from the light, but with D3 from the light, his body will stop making it when he has enough. The body regulates how much it makes to keep it in the safe zone. When we give it through the diet we bypass the regulation and he can get too much. So how much more do we need to give? That is unknown so we have to make a guess. For veiled and panther chameleons, I am going to suggest you use the Reptivite once a week if this is a growing chameleon. I am more concerned with your chameleon, especially veiled chameleon getting Metabolic Bone Disease than I am a vitamin D3 overdose. So for now I am going to suggest you dust one feeding a week with the Reptivite with D3 while we are under the Chameleon Kit conditions. Once we upgrade your system we will rely more on the UVB bulb for D3 synthesis. Jackson’s Chameleons are much more sensitive to vitamins and will get fluid collars with too much so, for Jackson’s chameleons I’ll suggest doing the Reptivite every weeks instead.
Reptivite also has pre-formed vitamin A. This is another one we have to be careful not to overdose, but once a week at the levels in Reptivite should be fine for this short while. Now, one thing I do not like about Reptivite is that they include a perfect balance of Calcium and phosphorus in that 2:1 ratio we want. Unfortunately, this means we can’t put it on a cricket and have a balance. It shouldn’t be a big deal if you are doing it once a week, but if you want to make me feel better, mix in an equal part of that plain calcium and then there will be calcium enough to counter act the phosphorus in the cricket.
Does this sound all complicated? Yeah, I am sorry. It is. But let’s make it simple. Feed every other day. Dust all feedings with calcium except for the weekend feeding that is dusted with Reptivite with D3. Unless you have a jackson’s chameleon in which case you do the reptivite every two weeks.
For both of these make sure you are feeding your feeder insects fruits and vegetables and grains to ensure they are not just empty shells when you feed them to the chameleon. This is called gutloading and it is very important. The powders are supplements. Not meal replacement shakes.
To make this a complete summary, let’s talk about hydration. You may have gone home with any number of hydration devices or plans. The most common are a hand spray bottle or a dripper. Either of these can be used for now. If you are hand spraying then a spritz on the leaves every morning and afternoon should provide the water he needs. I always use a dripper to make sure he is getting enough. If he drinks from the dripper then I know I need to spray the leaves more. Don’t spray your chameleon as he won’t like it. But go ahead and keep spraying until he stops drinking if he starts drinking when you are spraying. There is no drainage tray included with this cage and that means an automatic misting system is probably not a good idea unless you get a tray to put under the cage to catch the water. The company does make a substrate tray, which will catch water, but this is not the appropriate accessory. You don’t want to catch the water inside the cage. It needs to be caught and stored outside the cage so it can’t mingle with the poop and make a disgusting situation. There are trays specifically made to be drainage trays, but these take some money and I am going to suggest that you not accessorize this cage, but start your plans for the next stage as quickly as possible.
We do have one last piece of equipment. The thermometer. This can be hung in the cage and you can monitor your ambient temperature. This allows you to track conditions and know whether you are meeting the needs of your particular species.
So this is what we can do with the cage as you have it out of the box. I took the challenge of figuring out how to make this work with as little excess items to purchase as possible. The things we couldn’t do without were the plant and the hand mister.
So, now that your chameleon is as set as is possible with what you have it is time to start the transition to a better set-up. The first two things that you will have to upgrade are the cage size and the UVB light and the supplementation. And they all three pretty much have to go together. The size and strength of the UVB light and fixture you get will depend on which cage you plan on graduating to. And the supplementation routine is directly related to the UVB and who you are talking to.
At this point I will let you go back to your social media group or the other episodes of my podcast for how to put together your forever cage. And I do this in recognition that this learning process is more comfortable when you have people helping you in real time. If you have people guiding you as to what needs changing then follow their guidelines. It is important that you follow only one person or group’s recommendations because getting a second opinion will just give you different results. And beware of husbandry by consensus. You cannot consolidate the ten different opinions you get off of a Facebook question into a coherent plan forward. Half the people who respond to your picture just want to be heard and have no idea what they are saying. And it is difficult for you to separate out the people that have experience. Well, unless you research the names. I invite you to listen to the previous episodes in this podcast. I go deep into topics, and you will definitely get a feel for what sounds right and what sounds off in the real world. If you want to check out more of these podcasts, I suggest starting with episode 113 which will lead you through selecting a proper chameleon cage, 114 which talks about creating an effective interior and 115 which is about maintaining the chameleon cage. And then just go back to episode 1 and listen on the way to work. By time you catch up your head will be filled with what we in the chameleon community know at this point.
Even if the first steps into the chameleon community were a little rocky, this is an amazing journey. I hope you are able to discover the beauty and wonder that I have in these mini tree dragons.